Phone

    00852-6915 1330

switch Related Articles

Stay Ahead with Expert Electronics Insights,
Industry Trends, and Innovative Tips

Transformer

The Complete Explanation of a Flyback Transformer?

Ⅰ Introduction A flyback converter has the function of a simple switch-mode power supply, which is usually applied in either AC or DC applications. This low- to mid-power device with multiple outputs transfers power from the input to the output during off-time. It can be found in a television set, a plasma lamp, and a variety of other electronic devices that require high voltage.   flyback transformers which I have met with." width="455" height="240" />  6 different kinds of flyback transformers which I have met with   Catalog Ⅰ Introduction Ⅱ Basics of Flyback Transformers 2.1 What are Flyback Transformers? 2.2 What is a flyback? Ⅲ How Does a Flyback Transformer Work? Ⅳ Design of Flyback Transformer 4.1 Key Components of Flyback Transformer 4.2 Design of Flyback Transformer Ⅴ Advantage  and application of Flyback Transformers 5.1 Advantages of Using Flyback Transformers 5.2 What are typical flyback transformer applications? Ⅵ Practical Projects of Flyback Transformers Ⅶ FAQ       Ⅱ Basics of Flyback Transformers   2.1 What are Flyback Transformers?   A flyback transformer is a gapped-core coupled inductor. When the input voltage is applied to the primary winding during each cycle, energy is stored in the gap of the core. It is then transferred to the secondary winding, where it is used to power the load. Flyback transformers are used in flyback converters to provide voltage transformation and circuit isolation.   Flyback transformers are the most common choice for low-cost, high-efficiency isolated power supply designs up to 120 Watts. They offer circuit isolation, the ability to have multiple outputs, and the ability to have positive or negative output voltages. They can also be controlled across a wide range of input voltage and load conditions. Because the energy is stored in the transformer, the flyback topology, unlike the other isolated topologies, does not require a separate output filter inductor. This reduces the number of components required and simplifies the circuit requirements. This article goes over flyback transformers and the applications that they are best suited for. What is a flybackTransformers ?     2.2 What is a flyback?   In the condition of flyback topologies, energy is kept in the magnetic field of the transformer during the first half of the switching cycle, but in the second half of the cycle, it is released to the secondary winding(s) connected to the load. Flyback transformers have a gapped-core design that allows for high energy storage without oversaturating the core. This aspect of energy storage distinguishes flybacks from other topologies such as forward-mode, in which energy is transferred directly from primary to secondary. Flyback transformers are also known as coupled inductors as the gapped core and stored energy.   The circuit of a flyback transformer?       Ⅲ How Does a Flyback Transformer Work?   A flyback transformer circuit resembles other isolated transformer circuits in appearance and has many of the same components, such as a switch, output rectifier or diode, and input and output capacitors. However, compared with other isolated transformers, flyback transformers store energy within the core and do not require a separate output inductor. By ensuring circuit isolation and allowing both positive and negative output voltage, this highly efficient construction facilitates cost-effective power usage.   Switch The metal oxide semiconductor field-effect transistor (MOSFET) is the most common switch design for flyback converters, consisting of three terminals that modify the intensity of and redirect electronic signals. Flyback converter switches can also consist of bipolar transistors, gallium nitride (GaN), or silicon carbide (SiC). Current flows are stored in the core through the primary coil when the switch is closed (or in the on position). When the switch is turned off, current flows through the secondary coil and is transmitted to the output load. The output voltage is adjusted by varying the duty cycles and turn ratios of the primary and secondary coils.   Coupled Inductor A coupled inductor is made up of the coils that transmit and store energy in a flyback transformer. Mutual electromagnetic inductance connects the two coils—when energy flows into the primary coil, it creates a magnetic link and generates a voltage in the second coil. The function of coupled inductors is to change the voltage. They can also be used to isolate circuit components to improve electrical flow efficiency. When the switch is turned on, energy enters the primary winding and is stored in the core. When the switch is in off status, the stored magnetic flux flows into the secondary winding, and the energy is distributed via a diode.   Output Diode As current flows from the second coil, it can be increased, decreased, or modified. Diodes ensure that current flows unidirectionally toward the output and that the voltage remains constant to meet the application's requirements. Because the current from the transformer can fluctuate depending on the input voltage, the diode, and output capacitor help to maintain a constant outflow of current.   Input and Output Capacitors In flyback transformers, capacitors can be installed on both the input and output ends of the current flow. They are used to reserve energy to release it in controlled amounts. Input capacitors manage the flow of energy into the primary coil, while output capacitors manage the flow of energy to ensure a smooth flow at the desired voltage and current.     Fig. 2: Current when switching on and off       Ⅳ Design of Flyback Transformer   4.1 Key Components of Flyback Transformer Primary switchMutually coupled inductorOutput rectifierInput capacitorOutput capacitor     4.2 Design of Flyback Transformer It is made up of a few electrical components. A switching device, consisting of transistors or MOSFETs, is present at the input to turn on and off the primary coil's input voltage. In reverse bias, the secondary coil contains a diode that restricts current flow.       Fig 1. Construction of Flyback transformer   A flyback transformer, unlike other types of transformers, is designed to be excited by direct current voltage. A switch powered by a DC supply drives the primary winding. The magnetic flux is transferred to the secondary coil when the primary coil is activated. Because the secondary coil is connected to a diode in reverse bias., the current is stored. However, As a result, the next incoming primary winding pulse adds to the stored current (i.e the energy stored in the previous pulse). The result of this subsequent addition is a very high pulse of electricity at the output.       Ⅴ Advantage  and application of Flyback Transformers   5.1 Advantages of Using Flyback Transformers Flyback transformers have several advantages over other types of converters, including:   Circuit isolation. The circuit isolation provided by flyback transformers prevents electrical hazards and improves safety, especially for those working near high-energy electrical systems.   Compact size. Flyback transformers are smaller, lighter, and easier to install than comparable transformers due to their simple design, making them a better fit within your overall electrical system.   Cost-effectiveness. Flyback transformers typically cost the same as other transformers. However, because they contain fewer components, flyback converters – of which flyback transformers are an important component – are typically less expensive than comparable converters. This is important to remember when thinking about flyback transformers and their use in flyback converters.   Convenience Flyback transformers can be used to isolate and manipulate multiple output voltages from a single control.     5.2 What are typical flyback transformer applications? Flyback transformers can be used in a variety of applications, including:   DC-DC power suppliesTelecomLED LightingPower over Ethernet (PoE)Capacitor chargingBattery chargingSolar MicroinvertersAC-DC power supplies Flyback transformers are commonly used when the output current is less than 10 amps and the output power is less than 100 watts. Coilcraft sells standard, off-the-shelf flyback transformers ranging in power from a few Watts to around 120 Watts. Forward-mode, push-pull, and half-bridge / full-bridge topologies are more efficient when higher current and power are required.     Ⅵ Practical Projects of Flyback Transformers The drivers used to drive flyback transformers in flyback mode, or push-pull topology, are featured in this project because they are not conventional transformers.   Projects circuit   These flyback transformers can be found in anything with a CRT, such as TVs or monitors, and are responsible for generating high voltage to create an electric field. In turn, electrons are accelerated toward the screen, where they excite phosphors and form images. Flyback transformers are made of coupled inductors that are driven differently than iron-cored main transformers because they use a ferrite core that requires different operating conditions.   building drivers for flyback transformer   To avoid finding the built-in primary, you may need to consider winding your primary during construction. The primary turns can be adjusted to achieve the desired output voltage or drive voltage. The 555 astable modes is used in one flyback driver design.   Ⅶ FAQ 1. What is the function of flyback transformer? A flyback transformers, also known as a line output transformer, stores energy from input voltage in switched-mode power supplies. It is useful for multiple electrical applications. At one time, these transformers were used to meet high voltage needs at high frequencies.   2. Why is it called a flyback transformer? The reason it is called a flyback transformer is because the primary winding uses a relatively low-voltage saw-tooth wave. The wave gets strengthened first and then gets switched off abruptly; this causes the beam to fly back from right to left on the display.   3. What is a flyback transformer in CRT? A flyback transformer, sometimes called a line output transformer, is used in older CRT TV's and computer monitors to produce the high voltage required to drive the CRT and electron gun. They also have auxiliary low voltage windings which the TV designers use to power other parts of the TV.   4. What type of transformer do I have? In order to do this, simply look for the “W” on your device's label. This will help you determine which transformer you need. If the device is 300 watts, then you will need to buy a transformer that is also 300 watts.   5. Why flyback converter is used? Flyback converters are often used in power supplies requiring low to medium output power at several output voltages. With a flyback, multiple outputs incur little additional cost or complexity—each additional output requires only another transformer winding, rectifier and output filter capacitor.   6. How do I select a core for a flyback transformer? The ideal core material should have a maximum available ΔB and low core losses (proportional to the shaded area). Powder cores are made of tiny insulated particles, hence, the air gaps are distributed evenly through the core structure.        
kynix On 2021-11-04   3638
Resistors

Pull Up and Pull Down Resistor Use Explained

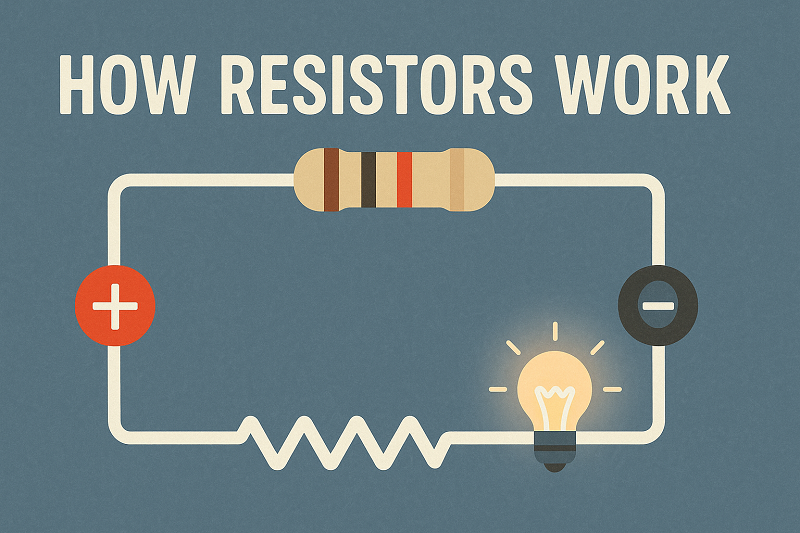
Introduction As we all know, Resistors play a important role in limiting current in the circuit. Among then, pull-up resistors and pull-down resistors are often mentioned and frequently used in electronics. The pull-up is to clamp the uncertain signal to a high logical level through a resistor, which acts as a current limiter; while the pull-down resistor clamps the uncertain signal to a low logical level. Because there are only two states of high level and low level in digital circuits, it is uncertain at the initial stage of digital signals. Pull-up/ Pull-down Resistor - Explained ( with calculation ) Catalog Introduction Ⅰ Why Pull-down and Pull-up Resistor? Ⅱ Pull-up & Pull-down Resistor Circuits Ⅲ What the Role of Pull-up and Pull-down Resistor? Ⅳ Pull-up & Pull-down Resistor Applications Ⅴ How to Select Pull-up & Pull-down Resistors? Ⅵ FAQ Ⅰ Why Pull-down and Pull-up Resistor? Pull-up and pull-down resistors are often applied when interfacing a switch or some other input with a microcontroller or other digital gates. That is, in the initial stage of digital circuit power-on, because the high logical level and low level of the output state are uncertain, in order to make the circuit state normally, a pull-up resistor or pull-down resistor is needed to stabilize the uncertain circuit state. The low logical level is connected to GND inside the IC, and the high level is connected to the super resistance inside the IC.The pull-up resistor connects with the status port of the power supply. Simply put, the high voltage is applied to this point, where the potential will increase. The pull-down resistor means that the resistor is connected to the negative pole, and there is also the case of digital grounding. When the input port signal changes due to different circuit forms, the change will be fed back to the output port, so that the output port acquires a state that should have been completed, but the input port has no signal at this time and keep the original state.According to the above understanding, many people may feel awkward. Take an example from daily life, when you use the key to open the door, people enter but the door is not closed, at this time, you can add a switch to make the door close automatically. Figure 1. Schematic of Pull-up Resistor at Positive Input The above schematic diagram explains why the positive pole and the input terminal resistor can high the level. The two resistances of the port are assumed to be equivalent. We can get that the voltage of the port is 2.5V according to Ohm's law. By connecting the pull-up resistor (red part), the voltage of the port rises at this time, calculate the port voltage. Among them, 10K is connected in parallel with the later connected 1K, and the resistance must be greater than or equal to 1K, which is equivalent to the series relationship between 1K and the 10K resistor below, but the passing current is actually the same. Finally, the voltage of the two 10K resistors increases, and the terminal voltage also increases.The pin connected to the IC and power (or ground) is not necessarily a pull-down resistor. When this happens, many people may think that the red part of the figure is also a pull-down resistor. However, it is not connected in series with any pin or ground. In fact, it is used for circuit startup resistor, not pull-up/pull-down resistor. For the pull-up/pull-down resistors, it is only for the input port and the output port. Although some circuits will connect the pull-up and pull-down resistors to the redundant ports for stability, not all the resistors are connected to one pin of the IC all the time, and the other pin is connected to power or ground to represent the pull-up and pull-down resistors.   Ⅱ Pull-up & Pull-down Resistor Circuits Look at the following analyses to figure out what are pull-up resistor and pull-down resistor in circuits. Pull-up resistors are used to ensure that a wire is pulled to a high logical level in the absence of an input, while pull-down resistors ensure the voltage between VCC and a microcontroller pin is actively controlled. Just check the details below. Figure 2. OC(TTL) Circuit,OD(COMS) Circuit When the I/O port of the IC is in high level, the impedance between the node and GND is very large, which can be understood as infinite. At this time, it is connected to VCC through a pull-up resistor (such as 4.7K ohm, 10K ohm resistor), and the voltage divider of the pull-up resistor is almost negligible. When the I/O port node is in low level, it can be directly connected to GND. At this time, VCC and GND are connected through the pull-up resistor, and the current passing through is very small, which can be ignored.The level value are relative to the ground level, so you should refer to the ground level value. See if those pins are connected to the ground, it has nothing to do with whether they are connected to peripheral devices.Connect a 10K ohm or 4.7K ohm pull-up resistor between the node and +5V to pull up the potential of this node. Often this node requires a single-chip microcomputer or other controller to control it (and this node is connected to I/O). If you simply want to make this node a high level, and the output impedance is very large, you can directly connect the power supply, but if the microcontroller wants to make this node low, that is, the node is grounded inside the microcontroller, so that the 5V power supply and the ground are short-circuited.In addition, when this node is required to be at a high level, the impedance between this node and the ground is generally very large. For example, with an impedance of 100K ohms, when connect a 10K ohm pull-up resistor, the voltage at this point is 100KΩ/(100K +10K)*5V=4.5V, so it can also get a high level.When the node is required to be low level, just connect it to the ground, and there is a 10K resistor between the power supply and the ground, so that it will not be short-circuited. When it is low, there is a loop formed by a load between the power supply and the ground. Sometimes this node will be connected with a resistor in series. Because the current flows to the place with low impedance, the current will flow to the ground through the resistor connected to the power supply instead of Flow to this resistance connected to the node, because the resistor connected to this node has a high impedance, so the potential at this point is in low level.It can be considered that, for the I/O port of the IC, controlling the high and low levels inside the IC is equivalent to controlling the O/O port to be connected to its internal GND or a very large resistor, such as 100K ohms. When the I/O port is the low level (0V), inside the IC, the pin that controls the O/O port of the IC chip is connected to GND.When the I/O port is at a high level, such as 5V, the I/O port pin is connected to a very large resistor in the chip, such as 100K ohms, and sometimes another one is connected in series at the I/O node. A resistor with a small resistance value, such as 68 ohms, because the current flows to a place with low impedance, when the I/O port and GND inside the chip are connected to a low level, the pull-up resistor and the GND inside the chip form a loop.At this time, the current at the I/O port node will flow to the GND inside the chip, because a small resistance resistor is connected in series at the node, which is high resistance relative to GND, so the current will not flow through this series resistor.Using a pull-down resistor, when the I/O port is in a high-impedance state, the pull-up resistor can keep it in a high-level state. That is, when the I/O port is in the high-impedance state, using a pull-down resistor to connect this port to GND. The high-impedance state has a large resistance value, which can be understood as disconnection, in fact, it is actually a large resistor inside the chip. The resistors are connected and pulled to the ground, so there is no current and the level value is 0. It can only work unless a high level value is given to this pin. Figure 3. Pull-up and Pull-down Resistor in MCU   Ⅲ What the Role of Pull-up and Pull-down Resistor? As for the purpose of pull-up & pull-down resistors, generally speaking, the pull-up resistor increases the current, and the pull-down resistor is used to absorb the current.1) Increase the voltage level.When the TTL circuit drives the CMOS circuit, if the output high level of the TTL circuit is lower than the lowest high level of the CMOS circuit, then it is necessary to connect a pull-up resistor to the output terminal of the TTL to increase the value of the output high level. The OC gate circuit must add a pull-up resistor to increase the high-level value of the output.2) Increase the drive capability of the output pin.In order to enhance the drive capability of the output pins, pull-up resistors are often used on some single-chip pins.3) The N/A pin (the pin not connected) should be anti-static and anti-interference.On the CMOS chip, in order to prevent damage caused by static electricity, the unused pins cannot be left floating. Generally, a pull-up resistor is connected to reduce the input impedance, provide a leakage path, and improve the anti-electromagnetic interference ability of the bus. Because the pin is left floating, it is easier to receive electromagnetic interference from the outside world.4) Resistance matchIn the long-line transmission, the resistance mismatch can easily cause the reflected wave interference. In addition, the pull-down resistor makes the resistance match, which can effectively suppress the reflected wave interference.5) Preset space state/default potentialPull-up or pull-down resistors are connected to some CMOS input terminals to preset the default potential. When these pins are not used, these input terminals are pulled down to low level or pulled up to high level. The state when idle on the bus such as I2C is obtained by the pull-up and pull-down resistors.6) Improve the noise tolerance of the chip input signal.If the input terminal is in a high-impedance state, or in a floating state, a pull-down or pull-down resistor needs to be added at this time, so as to avoid the random level. Similarly, if the output terminal is in a passive state, a pull-down or pull-down resistor needs to be added. For example, the output terminal is only the collector of a transistor, thereby improving the noise tolerance of the chip input signal and enhancing the anti-interference ability through a pull-up resistor or pull-down resistor. Figure 4. Pull-up/ Pull-down Resistor   Ⅳ Pull-up & Pull-down Resistor Applications When to use pull-up or pull-down resistors? Look at the following cases explained.1) If a pull-up & pull-down resistor is used for the input signal pin, the usual function is clamping the signal to a certain level to prevent the signal line from appearing in an uncertain state. In practical applications, the 10K ohm resistor is the most used pull-up resistor. Whether to use a pull-up resistor or a pull-down resistor depends mainly on the needs of the circuit system itself. For example, for a highly effective enable control signal, we hope that the circuit system be in an invalid state after power-on, and then a pull-down resistor will be used.Assuming that the enable signal is used to control the motor, if it is left floating, the signal line may be triggered falsely to a high level by other noise interference after power-on (or during operation), resulting in undesired rotation of the motor, and a pull-down resistor can be added at this time. Correspondingly, for the active-low reset control signal (RST#), if we want to be in an inactive state after power-on reset, a pull-up resistor should be used.2) Most chips with logic control functions (such as single-chip microcomputers, FPGAs, etc.) will integrate pull-up or pull-down resistors. Users can choose whether to turn on or not according to their needs. STM32 microcontroller GPIO mode includes pull-up or pull-down.3) According to the resistance value of the pull-up resistor, we can also divide it into strong or weak pull-up/down. The pull-up resistors integrated in the chip are usually weak pull-up (larger resistance), the smaller the pull-up resistance, the stronger the level capability (strong pull), and the stronger the ability to resist external noise (that is, if the unwanted interference noise is to change the strong pull signal level, the required energy must be strengthened accordingly ), but the smaller the pull-up resistance, the greater the corresponding power consumption, because the normal signal requires more energy to change the state of the signal line. In terms of energy consumption, both pull-up /down resistors are the same.4) There is no strict definition of how many ohms are the boundary between strong pull and weak pull. Generally, the pull-up resistors we use are weak pulls, so we can still use external control signals to pull up/down the signal lines as needed.The extreme of the strong pull resistance is the zero, that is, the signal line can directly connected to the power supply or ground.5) There are more knowledge points involved when the pull-up resistor is used as an output (or input and output), but the essential function is also to clamp the level. The most common output pull-up resistor appears in the open collector (OC) Or open drain (OD) structure pin.6) The current sink capability and current source capability are also called the drive capability of the chip pins. For any given chip, the pin drive capability is limited. If the load driven by the pin is large, it may cause the output level to be incorrect (the predetermined level cannot be output).7) OC (OD) pin output structure is different (OC structure exists in the transistor, and OD structure exists in the field effect transistor FET). The output of most comparator chips is an OD/OC output structure, and the signal pins of many chips or modules that feed back the system status are also in this structure, so that users can pull up the level to the corresponding level according to the actual needs of the circuit system. With the power supply voltage VCC, the level conversion can be omitted. Figure 5. Pull up Resistor with Example   Ⅴ How to Select Pull-up & Pull-down Resistor? When select pull-up & pull-down resistors, you can consider the following three aspects:1) Considering power saving, sink current capability of the chip should be large enough, the resistance is large and the current is small.2) It is necessary to ensure sufficient drive current, so the resistance is small and the current is large.3) For high-speed circuits, excessive pull-up resistors may have smooth edges.Considering the above three points comprehensively, the resistance value is usually selected between 1K and 10K. The same principle applies to pull-down resistors.   Ⅵ FAQ 1. What is pull-down and pull-up resistor?A pull-up resistor connects unused input pins (AND and NAND gates) to the dc supply voltage, (Vcc) to keep the given input HIGH. A pull-down resistor connects unused input pins (OR and NOR gates) to ground, (0V) to keep the given input LOW.   2. What is difference between pull up and pull-down resistor?A pull-up resistor connects unused input pins (AND and NAND gates) to the dc supply voltage, (Vcc) to keep the given input HIGH. A pull-down resistor connects unused input pins (OR and NOR gates) to ground, (0V) to keep the given input LOW.   3. When to use pull-up or pull-down resistors?Pull-up and pull-down resistors are often used when interfacing a switch or some other input with a microcontroller or other digital gates. Most microcontrollers have built-in programmable pull-up and/or pull-down resistors, so fewer external components are needed.   4. What is the function of a pull-up resistor?In electronic logic circuits, a pull-up resistor or pull-down resistor is a resistor used to ensure a known state for a signal. It is typically used in combination with components such as switches and transistors, which physically interrupt the connection of subsequent components to ground or to VCC.   5. What is the purpose of pull-down resistor?What is Pull-down Resistors. Similarly to pull-up resistors, pull-down resistors ensure the voltage between VCC and a microcontroller pin is actively controlled when the switch is open. However, instead of pulling a pin to a high value, such resistors pull the pin to a low valued instead.   6. How do you calculate pull-down resistors?To calculate the pull-down resistor value, it's slightly different from the pull-up resistor value. Knowing that current is 100uA, we'll take 0.5v as our pull-down voltage since the input is 0.8v. Thus, applying our R = V/I once again, but this time we don't have to minus, so our formula remains constant.   7. Why does I2C need pull-up resistor?As discussed in the I2C Basics module, the resistors that are commonly seen on I2C circuits sitting between the SCL and SDA lines and the voltage source are called pull up resistors. ... A pull up resistor is used to provide a default state for a signal line or general purpose input/ouput (GPIO) pin.   8. Which port has no built in pull-up resistor?Input/Output (I/O) pin − All the circuits within the microcontroller must be connected to one of its pins except P0 port because it does not have pull-up resistors built-in.   9. What is pull up and pull down in Arduino?Introduction: Understanding the Pull-up/Pull-down Resistors With Arduino. ... With a pull-up resistor and with the button unpressed you make a logic state ON and with the button pressed you make a logic OFF. With a pull - down resistor and a pressed button you make an ON logic state and OFF logic state when its unpressed.   10. What happens if the pull up resistor for an I2C signal is too small?Too small of a value will once again prevent the output drivers from sinking enough current to pull the pin all the way down to 0.
kynix On 2021-10-07   3665
Resistors

What is an Oil Pressure Sensor?

CatalogⅠ IntroductionⅡ How does The Oil Pressure Sensor Work?Ⅲ Oil Pressure Sensor LocationⅣ Types of Oil Pressure Sensors4.1 Oil Pressure Switch4.2 Oil Pressure SenderⅤ How to Test an Oil Pressure Sensor?Ⅵ Symptoms of a Faulty Oil Pressure Sensor6.1 The Oil Pressure Light Blinks Over and Over6.2 The Oil Pressure Gauge Shows an Error6.3 The Oil Pressure Light Comes on Ⅶ How to Replace an Oil Pressure Sensor? Ⅷ Conclusion Ⅸ Frequently Asked Questions about Oil Pressure SensorⅠ IntroductionOil is essential for your engine, which lubricates and reduces friction throughout the engine. Because there's no way to tell how much oil is being pumped through the engine by looking at it, your car's computer relies on the oil pressure sensor to figure it out. The oil pressure sensor is a simple electrical switch that sends data to the oil pressure gauge on the instrument cluster.  Video. How to Test an Oil Pressure Switch? Ⅱ How does The Oil Pressure Sensor Work? The primary function of an engine oil pressure sensor is to monitor the vehicle's oil pressure and communicate that data to the combination meter or instrument panel. When a problem occurs, the oil pressure sensor sends data to the car's electronic control module for analysis. The instrument cluster panel, as well as the engine oil pre-heating system, will be activated. When the oil pressure falls outside of the preset range, standard oil pressure sensors can produce a warning signal. The oil pressure sensor is made up of two parts: a spring-loaded switch and a diaphragm. The diaphragm that is exposed to oil pressure is attached to the spring-loaded switch. The pressure switch is positioned on the side of an engine block and is connected to an oil gallery. The switch spring pressure is exceeded as the oil pressure develops on the diaphragm, forcing the electrical contacts apart and causing the warning light to illuminate. If the oil pressure falls below the predetermined limit, the diaphragm releases pressure from the springs, closing the switch.Figure 1.How does The Oil Pressure Sensor work? A vehicle's dashboard can show a low oil pressure indicator light. When this light flashes constantly, any driver will recognize that the oil pressure has dropped temporarily. However, if this indication continues to illuminate, the driver will be alerted of a complete loss of oil pressure. When the engine of a vehicle is started, an electrical current flows from a fuse to the oil pressure switch, turning off the indicator light. The diaphragm pushes apart the contacts when oil pressure rises above 4.3 psi (per square inch), turning on the oil pressure light. Ⅲ Oil Pressure Sensor Location Depending on the make, model, and engine, the actual position of your oil pressure sensor may differ. Typically, the oil pressure sensor is found near the bottom of the cylinder head in the engine block. However, it can be mounted to the cylinder head as well. A block connector and one or two thin wires will be added to it.Figure 2.Location of Oil Pressure Sensors  Ⅳ Types of Oil Pressure SensorsAn oil pressure sensor is a device that measures the engine's oil pressure. The term "oil pressure sensor" refers to at least two different and unique types of sensors: an oil pressure switch and an oil pressure sender. 4.1 Oil Pressure SwitchAn oil pressure switch is a device that protects an engine. It is a specific type of oil pressure sensor. The oil pressure switch is a mechanical device with a switch within, as the name implies. The oil pressure switch can have one, two, or three pins. When most oil switches for protection are actuated to signify low oil pressure, they close. This might be done by using the engine block as a ground, or by using another approach.  Figure 3.Oil Pressure Switch 4.2 Oil Pressure SenderA form of the oil pressure sensor is an oil pressure sender. An oil pressure sender is a device that detects and sends the oil pressure of an engine to the engine or machine controller. It can be used as a generator protection device to show the user the oil pressure or for logging and diagnostic purposes. It may display a variety of readings, unlike an oil pressure switch.Figure 4. Oil Pressure Sender Ⅴ How to Test an Oil Pressure Sensor?The vehicle's gauge indicates that the engine is receiving insufficient oil pressure or that the sending unit has become faulty or damaged over time. Low oil pressure could indicate a lack of oil, which can be remedied by adding extra. It could also mean the engine is leaking oil or the system is burning it. These steps can be used to determine if the oil pressure sensor is defective. The first step is to turn the key to the accessory setting after inserting it into the ignition. Check to see if the engine is turned off and has cooled down after use. Examine the oil indicator on the dashboard after that. If the gauge is at zero, unplug the wire that is directly attached to the sending device.If the gauge keeps rising after that, the transmitter is broken and needs to be replaced. Next, connect the transmitting unit's disconnected wire to the negative part of the battery and another metal object in the vehicle.It is a good sender and does not malfunction if the oil gauge reading reads zero, which will show you whether or not the oil pressure sensor is working properly. Ⅵ Symptoms of a Faulty Oil Pressure SensorThe engine oil pressure indicator will often illuminate if there is an issue with the oil pressure sensor. It could also cause the oil pressure gauge to produce an incorrect reading. The three most common indicators of a defective oil pressure switch or sensor are listed below. 6.1 The Oil Pressure Light Blinks Over and OverThe low oil indicator on the dashboard can occasionally flicker if the oil pressure sensor is not working correctly, which could make a driver worry, leading them to feel their oil levels are low, which, if right, could damage the engine.Figure 5. Oil Pressure Light You should physically check your oil level to see whether it is low in order to establish if this is a genuine warning. If it isn't, you most likely have a malfunctioning oil pressure sensor, which you should repair as soon as possible. 6.2 The Oil Pressure Gauge Shows an ErrorIf you have an older vehicle, the oil pressure is likely calculated using a mechanical gauge. When the oil levels are normal but the gauge reads zero, it means the oil pressure sensor is broken or there is an issue with the connection.Figure 6. Oil Pressure Gauge If you drive a modern vehicle, your oil pressure gauge is almost certainly electronic, and it receives the reading via an electronic signal.In a modern car, if an oil pressure sensor fails, the gauge will display unusual readings or will remain at full or zero. Examine the sensor's wiring and replace it if necessary.Don't assume your engine oil level is low without checking the dipstick yourself. If you don't, you risk having too much oil in your engine, which can lead to a range of issues, including high oil pressure. 6.3 The Oil Pressure Light Comes onThe lights on the oil pressure gauge are the best method to see if your sensor is bad. If the low oil pressure warning light illuminates even though your engine's oil levels are normal and it runs smoothly and silently, you most likely have a faulty oil pressure sensor. This sensor will give you erroneous readings if it is malfunctioning. You have a genuine oil pressure problem if your oil levels are correct yet your engine makes grinding, ticking, or other noises, such as a malfunctioning oil pump, and the sensor is merely doing its job. These readings will eventually exceed the typical specifications, causing the warning light to illuminate. To keep track of your oil pressure level, you need to change your sensor at this point. Ⅶ How to Replace an Oil Pressure Sensor?If you notice that the oil pressure sensor is broken, you may need to look into the procedures for replacing the sensor. The oil pressure sensor, as well as the oil pressure gauge and light, can be used to notify the driver of the oiling system's state. The oil pressure may diminish as the oil degrades. The oil pressure sensor detects a drop in oil pressure and reports it to the gauge on the instrument cluster. We'll go over how to replace an oil pressure sensor step by step. To begin changing an oil pressure sensor, you'll need a screwdriver set, shop towels and rags, thread sealant, and a wrench set. Oil pressure sensors are often found in the engine block or cylinder heads. Therefore the first step is to find it. If you can't discover the sensor, consult a repair manual. Then, the electrical connector for the oil pressure sensor must be unplugged. Pull the electrical connector out of the oil pressure sensor by releasing the retaining tab. Because the oil pressure sensor is overly exposed to the elements, debris might build up over time, necessitating continuous plugging and unplugging. The oil pressure sensor must be removed as the third step. You'll need to use the wrench or socket to release the oil pressure sensor, then undo the rest by hand. Then, compare the oil pressure sensor you replaced with the one you removed. Because the oil pressure switch is installed in a place with pressurized oil, use caution. After you've completed these steps, thread the replacement oil pressure sensor into place until you can no longer turn it by hand. Reinstall the electrical connector after tightening it with the wrench or socket. The next step is to test the engine for appropriate operation by starting it and looking at the oil pressure indicator. If you do not follow these instructions, your engine may completely fail, necessitating an engine replacement. Ⅷ ConclusionThe oil pressure sensor is the most commonly used pressure transmitter in industrial practice. It is widely used in industrial automation environments involving petroleum pipelines, water conservancy, railway transportation, intelligent buildings, and many other industries. Even though the installation method is simple and the service life is long, we must have the above knowledge to get the most out of it. Ⅸ Frequently Asked Questions about Oil Pressure Sensor1. Can you drive with a bad oil pressure sensor?If the oil level is fine on the dipstick, and the engine runs quietly and smoothly, the light is most likely the result of a malfunctioning sensor. In this case, stop driving until you've resolved the issue or you could be facing major and immediate engine damage. 2. How long do oil pressure sensors last?The oil pressure sensor, like all of the other sensors and switches on a car, is designed to survive as long as the vehicle itself. Due to the wear and harsh conditions that the sensor is subjected to, this is usually not the case; the sensor will become damaged and will need to be replaced. 3. Can you clean an oil pressure sensor?If the oil level is normal, the suspect may be an oil pressure sensor. Getting the sensor replaced can't eliminate the illuminated message. It is possible to easily clean the filter screen with a brake cleaner and low air pressure. 4. How much does it cost to replace oil pressure sensor?Between $121 and $160 is the average cost for an oil pressure sensor replacement. The cost of labor is between 73 and 93 while the cost of parts is between $48 and 67. Taxes and fees are not included in the estimate. 5. Can oil leak from oil pressure sensor?A bad oil pressure switch or sender may leak engine oil. Oil leaks can be caused by several issues, so a professional inspection is order here.
kynix On 2021-08-19   15404
Resistors

Reed Relay Basics Update | Uses in Switching Circuits

IntroductionAs one type of relays, reed relays use an electromagnetic coil to control one or more flexible ferromagnetic metal reed switches directly. It is composed only by the contacts themselves that triggers the conduction in the secondary circuit. Reed relay switches can be used as magnetic proximity switches or relays, which are smaller in size, higher in speed and longer in working life than general mechanical switches. Here, let's explore this special relay.What is a Reed Relay? Characteristics IntroductionCatalogIntroductionⅠ A Special Relay: Reed RelayⅡ Structure Comparison: Relay vs Reed RelayⅢ Reed Relay CharacteristicsⅣ What is a Reed Relay Used For?Ⅰ A Special Relay: Reed RelayIn electronic circuits, relays are the switches which close and open the circuits contacts electronically as well as electromechanically. When the relay coil is energized or de-energized, it plays the role of automatic regulation, safety protection and circuit conversion. Relays are available with two main types. As everyone knows, relays are divided into mechanical relays and semiconductor relays.Figure 1. Mechanical Relay vs Semiconductor RelayOn the insulation detection circuit of BMS, we often use a device called PhotoMOS, which is used to switch the Wheatstone bridge. Actually, it is a semiconductor relay.Figure 2. PhotoMOS AQV258For example, AQV258 is a model we often choose.PhotoMOS is a semiconductor relay with LED as input and MOSFET as output, but we are not mainly discussing PhotoMOS today.In recent years, another device has appeared on the insulation detection circuit, which is called Reed Relay Switch, Reed Switch, Reed Relays, etc. It is also used for the switch of the Wheatstone bridge arm. Ⅱ Structure Comparison: Relay vs Reed RelayReed relay is a kind of mechanical relays, but its structure is different from the traditional electromagnetic relay. The traditional electromagnetic relay is an electrical relay that uses the suction force generated by the circuit in the input circuit between the electromagnet core and the armature to work. This kind of relay is large in size, slow in action, and limited in life, but it is reliable. With the development of electronic appliances in the direction of miniaturization, new requirements have been put forward for relays. In this case, reed relays can meet the needs of this development in many aspects.Figure 3. Electromagnetic Relay StructureThe reed relay is composed of two parts: a reed switch and a coil. Compared with other types of relays, it is more compact and has higher energy efficiency. The following describes its structure and principle in detail.As shown in the figure below, the magnetic reed switch consists of two magnetic reeds, which are sealed inside a glass tube. The two magnetic reeds have a contact overlap area at the middle end of the glass tube, and has a small gap. The inside of the glass tube is filled with inert gas, such as nitrogen, to prevent oxidation. In order to improve the strength of electrical breakdown, the inside of the glass tube can also be evacuated.Figure 4. Reed Relay StructureThe magnetic reed body is made of nickel-iron alloy, and the surface of the contact overlap area of the two magnetic reeds is plated with hard metals such as rhodium or ruthenium to play a role in wear resistance. Placing the magnetic reed switch in a magnetic field, when the two magnetic reeds are magnetized into opposite polarities, they generate attractive force, and the contact overcomes the elastic force to connect. Similarly, when the magnetic field disappears, the contact is pulled away without magnetic force.In order to allow the reed switch to be closed or opened by human control, the coil is wound on the surface of the glass tube, and the coil is energized, thus forming an electromagnet, which generates a magnetic field for the reed switch to act.Figure 5. Relay CoilTherefore, as a circuit switch device controlled by a magnetic field signal, the reed switch can be used as a sensor for counting and limiting (in the security system, it is mainly used for the production of door and window magnets). It is widely used in various communication devices. In practical applications, permanent magnets are usually used to control whether the two metal pieces are connected or not, so they are also called magnetic relay.What’s more, the more turns the coil has, the less current reed relay switch needs to work. The relationship between the number of turns and the working voltage is restricted by the following factors: the wire diameter of the coil, the number of turns, the resistivity of the conductor, and the size of the reed contact.In theory, the working principle of the reed relay is like a switch: when the permanent magnet is close to the reed switch or the magnetic field formed by the coil winding on the reed switch magnetizes the reed, the contact part of the reed will be attracted by the magnetic force. When the attractive force is greater than the elastic force of the reed, the normally open contact will attract and close; when the magnetic force is reduced to a certain extent, the contact is opened by the elastic force of the reed.Figure 6. Reed Relay Magnetic FieldThe lifespan of reed switches is shorter than that of semiconductor switches, but much longer than general electromagnetic relays. The following figure shows the operating parameters of a certain type of reed switch, which can be switched on and off millions of times.Figure 7. Life Test DataThe reason for using the reed relay in the bridge method is that it has higher insulation and withstand voltage regardless of the load end or input/output. Ⅲ Reed Relay Characteristics1) High reliabilityThe failure rate of general relays is set at 50ppm, so in order to meet this requirement, the quality level of reed switches is much higher than this standard. So far, there has not been any electromechanical device that can achieve this level of quality.2) High securityReed relay switch has excellent insulation properties. Its insulation resistance can reach up to 1015Ω, that is, its leakage current only has 10-15A. Such extremely low leakage levels are widely used in medical electronic equipment, such as probes inserted into the human body or cardiac pacemakers, because these equipment require no leakage current close to the heart, even if the current is microampere or submicroampere, which will change the electrical properties of key parts of the heart.3) High adaptabilityThe reed sensor is sealed. Because the switch components is airtightly sealed in an inert gas, it will not contact the external environment, so it can work in almost any environment without being sensitive to humidity and not affected by the outside world. At the same time, the reed switch has no special requirements for the ambient temperature and has a wide temperature adaptability. The typical working temperature range can be from -50℃ to +150℃, and no special additional conditions, restrictions or costs are required.4) Long lifespanBecause the reed switch is a wear-free component and does not use a sliding component, there will be no worn metals, ensuring practically unlimited mechanical service life. At the same time, because the contact made of inert precious metal rhodium has a high melting point, it can reduce the loss of arc power generation on the contact surface, so it is more resistant to wear and can maintain a longer working life. General reed switches can work up to a million times under low-level loads (less than 5V and lower at 10mA).5) Small sizeThe reed relay switch can be installed in a limited space and is very suitable for miniaturized equipment.6) Superior electrical performanceReed relay switches have a series of excellent electrical properties. For example, their contacts have extremely low on-resistance when they are turned on, typically as low as 50mΩ. In addition, their direct switching signals can range from a few nanovolts to thousands of volts, and the current ranges from micro An to An, etc.7) High speed operationSince each movable component has only a very small weight, the operating speed is very high, making the reed switch a part that can be used in transistor circuits or integrated circuits.Ⅳ What is a Reed Relay Used For?Reed relay switches have been widely used in many fields of automatic control systems, such as machinery, automobiles, electronics, electric power, petroleum, chemical industry, office automation, communications and other engineering. For example, in the military field, high-voltage reed relays are related to national defense components for modern weapons and equipment. Frequently Asked Questions about Reed Relay Basics and Uses1. What is a reed relay used for?Reed Relays are ideally used for switching applications requiring low and stable contact resistance, low capacitance, high insulation resistance, long life and small size. 2. What is the difference between relay and reed relay?A relay switch is composed of an electromagnet that actuates a high power switch made of two metallic contacts. ... A reed switch is composed only by the contacts themselves that triggers the conduction in the secondary circuit. 3. Why is reed relay used in a switching circuit?The reed relay consists of a switch with magnetic contacts that move under the influence of an external magnetic or the induced field from its solenoid. They have faster switching speed compared to the electromechanical ones but their switching current and voltage is lower mainly because of its contacts thickness. 4. What is required to operate a reed relay in a switching circuit?The coil surrounds the reed switch and generates the axial magnetic field needed to close the reed contacts. 5. Where is a reed switch used?Reed switches are used in fluid level sensors for brake fluid reservoirs and to monitor motor oil levels. They are also used in speed sensors for engine control and power steering. Automatic door locks, air bags, parking brakes, seat, door, and hood proximity sensors also utilize reed switches.
kynix On 2021-07-26   3955
Resistors

How to Dim LED With Mainstream Dimmers?

IntroductionIn the lighting industry, people often have a misunderstanding about dimming LED lights. And the reality is that the application of LED light source dimming technology in engineering is often unsatisfactory. Why is this the case? Is the LED light source dimming technology immature, or the technology is difficult to master? So this article analyzes the LED dimmer to help readers to fully understand and master it.Dimming all kinds of LEDs?CatalogIntroductionⅠ Dimming LED Lights1.1 What is Dimming?1.2 LED Dimming Circuit Example1.3 LED Dimming Using SCRⅡ Dimming LED Using PWM2.1 LED Dimming Current2.2 LED PWM Dimmer2.3 LED PWM Dimming Advantages2.4 LED PWM Dimming Problems2.5 DALI PWM Dimmer IntroductionⅢ Main LED Dimmers ComparisonsⅠ Dimming LED Lights1.1 What is Dimming?LED dimmer switch is an electrical device that changes the luminous flux of the light source in the lighting device and adjusts the illuminance level. The purpose of the dimmer is to adjust the different brightness of the light. By reducing or increasing the rms voltage, the light output of different intensities produced by the average power lamp is promoted. Although variable voltage devices can be used for various purposes, this regulation is aimed at controlling lighting. Regarding the LED dimmer switch, we must first understand the volt-ampere characteristics of the LED. That is, the characteristics of the current flowing through the LED PN junction with voltage. Generally, the reverse characteristic curve changes steeply. When the voltage exceeds a certain threshold, the current will rise exponentially, thereby breaking down the LED PN junction. The forward voltage of the LED is also determined by its forward current. It can be seen from the figure that the change of the forward current will cause the corresponding change of the forward voltage, to be precise, the decrease of the forward current will also cause the decrease of the forward voltage. Therefore, when the current is lowered, the voltage of the LED will also decrease, which will change the relationship between the power supply voltage and the load voltage.Figure 1. Diode Volt-Ampere Characteristics CurveTherefore, from the volt-ampere characteristics of the LED, we can know that the dimming of the light source cannot be achieved simply by reducing the input voltage or input current of the LED. In addition, the waveform of the sine wave of the LED is different from the waveform of the incandescent lamp, so it cannot simply change its conduction angle to achieve the purpose of dimming.LED dimming methods can be divided into analog dimming and digital dimming. Analog dimming is to achieve dimming by changing the current in the LED loop. The power supply voltage remains unchanged, and the current in the loop is changed by changing the resistance value to achieve the effect of changing the brightness of the LED. Many analog dimming is an extension of this method. Its advantage is that the current can be continuous, but the range of adjustable current is often limited by hardware, and there are few adjustment gears. This method is not ideal for high-precision lighting equipment.Digital dimming, also known as PWM (Pulse Width Modulation) dimming, uses PWM waves to turn on and off the LED to change the on-time of the forward current to achieve the effect of brightness adjustment. This method is based on the fact that the human eye is not sensitive enough to the brightness flicker. If the frequency of brightness and darkness exceeds 100Hz, the average brightness is seen by the human eye, not the LED flickering. PWM adjusts the brightness by adjusting the ratio of light and dark time. In a PWM cycle, because the perceived brightness of human eyes to flicker is a cumulative process, that is, the brighter time accounts for the greater the proportion of the entire cycle. The longer the time, the brighter the human eye feels.1.2 LED Dimming Circuit ExampleFor example, in an LED lamp with an input of 24V, 8 1W high-power LEDs are connected in series. When the forward current is 350mA, the forward voltage of each LED is 3.3V, then 8 pieces in series is 26.4V, so a constant current source greater than 24V should be used. However, in order to dimming, the current is reduced to 100mA. At this time, the forward voltage is only 2.8V, and 8 pieces are connected in series to 22.4V. The load voltage becomes lower than the input voltage, so that a constant current source larger than 24V cannot work, and finally the LED will flicker.In this case, you may choose a step-down (wide voltage) constant current source, such as a 10V-30V constant current source for dimming. However, if this type is adjusted to a low forward voltage, the LED load current will also become very low. So the step-down ratio is very large, beyond the normal working range of constant current source, which will make LED unable to work and cause flicker. In addition, LED works at low brightness for a long time, which will reduce its efficiency and increase the temperature rise. Because the efficiency of the step-down constant current source is related to the voltage ratio, the larger the voltage drop ratio, the lower the efficiency. And greater power loss on the chip will damage the life of the constant current source and the LED light source.1.3 LED Dimming Using SCROrdinary incandescent lamps and halogen lamps usually use thyristors for dimming. Because they are pure resistance devices, and do not require the input voltage to be a sine wave. Their current waveform is always the same as the voltage waveform, no matter how the voltage waveform deviates from the sine wave, changing the effective value of the input voltage will dim the LED light .However, the adjustment of LED light source by thyristor dimming will cause unexpected problems, that is, the LC filter at the input will cause the thyristor to oscillate. This oscillation is indifferent to the incandescent lamp, human eyes can't see it at all because of thermal inertia. However, this dimming method will cause the driving power of LED produce audio noise and flicker. It will also destroy the waveform of the sine wave, thereby reducing its power factor value (usually lower than 0.5), which greatly reduces the system efficiency of the LED. Moreover, the thyristor dimming waveform increases the harmonic coefficient, and the non-sinusoidal waveform will cause serious electromagnetic interference on the line to pollute the power grid.Ⅱ Dimming LED Using PWM2.1 LED Dimming CurrentHere, you may ask: Lower voltage or current or thyristor dimming methods are not suitable for LED light source dimming, so what is the most suitable method?Is it an analog (0-10V) dimming method? May be not. Analog dimming faces a severe challenge, which is the output current accuracy. Almost every LED driver needs some kind of series resistance to distinguish the current, and the tolerance, offset and delay in the analog (0-10V) dimming drive cause a relatively fixed error, which will reduce the accuracy of the output current, and the final output current cannot be specified, controlled or guaranteed. Therefore, to ensure the dimming effect of the LED light source, one of the important rules is to reduce the output current error and improve the current accuracy in a closed loop system.2.2 LED PWM DimmerThe PWM dimming method can solve the above problems very well. Because diode characteristics, LED can realize fast switching, and its allowable switching speed can be as high as microseconds or more. Therefore, as long as the power supply is changed to a pulse constant current source, the brightness can be changed by PWM. This PWM dimming. This method is like a sluice that opens and closes in microseconds or more. The switching frequency of it is so fast that humans can’t recognize the state of its opening with the naked eye. As a result, people can only identify the speed of its switching frequency by the amount of water downstream. In addition, because the sluice changes the duty cycle of the output water flow (effective water flow), it does not change the instantaneous water pressure and flow rate, so the opening and closing action of the sluice gate will not affect the hydropower generation. The amount of water flowing down and power generation are just changed. Therefore, the PWM dimming method does not change the instantaneous voltage and current of the input LED PN junction, but changes the duty cycle of the output current to change LED brightness.2.3 LED PWM Dimming Advantages1) There will not be any LED chromatogram shift, because the LED always works between the full amplitude current and 0.2) It has a very high dimming accuracy, because the pulse waveform can be controlled to a high precision.3) Even if the light is dimmed in a wide range, there will be no flicker. Because it will not change the working conditions of the constant current source (boost ratio or step-down ratio), problems such as overheating are less to occur.4) It can be combined with digital (DALI/DSI/DMX 512) control technology for control, because the digital control signal can easily be transformed into a PWM signal.2.4 LED PWM Dimming Problems1) Because the LED is in a fast switching state, if the working frequency is very low, the human eye will feel flicker. In order to make full use of the residual visual phenomenon of the human eyes, its operating frequency should be higher than 100Hz, preferably 200Hz.2) Eliminate the howling caused by dimming. Although the human eye can't detect it above 200Hz, it is within the range of human hearing until 20kHz. At this time, it is possible to hear the slightest voice. There are two ways to solve this problem: One is to increase the switching frequency above 20kHz, out of the range of human hearing, another is to find out the sound-producing device and deal with it.At present, some manufacturers have solved the above problems well. A good LED light source dimming technology needs a good LED control signal technology to match and cooperate in order to become an effective, stable and reliable system. For example, the LED PWM dimming method has the advantage that the digital control signal can easily be converted into a PWM signal. At the same time, in the digital control signal of lighting, DALI (Digital Addressable Lighting Interface) has the unparalleled superiority of other lighting digital control methods, and it is also the mainstream of the current digital control application in the lighting industry. Therefore, the matching of PWM dimming mode and DALI takes into account their respective advantages, where PWM dimming technology solves the final dimming problem of LED light sources, and DALI solves the control, feedback and networking of each LED light.Figure 2. LED PWM Dimming Circuit2.5 DALI PWM Dimmer IntroductionThe biggest feature of DALI technology is that each lamp has an independent address. Through the DALI system software, a single lamp or any lamp set can be accurately dimmed and switched, regardless of whether the lamps are on strong current loop or not. That is to say, the lighting control has nothing to do with the strong current circuit. The DALI system software can independently address single or multiple lamps on the same strong current circuit or different circuits, to achieve individual control and arbitrary grouping set. This concept brings great flexibility to lighting control, which can meet different LED lighting requirements. Even after installation, they can still modify the control requirements at will, without having to do anything to the wiring.The following are the application advantages of PWM dimming method combined with DALI.1) The design is simple and easy to implement.In the design, as long as they are connected to each other through the digital signal interface, they are connected in parallel to the 2-core control line. All design process can be programmed by computer software during installation and debugging, which not only saves design costs, but also improve working efficiency.2) Simple and economical installationThe DALI control line has no special requirements for the wire and no polarity requirements during installation. It only requires the main power line to be separated from the control line. The control line does not need to be shielded. When the current on the control line is 250mA and the line is 300 meters long, the drop does not exceed 2V. The control line and the power line can be parallel, no need to bury the line separately. The compact design of the control components does not require a special control cabinet, so installation is simple and economical.3) Simple and convenient operationThe PWM LED driver with DALI control can automatically handle filament preheating, ignition, dimming, switching, fault detection and other functions. The user interface is very friendly. Users can operate and control without deep understanding, such as sending a change. According to the command of the scene, each relevant LED driver calculates the dimming rate according to the difference between the current brightness and the required installation brightness to achieve that all the LED light sources are synchronized to the required scene brightness.4) Accurate and reliable controlDALI is a digital signal, which is different from an analog signal. The signal of 1010 can realize disturbance-free control, and will not distort the control signal due to long-distance voltage drop. Therefore, even if the DALI digital signal control line and the strong wire are in the same line and tube, it will not be disturbed. The DALI signal is two-way transmission, which not only transmits control commands forward, but also feeds back the information of the LED driver's status, fault information, switch, and actual brightness value to the system.5) Wide range of applicationsNowadays, DALI interface is not only used for fluorescent lamp ballast dimming, various electronic transformers for halogen lamps, electronic ballasts for gas discharge lamps. DALI technology also employed in wide range of LED light control makes it more and more widely. Ⅲ Main LED Dimmers Comparisons1) SCR DimmingFigure 3. SCR Dimming Circuit Diagram✅Advantages: It has the advantages of high adjustment accuracy, small size, light weight, easy remote control, etc., which occupies a leading position in the market.❎Disadvantages: The front-cut LED dimmer is prone to generate noise, so it is not recommended for high-demand occasions. The minimum load will vary depending on the LED dimmer and light source. It is necessary to consider derating to adapt to the spike caused by the driver. The typical derating percentage should be 25%-30% of the maximum rated load of the dimmer circuit. 2) CMOS DimmingFigure 4. CMOS Dimming Circuit Diagram✅Advantages: There is no minimum load requirement, so that better performance can be achieved on a single LED lighting device or a very small load.❎Disadvantages: High cost, complicated dimming circuits, lack of high-power products, and poor stability. 3) 0-10V DimmingFigure 5. 0-10V Dimming Circuit Diagram✅Advantages: Simple application, good compatibility, high precision, better dimming effect than phase-cut dimming.❎Disadvantages: Need to add additional control lines and controllers. The dimming effect is related to the wire diameter, cable material, power current, and power supply quantity of 0-10V dimming. 4) DALI DimmingFigure 6. DALI Dimming Circuit Diagram✅Advantages: Accurate and smooth dimming, two-way communication, and strong anti-interference ability, mainly used in single lamp control.❎Disadvantages: Like 0-10V products, additional control circuits and controllers need to be added. 5) DMX512 DimmingFigure 7. DMX512 Dimming Circuit Diagram✅Advantages: Powerful control functions bring rich lighting effects to architectural lighting, night lighting, studios and variety shows.❎Disadvantages: Special wiring layout and types are required, and certain programming is required to set the basic colors and scenes, which is more costly for later maintenance. The ideal transmission distance of DMX signal is less than 200 meters. And meanwhile, in actual use, the signal is greatly interfered by the outside world. 6) SLC and Ready2mains DimmingFigure 8. LED Dimming via Ready2mains✅Advantages: The digital dimming signal is transmitted through the AC wire, without additional signal wires and wiring. Digital signal transmission has good anti-interference performance and excellent dimming effect.❎Disadvantages: At present, there are relatively few products using this type of digital dimming technology, so there are relatively few compatible products. Frequently Asked Questions about LED Dimmer1. What are LED dimmers?An LED dimmer is the term for a device that performs a dimming control operation within such an LED lighting device. LEDs react instantaneously to alterations in power input, making solid state lighting especially suitable for dimming scenarios. 2. Why do my LED dimmer lights flicker?LED bulb flickering can be traced in almost every instance to a non-compatible dimmer switch in the lighting circuit. ... LED bulbs don't have glowing filaments. When the dimmer switch goes off and on many times per second, the LED bulb becomes a flickering strobe light. 3. Do you need a special dimmer for LED lights?Use an LED Dimmer switchA standard dimmer switch cannot be used with an LED light as you will never be able to dim the LED light either completely or not very well. LED lights need their own special electronic dimmer switch to have a fully functioning and dimming light. 4. How do LED dimmer switches work?In the case of PWM, dimmable LEDs work by creating a dimming effect. Unlike traditional lighting such as incandescent, dimmable LED bulbs don't rely on voltage to dictate their level of brightness. Instead, they essentially rely on a cycle of being on and off. 5. What is the best dimmer switch for LED lights?Best Overall: Lutron Toggler Single-Pole/3-Way Light Dimmer.Best Budget: GE Slide Dimmer Rocker Wall Switch, Single Pole.Best Smart: Kasa Smart Dimmer Switch HS220.Best for Bedrooms: Lutron Maestro LED+ Dimmer Switch, Single-Pole or Multi-Location.Best for LED: Lutron Diva LED+ Dimmer Switch, Single-Pole or 3-Way.
kynix On 2021-06-29   2674
Resistors

How to Reduce TRIAC Fault in Switching Circuits?

IntroductionWhat is a triac? TRIAC (Triode for Alternating Current) is an electronic component that is widely used in alternating current power control. It is a three terminal electronic component that conducts current in either direction when triggered. TRIAC is able to switch high voltages and high levels of current, and over both parts of an AC waveform. This makes triac circuits ideal for use in a variety of applications where power switching is needed. You can find its applications in switching, phase control, chopper designs, brilliance control in lamps, speed control in fans, motors etc.TRIAC Characteristics, TRIAC Structure and TRIAC WorkingCatalogIntroductionⅠ TRIAC vs Silicon Controlled Rectifiers (SCR)Ⅱ TRIAC Structure and SymbolⅢ How Do You Use a TRIACⅣ How Does a TRIAC Work?4.1 TRIAC Leakage Current4.2 SolutionsⅠ TRIAC vs Silicon Controlled Rectifiers (SCR)Thyristor also called SCR stands for silicon controlled rectifier while TRIAC stands for triode for alternating current. The TRIAC has on and off state characteristics similar to SCR. The main difference between SCR and TRIAC is that thyristor is a unidirectional device while in TRIAC as a bidirectional device. A TRIAC is defined as a three terminal AC switch which is different from the other silicon controlled rectifiers (SCR) in the sense. They can turn and regulate both parts of the AC waveform easily. This makes this component appropriate for a variety of applications where control of AC power is needed. A dimmer circuit will be an example application, and we use it domestically as a ceiling fan regulator circuit. Also it can be used to regulate a motor or electric heater's input power. This is why TRIAC is used for applications of low to medium power, leaving SCR with high-power applications. While this is a very interesting system, a problem known as "leakage current" is present. And we'll talk more about this leakage current, its adverse effects, and some well-known ways to solve these problems in this article. But let's clear out the basics of TRIAC before that. Ⅱ TRIAC Structure and SymbolAs for triac symbol, like any other electronic component, it consists of two SCRs linked in an antiparallel configuration, and if we look very closely at its symbol, it clearly reflects the TRIAC's bidirectional properties. Which you observe from the picture below.The upgraded variant of the thyristor is the TRIAC. A thyristor can only control current in one direction, as you already know, but a TRIAC can control current in both negative and positive directions. TRIAC turns in each sine wave loop because of the existence of the sine wave, which means we can use the entire cycle, unlike SCRs. Like thyristor, a TRIAC has three terminals, but it becomes a little difficult to assign names to these terminals since they are related simply to the cathode and the anode of two SCRs. Two SCRs are also connected to the gate terminal, which is why it was called Anode 1 and Anode 2 or Main Terminal 1 and Main Terminal 2 (MT1 and MT2).A multimeter can be used to test the health of a triac. First put the multimeter selector switch in a high resistance mode (100K), then connect the positive lead of multimeter to the MT1 terminal of triac and negative lead to the MT2 terminal of triac (there is no problem if you reverse the connection). Ⅲ How Do You Use a TRIACTriacs are semiconductor devices that are widely used for switching medium power AC. Let's acquire a little knowledge of  TRIAC functions before going further. As the following figure shows you.Two-thyristor AnalogyWe have previously said that as a configuration of two SCRs, a TRIAC can be realized. The above image provides a little bit more clarity on the subject, but it is much more complex to work at the semiconductor level. A TRIAC can be activated in many ways, unlike SCR, regardless of the polarity of the terminals. Regardless of the polarity of the initiating pulse, it may also be activated. When working with TRIAC, one thing to remember is that when the MT2 and gate current are at the same polarity, the sensitivity of the trigger current is much greater. We can now move on to cleaning out our key issue of leakage current with the simple cleared out.Triac Switching Circuit ExampleⅣ How Does a TRIAC Work?4.1 TRIAC Leakage CurrentThere is structural leakage current in the off state of thyristor, TRIAC, or any other solid-state AC switches, which is why a small amount of current flows through the load, this circuit is sufficient in some cases to charge a load circuit (Inductive) and causes it to flash spontaneously. We need to take careful care of the specifics and design the circuit accordingly to avoid this, and we will talk more about it in this section of this article.If the voltage of MT2 reaches a certain rated threshold voltage (which can occur due to the transient state of high voltage), the leakage current between the two terminals may enter the point at which the TRIAC breaks into conduction mode. In this state, a sudden localized heat will be produced when a sudden increase in current flows through the TRIAC, so that the TRIAC can be destroyed. Incandescent lamps are most likely the source of strong inrush currents, with capacitive loads.4.2 SolutionsBy applying one or more of the following methods, this condition can be avoided:1) Maximum Temperature Ratings Tj max. ensure that the temperature is not surpassed. As temperature rises, the current of leakage through the system increases, we can eliminate/reduce this issue by integrating specific TRIAC brands for specific requirements.2) By placing a broad value resistor from the gate to the cathode, we can reduce the TRIAC's sensitivity. This decreases the gate current, thereby reducing the current of leakage. It, on the other hand, increases the TRIAC turn-on time.3) If it is not possible to implement the methods described above, we can use a TRIAC with a less sensitive gate during the off time and apply a small degree of reverse bias to the gate. In this process, we have to minimize the dissipation of power through the gate.4) Depending on the form of load, another strategy for reducing leakage current is to fully eliminate the snubber circuit. The capacitor leakage also becomes the main source of leakage current, so we can decrease the current flow through the snubber and decrease the leakage current by removing the snubber network.If you want to know more TRIAC info, you can check its Triac I-V Characteristics curves with more examples. Before try these methods to reduce current leakage, please remember safety first! Frequently Asked Questions about TRIAC Basic and Its Applications1. What is a triac used for?The Triac is most commonly used semiconductor device for switching and power control of AC systems as the triac can be switched “ON” by either a positive or negative Gate pulse, regardless of the polarity of the AC supply at that time. 2. Which is an example of Triac?TRIAC ApplicationsTRIAC is very commonly used in places where AC power has to be controlled for example, it is used in the speed regulators of ceiling fans, AC bulb dimmer circuits etc. Let us look into a simple TRIAC switching circuit to understand how it works practically. 3. What is triac and its characteristics?A Triac is defined as a three terminal AC switch which is different from the other silicon controlled rectifiers in the sense that it can conduct in both the directions that is whether the applied gate signal is positive or negative, it will conduct. Thus, this device can be used for AC systems as a switch. 4. What is a triac switch?A Triac is a high-speed solid-state device that can switch and control AC power in both directions of a sinusoidal waveform. Being a solid state device, thyristors can be used to control lamps, motors, or heaters etc. 5. What is the working principle of Triac?The triac is another three-terminal ac switch that is triggered into conduction when a low-energy signal is applied to its gate terminal. Unlike the SCR, the triac conducts in either direction when turned on.
kynix On 2021-01-19   4499

Kynix

Kynix was founded in 2008, specializing in the electronic components distribution business. We adhere to honesty and ethics as our business philosophy and have gradually established an excellent reputation and credibility in our international business. With the accurate quotation, excellent credit, reasonable price, reliable quality, fast delivery, and authentic service, we have won the praise of the majority of customers.

Follow us

Join our mailing list!

Be the first to know about new products, special offers, and more.

Kynix

  • How to purchase

  • Order
  • Search & Inquiry
  • Shipping & Tracking
  • Payment Methods
  • Contact Us

  • Tel: 00852-6915 1330
  • Email: info@kynix.com
  • Follow Us

authentication

Kynix

© 2008-2026 kynix.com all rights reserve.