The Kynix Components
Stay Ahead with Expert Electronics Insights,
Industry Trends, and Innovative Tips
While the single-channel TL071 and dual-channel TL072 share an identical internal JFET-input differential front-end—delivering an input impedance of 1012 Ω, a typical slew rate of 13 V/μs[1], and a broadband input voltage noise of approximately 18 nV/Hz at 1 kHz—they are not pin-compatible and serve distinct circuit architectures.The TL071 provides dedicated external DC offset nulling pins (Pins 1 and 5) and absolute physical channel isolation, making it essential for precision DC-coupled instrumentation, modular synthesizer control voltage (CV) paths, and high-gain audio input stages. The TL072 packs two independent op-amps into the same 8-pin footprint, doubling board routing density for stereo audio preamps, active filters, and compact pedal buffers. However, it sacrifices manual offset trimming and introduces high-frequency capacitive crosstalk, common-mode power rail coupling, and die-level thermal feedback between channels.1. Quick Summary & Engineering Decision FrameworkKey Takeaway: Choosing between the TL071 and TL072 balances channel density against DC precision: the TL071 enables manual offset nulling and complete physical isolation, while the dual TL072 halves board space for AC-coupled audio paths.Need JFET High-Z Front-End? (1012 Ω, Low Bias Current)Single Stage / High-Z Direct-Coupled CV Path:Select TL071 (Single)Dedicated DC offset nullZero inter-channel bleedAbsolute physical isolationMulti-Stage / Stereo Path Space-Constrained Board:Select TL072 (Dual)2 channels per 8-pin packLower routing overheadIdeal for AC-coupled audioWhen to Select the TL071Direct-Coupled DC Circuits: Where input offset voltage (VOS) cannot be blocked by series capacitors and must be zeroed using an external trimmer potentiometer.Modular Synthesizer CV Processing: In 1V/Octave pitch-tracking circuits where a 3 mV DC offset introduces audible musical mistuning.Ultra-High-Gain Audio Front-Ends: In moving-magnet phono stages, microphone preamplifiers, or active instrumentation where running high-gain amplification alongside another channel on the same silicon die risks oscillation or inter-channel bleed.Sub-Module Thermal Isolation: Applications where output stage heat dissipation must remain isolated from sensitive high-impedance source nodes.When to Select the TL072Stereo Line-Level Preamplifiers: Where left and right line-level audio signals require identical amplification within a compact footprint.Active Multi-Pole Filters: Standard 2-pole or 4-pole Sallen-Key and state-variable topologies where cascaded operational amplifier stages share a tight circuit loop.Space-Constrained Audio Gear: Guitar effect pedals, multichannel mixing desks, and Eurorack utility buffers where PCB real estate and component count dictate layout economy.AC-Coupled Audio Paths: Circuits where DC-blocking capacitors isolate downstream stages, making external offset trimming unnecessary.Comparative Specification MatrixEngineering ParameterTL071 (Single Op-Amp)TL072 (Dual Op-Amp)Design ImplicationNumber of Channels12TL072 doubles functional board density.Package OptionsDIP-8, SOIC-8, TSSOP-8DIP-8, SOIC-8, TSSOP-8Identical standard packaging footprints.Pinout InterchangeabilityNon-compatibleIndustry-standard dual pinoutDirect cross-insertion causes circuit destruction.DC Offset TrimmingYes (Pins 1 & 5)None (Pin-starved)TL072 requires external summing for DC nulling.Quiescent Current (Iq, typ)1.4 mA total2.8 mA total (1.4 mA/ch)TL072 draws double the battery current in idle state.Slew Rate (typ, 25∘C)13 V/μs (Legacy) / 20 V/μs (H)13 V/μs (Legacy) / 20 V/μs (H)Full-power audio bandwidth identical per channel.Gain Bandwidth Product3 MHz typical3 MHz typical[2]Matching high-frequency gain profiles.Input Impedance (ZIN)1012 Ω1012 ΩMatched JFET input stages eliminate transducer loading.Broadband Noise (1 kHz)18 nV/Hz18 nV/HzIdentical input noise voltage floor per channel.Inter-Channel CrosstalkNon-existent (Discrete die)~120 dB (DC/100 Hz); degrades −6 dB/octTL072 exhibits capacitive HF bleed above 1 kHz.Exclusion ProfileHigh-density multi-stage routingDirect-coupled precision DC circuitsMatch component selection to circuit coupling mode.Note: Baseline operating conditions are VCC=±15 V and TA=25∘C unless specified.2. The "8-Pin Trap": Pinout Incompatibility and Drop-In HazardsA common mistake during repair or prototyping is treating the TL071 and TL072 as interchangeable because both share the standard 8-pin DIP or SOIC package. Plugging a TL072 into a TL071 socket (or vice versa) can cause circuit malfunction or permanently damage the semiconductor.Pinout Comparison: TL071 Single vs TL072 Dual Op-AmpSide-by-Side Pinout Collision AnalysisPin NumberTL071 Pin FunctionTL072 Pin FunctionCollision Risk when TL072 is Inserted in TL071 SocketPin 1Offset Null 1Output AHigh Risk: Output A drives current directly into the internal balance nodes of the input stage.Pin 2Inverting Input (-)Inverting Input A (-)Matched functionality (Channel A).Pin 3Non-Inverting Input (+)Non-Inverting Input A (+)Matched functionality (Channel A).Pin 4Negative Supply (VCC−)Negative Supply (VCC−)Matched power rail ground/negative reference.Pin 5Offset Null 2Non-Inverting Input B (+)High Risk: Channel B input is tied directly to the TL071 offset trimmer wiper network.Pin 6OutputInverting Input B (-)High Risk: The circuit's main output node is shorted to the high-impedance input of Channel B.Pin 7Positive Supply (VCC+)Output BSevere Risk: The active output stage of Channel B is tied directly to the positive power rail (VCC+).Pin 8No Internal Connection (NC)Positive Supply (VCC+)Severe Risk: The positive power rail is routed to an unassigned pad, leaving the IC unpowered or misbiasing pins.Failure Modes During Socket SwappingInserting a TL072 into a TL071 Socket: Pin 7 is typically connected to +15V on a TL071 board. In a TL072, Pin 7 is the low-impedance Output B. Connecting the positive supply rail directly to an active op-amp output forces high current through the internal output stage, triggering thermal breakdown. Pin 8, which provides VCC+ on the TL072, sits in a dead pad (NC), starving the dual IC of balanced positive supply current and causing unpredictable latch-up.Inserting a TL071 into a TL072 Socket: Pin 8 carries +15V on a TL072 board, but lands on the NC pin of a TL071. Pin 7 (the actual VCC+ pin of the TL071) lands on the Output B trace of the board. The TL071 receives no positive power supply, while downstream circuitry on Output B is back-fed by parasitic leakage currents.When this mismatch occurs, board Pin 7 (+15V rail) connects directly to Pin 7 of the TL072 (Output B), resulting in a high-current short that overheats the IC, while Board Pin 8 (No Connect) connects to Pin 8 of the TL072 (VCC+), causing power starvation and circuit failure.Bench Servicing and Adapter ProtocolsWhen servicing vintage audio equipment where single-channel op-amps are obsolete or physically unavailable, dual-to-single conversion requires a specialized daughterboard. These adapter PCBs cross Pin 8 (VCC+ on the dual) back to Pin 7 on the single footprint, isolate Pins 1 and 5 from the external null circuitry, and terminate the unused second channel into a stable, non-oscillating feedback loop.3. Core Electrical Architecture: Where Single and Dual Channels MatchThe TL071 and TL072 utilize the same monolithic JFET-input operational amplifier core. Per channel, their internal schematic topology is identical: a matched pair of high-voltage P-channel JFETs feeding a bipolar intermediate gain stage and a complementary Class-AB output driver.For practical layout implementation, examine UTMEL's guide on the TL071 op-amp[8] for single-channel topologies, and reference UTMEL's guide on the TL072 op-amp for dual-channel audio preamplifiers.The JFET Front-End AdvantageThe primary design reason to choose either part is input impedance. The reverse-biased P-N junctions of the input JFET gates yield an input resistance of 1012 Ω (1 TΩ) paired with an input bias current measured in picoamps: typical room-temperature values sit between 30 pA and 65 pA[3].Minimizing Source Loading: High-impedance transducers—such as electric guitar passive magnetic pickups (5 kΩ−15 kΩ series DC resistance with high inductance) or raw piezoelectric sensors (>1 MΩ)—suffer severe high-frequency attenuation ("tone suck") when terminated into standard bipolar op-amps (such as the NE5532 or LM833, whose bias currents range from 200 nA to 800 nA). The TL07x JFET gate draws negligible current, preserving source frequency response.Thermal Gate Leakage: JFET input bias current doubles roughly every 10∘C rise in silicon junction temperature. In high-temperature audio chassis, input bias current can rise from 65 pA at 25∘C to over 2 nA at 70∘C.Matched AC Signal ParametersBoth amplifiers share identical high-speed AC dynamics:Slew Rate (13 V/μs): Standard line-level professional audio (+4 dBu=1.228 VRMS, peaking around 3.5 Vpk) across the 20 kHz band requires a minimum slew rate: SRmin=2π×20,000 Hz×3.5 V≈0.44 V/μs Operating at 13 V/μs provides a comfortable margin above this threshold, eliminating slew-rate-induced distortion across the audible spectrum.Total Harmonic Distortion (THD): Maintains low distortion figures, typically between $0.003\%$ and $0.01\%$ at 1 kHz under standard audio loading (RL≥2 kΩ).Gain Bandwidth Product (GBW): A unity-gain bandwidth of 3 MHz allows for stable open-loop gain reserves across the typical audio band.Quiescent Current and Battery BudgetsBecause the TL072 contains two identical amplifier cores on a single silicon die, its supply current is twice that of the single-channel TL071:TL071 Quiescent Draw: 1.4 mA typical (2.5 mA maximum).TL072 Quiescent Draw: 2.8 mA typical (5.0 mA maximum).In portable, battery-powered equipment—such as 9V guitar effect pedals running on a standard alkaline battery (500 mAh nominal capacity to a 7.0 V cutoff):RuntimeTL071≈500 mAh1.4 mA≈357 hours RuntimeTL072≈500 mAh2.8 mA≈178 hoursSelecting a dual op-amp when only a single channel is needed halves battery life, increases baseline thermal dissipation, and adds unnecessary parasitic risk.4. DC Offset Nulling vs. Channel Density: The Real Design Trade-OffKey Takeaway: The core operational difference lies in DC precision management—the TL071 features dedicated offset null pins (Pins 1 and 5) for sub-millivolt calibration, while the pin-constrained TL072 cannot accommodate on-chip trimming.TL071 External DC Offset Trimming TopologyThe Physics of Input Offset Voltage (VOS)Due to manufacturing tolerances in ion implantation and physical gate geometry on monolithic silicon, the two JFETs in the input differential pair never match completely. This asymmetry manifests as an Input Offset Voltage (VOS), which typically measures 3 mV (with maximum values reaching 6 mV to 10 mV on standard commercial grades) and exhibits a thermal drift coefficient of approximately 18 μV/∘C.The TL071 Trimming SolutionThe TL071 routes the source/emitter connections of the input stage's active load to Pin 1 (Offset Null 1) and Pin 5 (Offset Null 2).To trim DC offset to zero:Connect a 50 kΩ to 100 kΩ non-inductive linear potentiometer between Pins 1 and 5.Connect the potentiometer wiper directly to the negative supply rail (VCC−).Ground the inputs through equivalent source resistances and adjust the wiper until the output reads 0.0 V DC.This adjustment alters the current balance through the internal load resistors, pulling output offset within microvolts of ground.Why the TL072 Cannot Support On-Chip TrimmingAn 8-pin package imposes a strict physical limit:2 Pins for Power Supplies (VCC+,VCC−)3 Pins for Channel A (IN+,IN−,OUT)3 Pins for Channel B (IN+,IN−,OUT)The package is fully allocated, leaving no pins for external offset nulling.Real-World Engineering ConsequencesAC-Coupled Audio Circuits: Offset is blocked by series capacitors, so no DC offset nulling is needed. The TL072 is ideal for board density.Direct-Coupled / CV Circuits: DC offset is amplified by stage gain, which triggers pitch drift in synth CV paths and causes "scratchy pot" DC artifacts. A TL071 with a null pot is mandatory.AC-Coupled Audio Paths (TL072 Preferred): In standard audio circuitry where capacitors isolate intermediate stages, a 3 mV−6 mV DC offset is blocked by downstream capacitors, preventing DC current from entering subsequent stages. The TL072 is the standard industry choice here because board space and channel density outweigh DC trim capabilities.Direct-Coupled CV and Instrumentation Paths (TL071 Mandatory): In synthesizer control voltage (CV) processing (e.g., 1 V/octave exponential converters), a 3 mV offset shifts pitch by: ΔCents=1200×0.003 V1.0 V=3.6 Cents Cascading multiple un-nulled stages can shift tuning out of acceptable tolerance. Furthermore, in direct-coupled audio topologies, passing DC offset currents across gain potentiometers causes audible "scratching" noises during adjustment, as well as transient "thumps" during mechanical bypass switching.5. Audio Realities: Channel Separation, Crosstalk, and Thermal InterplayKey Takeaway: Dual op-amps do not offer total channel isolation; parasitic pin capacitance, common-mode power rail impedance, and die-level thermal feedback cause TL072 channel separation to degrade above 1 kHz.Inter Miami CF vs. New York City FC | Full Match Highlights | Miami Mayhem!The "120 dB Isolation" Datasheet MythManufacturer documentation often lists a channel separation figure of 120 dB for the TL072. However, this figure applies strictly at DC and low frequencies (100 Hz to 1 kHz) under specific open-loop conditions (AVD=100,TA=25∘C). It does not reflect practical high-frequency performance in real-world circuit board layouts.Mechanisms of High-Frequency CrosstalkStray Inter-Pin Capacitance: In an 8-pin DIP or SOIC package, adjacent lead-frame fingers and internal bond wires run parallel over millimetric distances, introducing roughly 1 pF of parasitic stray capacitance between adjacent pins. Pin 1 (Output A) sits directly adjacent to Pin 2 (Inverting Input A), while Pin 7 (Output B) runs adjacent to Pin 6 (Inverting Input B). In high-impedance circuits, capacitive coupling rolls off channel separation at a rate of −6 dB/octave above 1 kHz. In audio circuits with high source impedances (>50 kΩ) operating at 10 kHz−20 kHz, real-world channel isolation can drop below 70 dB[5].Shared Power Rail Impedance: Both amplifier stages inside the TL072 share single bond wires to Pin 8 (VCC+) and Pin 4 (VCC−). When Channel A drives a heavy, low-impedance load (e.g., 600 Ω headphones or long cable runs), its dynamic current demands create small voltage drops across the parasitic inductance and resistance of those bond wires. This modulates the supply rails of Channel B, introducing signal bleeding between channels unless decoupling is carefully managed.Die-Level Thermal Gradients: When Channel A outputs significant power, its output transistors warm the silicon substrate locally. The resulting heat waves travel across the die, creating microscopic temperature gradients across the differential input transistors of Channel B. This thermal feedback induces low-frequency distortion and DC baseline shifts in the adjacent channel.Layout Rules to Mitigate CrosstalkMandate Separate TL071 Packages: For mastering-grade stereo channels, high-gain moving-magnet phono preamplifiers (>40 dB gain), and multi-channel microphone preamps, physical separation using discrete TL071s eliminates silicon thermal feedback and intra-package capacitive coupling.Use TL072 for Series Processing: The TL072 works well when both internal amplifiers handle the same signal in series (e.g., Stage 1 provides gain, Stage 2 buffers or filters). Any leakage between the two stages remains in-phase and coherent with the main signal path.PCB Decoupling Protocol: Place a 100 nF high-frequency ceramic capacitor within 3 mm−5 mm of Pins 4 and 8, running directly to a solid, low-impedance ground plane. Supplement this with a 10 μF electrolytic or tantalum capacitor nearby to suppress low-frequency rail modulation.6. Circuit Protection & Servicing Pitfalls: Unused Termination and Phase ReversalOp-Amp Protection: Termination and Anti-Phase Reversal MeasuresThe Unused Channel Hazard in the TL072When an engineer uses only one half of a TL072, leaving the unused amplifier pins floating or disconnected is a critical error.What Happens When Pins Float: The ultra-high input impedance (1012 Ω) picks up stray electrostatic charge, driving the inputs toward opposite power supply rails. The amplifier's high open-loop gain pushes the output into hard saturation against either VCC+ or VCC−. In this saturated state, the op-amp draws maximum internal supply current[7], overheats the package, reduces available power rail headroom, and injects high-frequency parasitic noise into the active operational amplifier stage.Why Grounding Both Inputs Fails: Grounding both IN+ and $IN-$ directly to 0 V does not solve the problem. The input offset voltage (VOS) acts as a permanent differential DC error. Amplified by open-loop gain (AVOL≈100 dB), this offset drives the output into hard rail saturation.Recommended Unused Channel TerminationDual-Supply Systems (±15V):Connect the unused output directly to its inverting input ($IN-$), configuring the stage as a unity-gain voltage follower.Connect the non-inverting input (IN+) directly to the system ground plane (0 V).Result: The amplifier output remains stably biased at 0.0 V DC[6], operating within its linear common-mode range with minimal quiescent current draw.Single-Supply Systems (+9V or +12V):Connect the output directly to the inverting input ($IN-$).Connect the non-inverting input (IN+) to a stable mid-rail reference voltage (virtual ground, VCC/2), generated via a resistor divider and decoupling capacitor.Never tie inputs to the supply rails or leave them floating.The JFET Phase Reversal TrapA characteristic failure mode of legacy JFET operational amplifiers is input phase reversal (output inversion):Silicon Physics: The common-mode input voltage range (VICR) of the legacy TL07x series extends from (VCC−+4 V) up to VCC+. If an input voltage swings too close to the negative supply rail (within roughly 3 V to 4 V of VCC−), the internal P-channel JFET gate-drain P-N junction loses its reverse bias and becomes forward-biased[4].Circuit Consequence: Forward-biasing this junction flips the internal differential balance. The op-amp output suddenly swings away from the negative rail and latches hard against the positive rail (VCC+). In high-gain audio power amplifiers, this sudden positive latch-up can damage speaker voice coils or saturate downstream transformer cores.Bench Protection: Install a current-limiting resistor (10 kΩ) in series with the non-inverting input, paired with external low-leakage Schottky clamping diodes to prevent input voltages from falling within 4 V of the negative supply rail.7. Component Sourcing & Evolution: Legacy TL07x vs. Modern TL07xH RevisionsWhen sourcing replacements for repair work or initiating a new hardware layout, engineers should be aware that modern production components differ from legacy 1980s-era parts.Parameter / FeatureLegacy TL07x (1970s - 2010s)Modern TL07xH SeriesMaximum Supply Voltage30V−36V total (±15V to ±18V)40V total (±20V)Typical Slew Rate13 V/μs typical20 V/μs typicalTypical Input Offset (VOS)3 mV typ (up to 10 mV)1 mV typ (laser trimmed)Phase Reversal SusceptibilityProne to JFET Phase ReversalIntegrated Phase Reversal ImmunitySemiconductor ProcessStandard bipolar-JFET processModernized high-voltage CMOS/JFETTexas Instruments introduced the modernized TL071H and TL072H families, fabricated on upgraded high-voltage semiconductor processes:Expanded Supply Voltage: Total supply voltage headroom increases from the legacy 30V−36V limit (±15V or ±18V) to a full 40V absolute maximum rating (±20V split supply).Upgraded Slew Rate: Typical slew rate is boosted from 13 V/μs to 20 V/μs, expanding the large-signal bandwidth margin.Lower DC Input Offset: Modern laser trimming reduces typical room-temperature input offset voltage from 3 mV down to 1 mV.Built-in Phase Reversal Protection: The "H" series features integrated internal clamp circuitry that prevents output phase inversion even if input signals drop below the negative common-mode threshold.Servicing Vintage Gear: Drop-In ViabilityModern "H" variants (TL071H, TL072H) use the standard pinouts and act as functional replacements for vintage audio consoles, effect pedals, and synthesizers. They maintain the JFET input impedance (>1012 Ω) while improving slew margin, offset drift, and latch-up resistance.Counterfeit Warning: Sourcing components from unverified open-market vendors carries risk. Counterfeiters frequently re-mark general-purpose bipolar op-amps (such as the LM358 or LM741) as TL071 or TL072 parts. Installing a re-marked bipolar chip in a high-impedance guitar circuit creates immediate source loading, bandwidth loss, and high input bias current drift. Always verify input pin resistance with a bench multimeter: a genuine JFET input measures as an open circuit (several gigohms) to ground, whereas a bipolar input displays readable P-N junction diode drops.8. Frequently Asked Questions (FAQ)Can I replace a TL071 with an NE5534 or LM741 in an existing circuit?Not without careful circuit evaluation. The LM741 is obsolete for audio: it has a slow slew rate (0.5 V/μs), a narrow bandwidth (1 MHz), high input noise, and bipolar inputs that load high-impedance sources.The NE5534 is an audio-grade operational amplifier with low voltage noise (3.5 nV/Hz), but it relies on a bipolar input stage that draws significant input bias current (500 nA typical vs. 65 pA for the TL071). If inserted into a high-impedance circuit (e.g., a guitar tone stack), this high bias current creates large DC offset errors across passive resistors. Additionally, the NE5534 is only stable for gains ≥3; running it as a unity-gain buffer requires an external 22 pF compensation capacitor across Pins 5 and 8 to prevent high-frequency oscillation.Can I swap a TL072 with an RC4558 or NE5532 in guitar pedals?Direct substitution works without pin modification because all three share the standard dual op-amp pinout. However, the circuit's tone will often change noticeably.The RC4558 and NE5532 use bipolar inputs. In circuits where the op-amp directly buffers passive guitar pickups without an intermediate transistor stage, the lower input impedance (300 kΩ for the 4558 vs. 1012 Ω for the TL072) loads the guitar pickup, attenuating high-frequency detail. Conversely, in low-impedance line-level stages, an NE5532 can deliver a lower broadband noise floor than a TL072 because its voltage noise is lower (5 nV/Hz vs. 18 nV/Hz).How much faster does a TL072 drain a 9V battery compared to a TL071?Under identical quiescent operating conditions, the TL072 draws approximately double the current of a TL071 (2.8 mA vs. 1.4 mA).On a standard 500 mAh 9V alkaline battery, a single-channel TL071 can run continuously for approximately 350 hours, whereas a dual-channel TL072 depletes the same battery in roughly 175 hours. For battery-powered field gear or pedalboards, avoid using dual op-amps with an unused channel when a single-channel op-amp satisfies the circuit requirements.Does the single-channel TL071 sound cleaner than the TL072?In an isolated, single-ended signal path, there is no audible difference. The internal silicon topology, slew rate (13 V/μs), total harmonic distortion ($0.003\%$), and noise spectral density (18 nV/Hz) are matched per channel across both parts.The TL071 only performs "cleaner" in circuits where a dual TL072 suffers from layout-induced degradation—such as high-frequency capacitive crosstalk, dynamic power rail modulation, or thermal coupling from a heavily loaded second channel.Can I use just one half of a TL072 and leave the other half disconnected?No. Leaving an unused op-amp stage floating allows high-impedance inputs to pick up electrostatic noise, driving the output into hard saturation against the power supply rails. This increases power consumption, generates package heat, and couples parasitic oscillation into the active channel. Unused channels should always be terminated as a unity-gain voltage follower with the non-inverting input tied to a mid-rail or ground reference.9. Engineering Pre-Flight & Bench Verification ChecklistBefore releasing a PCB to fabrication or closing an audio chassis after servicing, review the following design criteria:[ ] Pinout Verification: Confirmed that the schematic pin assignments match the physical IC package (TL071 single vs. TL072 dual; Pins 1 & 5 confirmed for offset null vs. dual I/O).[ ] DC Trimming Verification: If DC precision or direct coupling is required, confirmed whether a TL071 with a 50 kΩ−100 kΩ balance trimmer to VCC− is implemented, or if AC-coupling capacitors are placed to block TL072 offset drift.[ ] Unused Channel Termination: Ensured every unused amplifier stage in dual TL072 packages is configured as a unity-gain follower with the non-inverting input tied to a mid-rail/ground reference.[ ] Common-Mode Boundary Review: Confirmed that input signal swings never drop within 4V of the negative supply rail (VCC−) to prevent JFET phase reversal latch-up (or verified use of TL07xH series).[ ] Supply Rail Decoupling: Placed 100 nF surface-mount or ceramic disc bypass capacitors within 5 mm of Pins 4 (VCC−) and 7/8 (VCC+) directly to a low-impedance ground plane.[ ] Crosstalk & Isolation Audit: Verified that high-gain preamplification stages (e.g., >40 dB) utilize separate TL071 single packages or implement strict ground-shield routing between TL072 sections.Sources and references used for this guideTL071 data sheet, product information and support | TI.comSource type: official company documentationUsed for: Primary electrical specifications, single-channel pinout, offset nulling circuit, and modern TL071H updates.Caution: Manufacturer source; reflects specified factory test conditions (TA=25°C, VCC=±15V).TL072 data sheet, product information and support | TI.comSource type: official company documentationUsed for: Dual-channel electrical characteristics, dual pinout configurations, package options, and modern TL072H specifications.Caution: Manufacturer source; test conditions must be cited when referencing maximum ratings.Low noise JFET single operational amplifier - STMicroelectronicsSource type: official company documentationUsed for: Independent manufacturer verification of core JFET electrical characteristics (slew rate, GBW, input impedance).Caution: Multi-vendor standard device; slight parametric variances exist between manufacturers.Op Amps for Everyone Design Guide (Rev. B) - MITSource type: research sourceUsed for: Circuit stability analysis, decoupling guidelines, feedback loop stability, and JFET input phase-reversal theory.Caution: Academic/engineering textbook; provides theoretical design rules rather than specific product catalogs.Op amps in small-signal audio design - Part 1 - EE TimesSource type: reputable professional sourceUsed for: Audio engineering trade-offs between single and dual op-amps, inter-channel crosstalk, and distortion properties in audio mixing.Caution: Authored by Douglas Self; focuses specifically on small-signal audio applications.Properly terminating an unused op amp - EDNSource type: reputable professional sourceUsed for: Engineering guidelines and schematic topologies for terminating unused dual op-amp stages to prevent oscillation.Caution: Trade publication article; schematic implementation must account for single-supply vs dual-supply configurations.Avoiding Noise and Power Problems with Unused Op Amps - Analog DevicesSource type: official company documentationUsed for: Detailed electrical failure analysis of floating inputs, saturation rail currents, and parasitic oscillation in multi-channel op-amps.Caution: Competitor manufacturer application note; principles apply universally across analog operational amplifiers.TL071: Detailed Datasheet, Pinout, and Alternatives Guide - UTMELSource type: vendor articleUsed for: Practical component pin identification, breadboard setup, and application overview for single JFET op-amps.Caution: Commercial distributor article; use for basic pinout and application context, not primary parametric verification.
Kynix On 2026-10-16
Executive Summary and Rapid Migration Decision FrameworkThe NXP TJA1051 matches the standard SOIC-8 mechanical footprint of the Microchip MCP2551, but it is not an electrical drop-in replacement. Substituting a TJA1051 directly onto an unrevised MCP2551 printed circuit board (PCB) layout creates severe hardware risks, including logic-level overvoltage on modern microcontrollers, unintended power rail shorts through termination networks, and unexpected battery drain in low-power applications.Both components serve as physical layer transceivers converting digital Controller Area Network (CAN) transmit (TXD) and receive (RXD) logic signals into differential voltages across the physical bus lines (CANH and CANL). However, they represent two different technological generations. The MCP2551 is a legacy 5V Classical CAN transceiver, while the TJA1051 is a third-generation, automotive-qualified physical layer device designed for CAN Flexible Data-Rate (CAN FD) networks up to 5 Mbps.Before swapping components during an obsolescence redesign or supply-chain rework, use this rapid decision framework:Verification ParameterMicrochip MCP2551 LayoutNXP TJA1051 RequirementMigration Impact / Action RequiredPhysical FootprintSOIC-8 (150 mil body)SOIC-8 (or leadless DFN3030-8)Mechanically compatible on 8-pin SOIC pads.Main Supply Voltage (VCC)5.0V (4.5V to 5.5V)5.0V (4.5V to 5.5V)Compatible; both require an external 5V supply rail.Pin 5 FunctionalityVREF Output (0.5VDD)VIO Input (/3), NC (Base), or EN (/E)Incompatible: Output bias vs. power input. Must isolate trace.Pin 8 FunctionalityRS (Analog Slope / Standby)S (Digital Silent Mode Input)Incompatible: Resistor to GND vs. digital CMOS control pin.Microcontroller I/O (3.3V)Requires level translationNative on TJA1051T/3 via VIO pinStandard TJA1051T outputs 5V CMOS; risks damaging 3.3V GPIOs.Maximum Data Rate1 Mbps (Classical CAN)Up to 5 Mbps (ISO 11898-2:2016 CAN FD)TJA1051 supports CAN FD timing and symmetry rules.When a Direct Swap Causes Hardware FailureSplit-Termination Short Circuits: If an existing PCB connects Pin 5 of the MCP2551 to the center tap of split-termination resistors (60Ω+60Ω), dropping in a TJA1051T/3 connects the microcontroller's 3.3V logic supply directly to the dynamic common-mode bus voltage, injecting bus transients into the MCU supply.Battery Drain in Low-Power Modes: If firmware drives Pin 8 HIGH expecting an ultra-low-power sleep state (<10μA on MCP2551), the TJA1051 merely disables its differential transmitter while keeping the internal receiver and bus biasing circuitry active, consuming 2.5 mA to 5.0 mA continuously.Overvoltage Destruction of 3.3V Inputs: Procuring the base TJA1051T (lacking the /3 suffix) leaves Pin 5 internally unconnected and swings RXD to the 5V rail, exceeding the maximum ratings of non-5V-tolerant microcontroller inputs.Silicon Architecture and Parametric Comparison MatrixThe Microchip MCP2551 was engineered for Classical CAN networks governed by ISO 11898-2. For detailed legacy configurations, refer to the Microchip MCP2551 circuit, pinout, and datasheet[5]. In contrast, the NXP TJA1051 incorporates Silicon-on-Insulator (SOI) process technology to satisfy ISO 11898-2:2016 and SAE J2284-1 through J2284-5 automotive requirements[3]. For modern high-speed alternatives and packaging options, consult the NXP TJA1051 features, equivalents, and datasheet[6], as well as broader guides on modern CAN transceiver selection[7].The following matrix compares primary electrical limits, timing parameters, and operational ratings:Electrical Parameter / FeatureMicrochip MCP2551NXP TJA1051Design Impact and Circuit SignificanceCAN Standard ConformanceISO 11898-2 (Classical CAN)ISO 11898-2:2016 / SAE J2284TJA1051 guarantees loop delay symmetry for CAN FD fast phase.Maximum Rated Bit Rate1 Mbps5 Mbps (CAN FD)MCP2551 loop delays prevent operation above 1 Mbps.Supply Voltage Range (VCC)4.5V to 5.5V4.5V to 5.5VBoth transceivers need dedicated 5V power for bus differential drive.Digital Logic Supply (VIO)None (Fixed 5V CMOS)2.8V to 5.5V (/3 variant)TJA1051T/3 interfaces directly with 3.3V or 5V logic families.Pin 5 Terminal DefinitionVREF Output (0.5VDD)VIO / NC / ENOutput voltage reference vs. digital supply input vs. no-connect.Pin 8 Terminal DefinitionRS (Analog Slope / Standby)S (Silent Mode Input)Analog current sink mode select vs. high-impedance CMOS input.Continuous Bus Fault Tolerance−42V to +42V[2]−58V to +58V[1]TJA1051 provides wider safety margin for 24V industrial/truck networks.TXD Dominant Timeout (tto(dom))Minimum 1.25 ms0.8 ms to 5.0 msBoth isolate a locked-LOW MCU; TJA1051 defines tighter timing bounds.Unpowered Bus PassivityRisk of parasitic conductionFully passive (IL<5μA)TJA1051 eliminates parasitic reverse-powering via bus lines.Junction Thermal ShutdownTypically +160∘CTypically +190∘CTJA1051 tolerates higher junction stress during continuous bus faults.Standby Current Consumption<10μA (VRS>0.75VDD)2.5--5.0 mA (Silent Mode)TJA1051 lacks microamp sleep state on Pin 8.Architectural Evolution: Slope Control vs. Silicon MatchingThe legacy MCP2551 relied on external analog slope control via Pin 8 (RS). Connecting a resistor between Pin 8 and ground throttled output transistor rise and fall times, reducing high-frequency radio frequency (RF) emissions at the cost of higher loop propagation delays.Modern physical layers like the TJA1051 eliminate external slope control. Instead, precision internal matched output drivers maintain symmetry between VCANH and VCANL during transitions. This active symmetry minimizes common-mode electromagnetic emissions (EME) across both Classical CAN and high-frequency CAN FD transmissions, making external slope-tuning resistors obsolete.Трансиверы CAN шины TJA1050, MCP2551 как альтернатива RS485The Critical Pinout Traps: Detailed Analysis of Pin 5 and Pin 8The primary barrier preventing direct drop-in replacement lies in the hardware definitions of Pin 5 and Pin 8.Pinout Comparison: MCP2551 vs TJA1051T/3Subsection 3.1: The Pin 5 Conflict (VREF Output vs. VIO Supply Input)On the Microchip MCP2551, Pin 5 is an analog voltage reference output (VREF). It supplies a nominal output voltage of 0.5VDD (2.5V when VDD=5.0V) with a drive capability of ±50μA. Designers historically routed Pin 5 to the midpoint of split termination networks:Rtermination=120Ω⟹Rsplit1=60Ω,Rsplit2=60ΩA split capacitor (CSPLIT≈4.7nF to 100nF) was connected between this center tap and Pin 5 to establish a low-impedance AC path for common-mode disturbances while maintaining stable DC recessive bias.On the NXP TJA1051, Pin 5 functionality depends entirely on the product ordering suffix:TJA1051T (Base): Pin 5 is Not Connected (NC) internally.TJA1051T/3: Pin 5 is the VIO logic supply input, accepting 2.8V to 5.5V to bias internal input/output stages.TJA1051T/E: Pin 5 is an active-HIGH Enable (EN) input, allowing the transceiver to enter a lower-power standby state.The Split-Termination Short Circuit HazardIf a PCB designer solders a TJA1051T/3 onto an unmodified MCP2551 layout where Pin 5 was routed to split termination:Pin 5 ceases to output 2.5V and becomes a power supply sink for the transceiver's logic interface.The microcontroller's 3.3V logic supply rail becomes coupled to the differential CAN bus midpoint through the split-termination resistors.Every dominant-to-recessive transition on the CAN bus injects current spikes directly into the microcontroller's logic supply rail, causing microcontroller brownout resets and distorted CAN bus differential voltages.Subsection 3.2: The Pin 8 Conflict (Analog Slope Control vs. Digital Silent Mode)Pin 8 controls operating modes on both transceivers, but their internal electrical architectures are completely incompatible:MCP2551 Pin 8 (RS Operating Mechanics)The MCP2551 measures the analog current sunk from Pin 8:High-Speed Mode: Pin 8 connected directly to ground (0V). Slew rates are unconstrained, supporting data rates up to 1 Mbps.Slope-Control Mode: Pin 8 grounded through an external resistor (10kΩ to 100kΩ). Slew rates are proportional to the current extracted from Pin 8, attenuating EMI harmonics.Standby Mode: Pin 8 pulled HIGH (VRS≥0.75VDD). The transmitter, receiver, and internal biasing circuits shut down completely, dropping device current consumption to <10μA.TJA1051 Pin 8 (S Operating Mechanics)The TJA1051 treats Pin 8 (S) as a standard high-impedance CMOS digital logic input:Normal Mode: Pin 8 driven to logic LOW (GND). Transmitter and receiver are fully operational.Silent Mode (Listen-Only): Pin 8 driven to logic HIGH (VIO or VCC). The differential transmitter stage is disabled, but the receiver remains active and internal bus bias circuits remain powered. Quiescent current remains between 2.5 mA and 5.0 mA.The Standby and Quiescent Current TrapIf a designer expects the TJA1051 to replace an MCP2551 in a low-power, battery-powered tracking or automotive sleep node:Driving Pin 8 HIGH on the TJA1051 does not place the chip into deep sleep. The node continues to draw several milliamperes, draining backup batteries.If a legacy slope resistor (e.g., 24kΩ) is left in place on Pin 8, it acts as a passive pull-down to ground. As noted in Microchip's application brief on transceiver migration[4], this keeps the transceiver in Normal Mode, but provides zero edge-rate shaping.Microcontroller Interfacing: 3.3V vs. 5.0V Logic Design RulesModern embedded controllers (STM32, ESP32, NXP S32K, RP2040) run primarily on 3.3V supplies. Interfacing these processors to CAN transceivers requires attention to logic switching thresholds and overvoltage boundaries.Microcontroller Logic Interfacing: MCP2551 vs TJA1051T/3The 5V Logic Barrier on Legacy MCP2551The MCP2551 requires a 5V nominal power supply (VDD=4.5V to 5.5V). Its digital outputs are referenced directly to VDD:The minimum high-level output voltage on RXD is VOH(min)=0.7VDD (3.5V at minimum supply, and typically 4.8V under light load).Connecting RXD directly to a non-5V-tolerant 3.3V MCU GPIO breaches the silicon's absolute maximum ratings, triggering internal electrostatic discharge (ESD) clamp diodes, causing current injection, and risking latch-up failure.Interfacing the MCP2551 to a 3.3V MCU requires external level translation, such as a resistive divider (1.8kΩ/3.3kΩ) on RXD or a bidirectional level-shifting MOSFET.Native 3.3V Coupling via TJA1051T/3The TJA1051T/3 resolves this issue with its dedicated VIO input on Pin 5:Connect Pin 5 to the MCU's 3.3V system rail.The input thresholds for TXD and S scale proportionally with VIO.The push-pull output driver on RXD swings cleanly between 0V and VIO (3.3V logic levels), eliminating all discrete level shifters, clamping diodes, and series resistors.The Suffix Sourcing TrapProcurement substitutions during component shortages introduce a common production failure:Sourcing teams often order the base part number (TJA1051T) instead of the dual-voltage sub-variant (TJA1051T/3).In the base TJA1051T, Pin 5 is an unbonded internal node (NC). The digital I/O circuitry references VCC (5V).Mounting a TJA1051T on a 3.3V board causes RXD to output full 5V logic signals into the 3.3V microcontroller.Always verify component part numbers prior to assembly:TJA1051T: SOIC-8, standard 5V logic interface only (Pin 5 = NC).TJA1051T/3: SOIC-8, dual-voltage logic interface (Pin 5 = VIO, supports 3.3V systems).TJA1051TK/3: HVSON8 (DFN3030-8), dual-voltage logic interface (Pin 5 = VIO).TJA1051T/E: SOIC-8, enable-mode variant (Pin 5 = EN, 5V logic only).Bus Biasing, Split Termination, and EMC MitigationPhysical transmission line matching changes significantly when transitioning from older Classical CAN networks to modern high-speed or CAN FD topologies.Evolution of Common-Mode StabilizationLegacy Approach (MCP2551): Because older silicon topologies had looser propagation delay and transition matching between complementary output drivers, transceivers actively clamped the split-termination center tap to VREF (2.5V) to control common-mode voltage fluctuations during state changes.Modern Approach (TJA1051): NXP integrated high-precision driver symmetry circuits into the TJA1051 output stages. Internal active matching maintains recessive and dominant common-mode bus levels within narrow tolerances without requiring external reference voltage injection.Split-Termination Conversion RulesWhen redesigning or reworking an MCP2551 layout for the TJA1051:Sever the trace between Pin 5 and the center tap of the 60Ω+60Ω termination resistors.Terminate the center tap to system ground through an AC capacitor (CSPLIT=4.7nF to 10nF, rated for at least 50V).Never connect Pin 5 of any TJA1051 variant to the termination resistor network.Common-Mode Chokes (CMC) in High-Speed NetworksWhile the TJA1051 features low electromagnetic emissions that allow standard 500 kbps Classical CAN networks to run without common-mode chokes, higher-speed CAN FD systems (≥2 Mbps) operating in harsh automotive or industrial EMC environments benefit from a dedicated common-mode choke (typically 51μH or 100μH):Position the choke directly adjacent to the bus connector, outside the transceiver loop.Place ESD protection diodes between the common-mode choke and the physical bus connector (never between the choke and the transceiver).Maintain symmetrical differential pair trace geometry with matched trace lengths (ΔL<0.5 mm) to avoid converting differential signals into common-mode noise.Technical Nuance: Raw Point-to-Point UART PHY BridgeIn resource-constrained industrial telemetry, engineers sometimes use standalone CAN transceivers without an external protocol controller (such as the MCP2515) to create differential, noise-immune point-to-point serial links:Microcontroller UART_TX connects directly to transceiver TXD.Differential lines (CANH and CANL) run across twisted-pair wiring.Transceiver RXD connects to the receiving microcontroller UART_RX.While functional for proprietary, point-to-point links across long factory runs, this configuration bypasses all higher-level CAN mechanisms: bitwise arbitration, multi-master collision avoidance, automatic cyclic redundancy check (CRC) validation, and hardware-managed frame retransmission. It cannot interoperate with standard automotive on-board diagnostics (OBD-II) or standard CAN monitoring equipment.Advanced Fail-Safe Features: Unpowered Behavior and Babbling-Node ProtectionUpgrading physical layer silicon improves whole-network reliability when individual nodes fail or lose power.Unpowered Node Bus Disengagement (Passive Behavior)In industrial multi-drop buses and automotive networks, individual electronic control units (ECUs) often shut down while other bus nodes communicate:The MCP2551 Vulnerability: When VCC drops to 0V, legacy transceivers can exhibit parasitic reverse-conduction. Internal ESD protection networks and driver body diodes can become forward-biased by dynamic signals on CANH and CANL. This clamps the differential bus lines, loads the active nodes, and distorts signal integrity across the network.The TJA1051 Solution: The TJA1051 provides fail-safe, high-impedance off-state behavior. When VCC=0V (or VIO=0V), reverse leakage current into the transceiver pins remains negligible (IL<5μA across CANH and CANL). The unpowered node remains completely invisible to active network traffic.TXD Dominant Timeout Protection (tto(dom))A critical failure mode in distributed CAN networks is the "babbling idiot" node—a microcontroller that crashes, locks up, or suffers a trace short-circuit while holding TXD LOW (dominant state).Because CAN utilizes dominant-recessive bus arbitration, a permanent dominant level asserted by a single faulty node forces CANH HIGH and CANL LOW indefinitely, resulting in a total denial-of-service across the entire network.The TJA1051 integrates a hardware timer that monitors the TXD input line. If TXD remains asserted LOW longer than the internal timeout window (tto(dom)=0.8 ms to 5.0 ms), the internal driver disengages and releases the bus back to the recessive state.The transmitter remains disabled until the faulty microcontroller releases TXD back to a logic HIGH state, restoring normal bus arbitration for all other functioning nodes.Addressing Misleading Advice: Why Search Aggregators and AI Summaries MisleadLow-quality technical aggregators and ungrounded AI summaries frequently misstate CAN transceiver interoperability. Hardware teams migrating to new silicon should avoid these common errors:Myth 1: "The TJA1051 is a 100% pin-compatible drop-in replacement for the MCP2551."The Reality: The components share a mechanical package footprint (SOIC-8), but their pinout functions differ on Pin 5 and Pin 8. Soldering a TJA1051 onto an unmodified MCP2551 PCB connects logic supplies or no-connect pins to legacy termination networks, introducing noise and potential bus failure.Myth 2: "All TJA1051 transceivers support 3.3V microcontrollers natively."The Reality: Only sub-variants with the /3 suffix (TJA1051T/3 or TJA1051TK/3) feature the level-shifting VIO supply pin. The standard TJA1051T is a 5V-only device that drives 5V CMOS logic out of RXD, risking damage to 3.3V microcontroller pins.Myth 3: "Driving Pin 8 HIGH on the TJA1051 puts the transceiver into low-power sleep mode."The Reality: Driving Pin 8 HIGH on an MCP2551 engages an ultra-low-power Standby state (<10μA). On a TJA1051, Pin 8 is a digital Silent mode control that disables only the transmit driver; the receiver and bias networks remain fully powered, drawing 2.5--5.0 mA. For true microamp standby states with CAN bus wake-up capability, designers must select an alternate transceiver such as the NXP TJA1042 or Microchip MCP2561/62.Step-by-Step Hardware Migration and PCB Rework ChecklistFollow this systematic verification and rework sequence when replacing an MCP2551 with a TJA1051 on an existing printed circuit assembly:PCB Hardware Migration WorkflowPhase 1: BOM and Part Sourcing VerificationVerify the target microcontroller I/O voltage. If the MCU operates at 3.3V, confirm the BOM specifies TJA1051T/3 (or leadless TJA1051TK/3). Do not purchase the standard TJA1051T for 3.3V systems.If the system requires a true microamp standby state, discontinue the TJA1051 migration and switch to the pinout-compatible NXP TJA1042 or Microchip MCP2561.Phase 2: PCB Trace Rework (Pin 5)Locate Pin 5 on the PCB layout. If the trace connects to the center tap of a split-termination resistor pair, sever this copper trace using a precision milling tool or hobby knife.For 3.3V systems (TJA1051T/3): Solder a jumper wire from Pin 5 directly to the nearest local 3.3V regulated supply rail.Install a local 100nF X7R ceramic bypass capacitor directly between Pin 5 (VIO) and Pin 2 (GND).For 5V systems (TJA1051T base variant): Ensure Pin 5 remains floating on an isolated pad with no active copper traces.Phase 3: Control Circuit Configuration (Pin 8)De-solder and remove any legacy analog slope-control resistor (RS) connected between Pin 8 and ground.If firmware does not require Listen-Only capability, tie Pin 8 directly to Pin 2 (GND) to lock the transceiver permanently in Normal Mode.If firmware uses Listen-Only mode, verify that Pin 8 connects to an MCU digital GPIO that drives LOW (0V) for normal operation and HIGH (VIO) for silent mode. Confirm that no pull-up resistor holds this line HIGH during MCU startup.Phase 4: Power Supply DecouplingVerify that a low-ESR 100nF ceramic capacitor sits within 3 mm of Pin 3 (VCC) and Pin 2 (GND).Check that the 5.0V power rail maintains adequate ripple rejection under load steps up to 70 mA during dominant bus driving.Phase 5: Oscilloscope Pre-Flight and Functional ValidationUnpowered Resistance Check: Measure resistance from Pin 5 to ground with the board unpowered. Confirm there is no dead short to GND.Idle Bus Voltage Measurement: Power the board with no active CAN transmission. Measure the DC voltage on CANH and CANL referenced to ground. Both lines must sit between 2.0V and 3.0V (nominal 2.5V recessive state), with Vdiff=VCANH−VCANL≈0V.Dominant Drive Level Verification: Trigger transmission of a standard message frame. Confirm differential voltages meet the specification:VCANH≥2.75V (typically 3.5V)VCANL≤2.25V (typically 1.5V)Differential voltage Vdiff≥1.5V (typically 2.0V)Logic Level Swing Verification: Probe Pin 4 (RXD) during frame reception. Ensure logic pulses swing cleanly between 0V and 3.3V on 3.3V microcontroller nodes.Frequently Asked QuestionsCan an MCP2551 node and a TJA1051 node operate on the same physical CAN bus?Yes. Both devices comply with the physical layer differential signaling requirements of ISO 11898-2. In recessive states, both maintain bus lines near 2.5V; in dominant states, both drive CANH to approximately 3.5V and CANL to approximately 1.5V. They interoperate without issue provided the overall network operates within Classical CAN data rates (≤1 Mbps).What is the direct replacement for the MCP2551 if my application requires an ultra-low-power standby mode?The NXP TJA1042 or Microchip MCP2561/62 should be used instead of the TJA1051. The TJA1042 and MCP2561 feature dedicated Standby pins on Pin 8 that reduce device current consumption to <5μA while keeping an internal low-power receiver active to wake up the system upon detecting remote CAN bus traffic.What is the difference between the older TJA1050 and the modern TJA1051?The TJA1050 is NXP's legacy second-generation CAN transceiver. Like the MCP2551, the TJA1050 is limited to 5V logic interfaces, lacks support for CAN FD timing, and produces higher electromagnetic emissions. The TJA1051 is a third-generation device supporting CAN FD data rates up to 5 Mbps, offering integrated 3.3V MCU compatibility via the VIO pin, lower electromagnetic emissions, and unpowered passive bus behavior.Does replacing an MCP2551 with a TJA1051 automatically enable CAN FD capabilities?No. While the TJA1051 provides the necessary physical layer timing symmetry and low propagation delay required for CAN FD (up to 5 Mbps), upgrading the physical layer is only one part of the system requirements. The CAN controller (whether integrated into the MCU or via a discrete SPI controller like the Microchip MCP2518FD) must support the CAN FD protocol framing, flexible payload sizes (up to 64 bytes), and dual-bit-rate clock switching in firmware.Sources and references used for this guideNXP TJA1051 High-Speed CAN Transceiver DatasheetSource type: official company documentationUsed for: Authoritative electrical ratings, ISO 11898-2:2016 specifications, Pin 5 VIO input characteristics, and Pin 8 Silent mode mechanics.Caution: Vendor primary datasheet; applies strictly to NXP silicon and specific ordering suffixes.Microchip MCP2551 High-Speed CAN Transceiver DatasheetSource type: official company documentationUsed for: Authoritative ratings for legacy MCP2551, including 1 Mbps bandwidth ceiling, Pin 5 VREF output specifications, and Pin 8 Rs slope/standby resistor calculations.Caution: Vendor primary datasheet for legacy component; does not cover modern CAN FD operation.NXP TJA1051 High-Speed CAN Transceiver Product OverviewSource type: official product pageUsed for: Verification of AEC-Q100 automotive qualification, ISO 11898-2:2016 conformance, and package options.Caution: Vendor product page; contains high-level marketing summaries alongside technical specifications.MCP2551 to MCP2561 Migration Application Note (TB3101)Source type: official company documentationUsed for: Microchip design recommendations for migrating from MCP2551 slope control to modern digital control pins.Caution: Hosted on distributor portal; focuses on MCP2551-to-MCP2561 migration principles, which parallel TJA1051 hardware checks.MCP2551 Transceiver Circuits, Pinout, and DatasheetSource type: background sourceUsed for: Contextual background on standard MCP2551 transceiver circuits, basic interfacing, and internal link integration.Caution: Commercial component portal; used for contextual reference and internal linking rather than primary silicon verification.TJA1051 CAN Transceiver Features, Equivalent, and DatasheetSource type: background sourceUsed for: Contextual background on TJA1051 features, common equivalents, and internal link integration.Caution: Commercial component portal; used for contextual reference and internal linking rather than primary silicon verification.CAN Transceiver Selection: CAN 2.0, CAN-FD & SICSource type: reputable professional sourceUsed for: Practical PCB layout guidelines, termination network analysis, and differential routing constraints for CAN FD transitions.Caution: Independent engineering blog; does not replace manufacturer silicon application notes.
Kynix On 2026-10-15
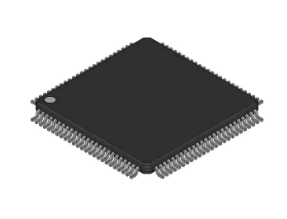
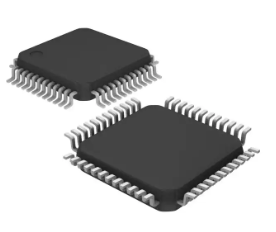
STM32F103C8T6 remains a familiar choice for control boards, instruments, industrial interfaces and embedded products built around a 48-pin Arm Cortex-M3 MCU. When the original device is difficult to source for a particular production window, designers often search for an STM32F103C8T6 alternative with a similar memory profile and peripheral set. The names that appear most often are GD32F103C8T6, APM32F103C8T6, CH32F103C8T6 and MM32F103CBT6.This Kynix comparison explains where those devices look similar, where their documented specifications differ and what an engineering team should validate before approving a vendor change. In our reviewed inquiry activity, interest in STMicroelectronics products increased, while STM32F103C8T6 continued to attract repeated sourcing attention. That is a directional observation from our own inquiry flow, not a measure of global demand, shortage levels or market-wide availability.ContentsQuick answerSTM32F103C8T6 baselineAlternative comparison tableGD32F103C8T6 comparisonAPM32F103C8T6 comparisonCH32F103C8T6 comparisonMM32F103CBT6 comparisonSelection guideMigration checklistKynix sourcing supportFrequently asked questionsQuick Answer: Which STM32F103C8T6 Alternatives Should You Evaluate?GD32F103C8T6 and APM32F103C8T6 are useful starting points when the objective is to evaluate another Cortex-M3 MCU with 64 KB of Flash, 20 KB of SRAM and an LQFP48 package. CH32F103C8T6 has the same headline memory capacities and package format, but its supply notation, USB resources and vendor ecosystem require particularly careful review. MM32F103CBT6 changes the comparison by providing 128 KB of Flash and a different documented supply range, so it is more naturally treated as a redesign candidate than a like-for-like capacity match.A similar package, core or peripheral list does not establish interchangeability; each candidate requires an exact pin, electrical, firmware, toolchain and production-test review. The right STM32F103 substitute is therefore the device that passes the requirements of a specific board and application, not the one with the most similar name.Start with GD32F103C8T6 when the same 64 KB Flash and 20 KB SRAM profile is important and the team can qualify a 2.6-3.6 V device with its own vendor support stack.Evaluate APM32F103C8T6 when the same headline memory profile and a 2.0-3.6 V VDD range are useful, with a planned port to Geehy support files and tools.Review CH32F103C8T6 when WCH's peripheral set and ecosystem fit the project, but confirm exact supply limits and every used function in the current data sheet.Consider MM32F103CBT6 when 128 KB of Flash or its wider documented VDD range serves a redesign and the analog supply requirements are acceptable.STM32F103C8T6 Baseline SpecificationsA meaningful alternative comparison starts with the exact ST orderable device, not the maximum capabilities of the wider STM32F103 family. ST lists STM32F103C8T6 as an active, industrial-grade device built around an Arm Cortex-M3 core running at up to 72 MHz. The C8 density provides 64 KB of Flash and 20 KB of SRAM. The T package code identifies LQFP48, and temperature suffix 6 covers -40°C to 85°C.The device operates from a 2.0-3.6 V application supply. Its selected connectivity includes a USB 2.0 full-speed device interface and CAN 2.0B. The LQFP48 configuration provides two 12-bit ADCs with ten external channels, along with timers, USART, SPI and I2C resources that made this MCU common in established designs.These specifications define only the visible baseline. A real design also depends on pin multiplexing, clock trees, interrupt assignments, DMA requests, reset and boot behavior, option bytes, Flash programming algorithms, peripheral timing and errata. Those details decide whether a candidate can use the existing PCB, how much firmware must change and what must be repeated in qualification.STM32F103C8T6 Alternative Comparison TableExact deviceCore and maximum clockMemorySupplyPackage and temperatureSelected connectivityMigration focusSTM32F103C8T6Arm Cortex-M3, 72 MHz64 KB Flash, 20 KB SRAM2.0-3.6 VLQFP48, -40°C to 85°CUSB full-speed device, CAN 2.0B, two 12-bit ADCsBaseline device and STM32 software/tool ecosystemGD32F103C8T6Arm Cortex-M3, 108 MHz64 KB Flash, 20 KB SRAM2.6-3.6 VLQFP48, -40°C to 85°CUSB full-speed device, CAN 2.0B, two 12-bit ADCsSupply floor, clocks, firmware support and programming flowAPM32F103C8T6Arm Cortex-M3, 96 MHz64 KB Flash, 20 KB SRAMVDD 2.0-3.6 V; check VDDA requirements for ADC useLQFP48, -40°C to 85°CUSB device, CAN, two 12-bit ADCsPin audit, vendor startup/library port and full qualificationCH32F103C8T6Arm Cortex-M3, 72 MHz64 KB Flash, 20 KB SRAMWCH selection table shows 3.3/5.0 V choices; confirm exact limitsLQFP48; confirm temperature in the current exact-device data sheetUSB full-speed host/device resources, CAN, one 12-bit ADCSupply interpretation, USB role, analog resources, firmware and toolsMM32F103CBT6Arm Cortex-M3, 96 MHz128 KB Flash, 20 KB SRAMVDD 2.0-5.5 V; VDDA 2.5-5.5 VLQFP48, -40°C to 85°CUSB device, CAN 2.0B, two 12-bit ADCsDifferent capacity and supply profile, plus firmware and tool portEngineering warning: Matching an LQFP48 outline or a familiar peripheral name does not establish interchangeability. Recheck every power and ground pin, reset and boot strap, oscillator connection, analog limit, alternate function, memory layout, startup sequence, erratum, programmer and production test before approving a vendor change.GD32F103C8T6 vs STM32F103C8T6GD32F103C8T6 is a logical candidate to research because its orderable configuration combines an Arm Cortex-M3 core, 64 KB of Flash, 20 KB of SRAM and LQFP48 packaging. Its documented peripheral summary also includes USB full-speed device, CAN 2.0B and two 12-bit ADCs. Those similarities can reduce the number of obvious architectural mismatches at the beginning of a feasibility study.The differences still matter. GigaDevice documents a maximum clock of 108 MHz and a 2.6-3.6 V VDD range, compared with 72 MHz and 2.0-3.6 V for the STM32 baseline. A board expected to operate below 2.6 V cannot treat that supply difference as a minor detail. The higher clock ceiling is not an automatic application-speed gain either: clock configuration, Flash timing, peripheral clocks, power, electromagnetic behavior and firmware assumptions must all be validated.For firmware, create a separate GD32 target using the current vendor device definitions, startup code, clock setup and Flash algorithm. Audit direct register access instead of assuming identical behavior. Retest interrupt and DMA paths, USB enumeration, CAN timing, ADC scaling, timers, watchdogs, low-power modes and boot behavior.GD32F103C8T6 can therefore be a practical board-level migration candidate, but approval should follow a net-by-net comparison and application qualification. Its value is that it gives engineers a concrete, documented second-source path to evaluate—not that the shared F103 label guarantees unchanged hardware or firmware.APM32F103C8T6 vs STM32F103C8T6APM32F103C8T6 also matches the STM32 baseline at the headline level: Arm Cortex-M3, 64 KB Flash, 20 KB SRAM, LQFP48 and an industrial -40°C to 85°C order code. Geehy documents a maximum system clock of 96 MHz and VDD operation from 2.0 V to 3.6 V. The data sheet separately specifies the analog-supply condition when the ADC is used, so a comparison must include VDDA and analog performance rather than relying on the digital VDD range alone.The device includes USB device and CAN resources, plus two 12-bit ADCs for the C8 configuration. That makes it relevant to many boards that use those functions, but peripheral names do not establish identical registers, reset states, clock routing or electrical performance. Verify the exact LQFP48 pinout and every alternate function used by the design. Pay special attention when one pin serves a boot strap, oscillator, analog input or remapped communication function.Build APM32 firmware with Geehy's current support package, startup files, device headers and programming method. Keep the APM32 target separate from the known-good STM32 build so results remain reproducible. Then compare power-up, reset, clock startup, Flash erase/program/verify, interrupt latency and the complete set of application peripherals.APM32F103C8T6 is best described as an evaluation candidate for a controlled port. It may align well with a design's memory and voltage requirements, but the decision depends on verified pin behavior, firmware changes, development-tool support and production programming—not on a similar model number.CH32F103C8T6 vs STM32F103C8T6WCH lists CH32F103C8T6 as a 72 MHz Cortex-M3 device with 64 KB of Flash, 20 KB of SRAM and an LQFP48 package. The selection table also shows CAN, one 12-bit ADC with ten channels and USB resources that include host and device roles. This combination may be attractive when the project is already prepared to work with WCH's documentation and development environment.This comparison needs extra care because the current WCH selection table presents 3.3/5.0 V choices, while a selection-table label is not a complete set of operating conditions. Confirm VDD, VDDA, input tolerance, output levels and analog limits in the current exact-device data sheet before connecting the part to an existing STM32 board. Do the same for the required temperature grade instead of inferring it from another family member.The USB description also deserves a requirements-level review. A host/device resource list is not proof that an existing STM32 USB device stack, clock arrangement, endpoint implementation or boot workflow transfers unchanged. Compare the exact pins and external circuitry, then port with WCH-provided headers, libraries, startup code and programmer support. Validate the selected USB role, CAN interface, ADC channels, timers, serial ports, interrupt mapping and low-power behavior independently.CH32F103C8T6 belongs in an STM32F103 alternative study when its documented functions match the product's needs and the team accepts a schematic and firmware review. Resolve the supply and temperature requirements before approval.MM32F103CBT6 vs STM32F103C8T6MM32F103CBT6 is not a same-density comparison: MindMotion documents 128 KB of Flash and 20 KB of SRAM, versus 64 KB and 20 KB for STM32F103C8T6. It uses an Arm Cortex-M3 core at up to 96 MHz and is available in LQFP48 over -40°C to 85°C. Its selected functions include USB device, CAN 2.0B and two 12-bit ADCs with ten external channels on the C package.The supply profile is another important difference. The documented VDD range extends from 2.0 V to 5.5 V, while VDDA is specified from 2.5 V to 5.5 V. A wider maximum range can be useful in a redesign, but it is not a reason to assume identical thresholds, analog accuracy, 5 V tolerance or behavior on an existing 3.3 V board. Compare every electrical table that matters to the product.Additional Flash may provide useful headroom, yet the linker layout, boot process and update strategy still need deliberate porting. Use MindMotion's CMSIS and peripheral-library resources, device startup, linker configuration and supported programming flow. Review register-level code, interrupt numbers, clock configuration, option bytes, boot-ROM behavior and debugging. Test USB, CAN, ADC, timers and low-power paths against product-level limits.MM32F103CBT6 is a candidate when the design can benefit from its documented memory or supply profile and accepts a controlled vendor migration.How to Choose an STM32F103C8T6 SubstituteThere is no universal best STM32F103C8T6 alternative. Start with the requirement that is hardest for the product to change, then eliminate candidates that do not meet it.For a 64 KB Flash and 20 KB SRAM target: compare GD32F103C8T6, APM32F103C8T6 and CH32F103C8T6 first. Memory alignment narrows the search, but it does not settle voltage, pins or firmware.For a higher documented clock ceiling: evaluate GD32F103C8T6 at up to 108 MHz or APM32F103C8T6 and MM32F103CBT6 at up to 96 MHz. Qualify the application at the actual selected clock; do not equate the maximum rating with delivered performance.For additional program-memory headroom: MM32F103CBT6 provides 128 KB of Flash. Confirm that the new memory map, programming flow and firmware-update design are controlled.For supply-sensitive designs: compare the complete VDD, VDDA, input, output and brownout specifications. GD32's 2.6 V floor, APM32's ADC-related analog minimum, WCH's selection-table notation and MM32's separate analog range can change the decision.For USB or CAN products: verify the exact role, pins, clock accuracy, transceiver interface, driver stack and compliance behavior. A checkmark in a selection table is only the start.For a frozen PCB and firmware: keep the original STM32F103C8T6 unless an alternative passes a complete equivalence study. A redesign may cost less than forcing an uncertain substitution into a tightly constrained legacy product.Migration and Qualification ChecklistFreeze the exact order codes. Compare orderable parts, packages and temperature grades—not family names or development boards.Perform a net-by-net pin audit. Check power, ground, reset, boot, oscillators, debug, analog references and every used alternate function.Compare electrical limits. Review supplies, thresholds, output drive, tolerance, current consumption, ADC conditions and clock specifications across operating corners.Create a separate firmware target. Use the candidate vendor's current headers, startup, linker file, clock configuration, libraries and Flash algorithm.Audit low-level assumptions. Locate direct register access, interrupts, DMA, option bytes, boot ROM, watchdog, low-power and nonvolatile-memory dependencies.Bring up with current limiting. Verify power, reset and clocks before enabling peripherals. Capture waveforms for timing-sensitive interfaces.Test the real application. Exercise USB, CAN, ADC, timers, communications, update paths and fault recovery with production-like loads and fixtures.Review errata and tools. Confirm debugger, programmer, production flashing, serialization and failure-recovery procedures for the exact silicon revision.Repeat qualification. Run the environmental, EMC, power-cycle, endurance and regulatory tests affected by the component change.Release as a controlled configuration. Assign a distinct BOM entry, approved-vendor record, firmware build and manufacturing test definition. Do not mix devices under one undocumented setup.Source STM32F103C8T6 and Alternative MCUs with KynixAt Kynix, we help buyers source electronic components and turn an alternative-MCU search into a clear request for quotation. You can begin with our STM32F103C8T6 product page, browse our STMicroelectronics product selection, or use our search and inquiry process to send a multi-part request.When you send us an RFQ, include the exact manufacturer part number, quantity, package, destination, required schedule, acceptable date-code window and any inspection or documentation requirements. If you are evaluating GD32F103C8T6, APM32F103C8T6, CH32F103C8T6 or MM32F103CBT6, identify the preferred candidate and whether mixed manufacturers are acceptable. Our team can then respond to the actual sourcing requirement instead of treating similar F103 names as interchangeable items.Our published Kynix guarantee states that each product has a warranty valid for 365 days after the parcel arrives. For a production program, pair that coverage with lot, packaging, traceability, inspection and acceptance requirements written into the inquiry and order. This gives both sides a clearer basis for quoting and receiving the material.Availability, price, lead time and lot-specific evidence can change, so confirm them in the current quotation and keep each device's engineering approval separate.Frequently Asked QuestionsWhat is the best STM32F103C8T6 alternative?There is no universal best choice. GD32F103C8T6 and APM32F103C8T6 provide the closest headline memory profile among the devices compared here. CH32F103C8T6 may fit projects aligned with WCH's ecosystem, while MM32F103CBT6 provides a different 128 KB Flash and supply profile. The best candidate is the one that meets the exact board, peripheral, firmware, environmental and production requirements after qualification.Is GD32F103C8T6 a drop-in replacement for STM32F103C8T6?No such conclusion should be made from the package and memory specifications alone. Treat GD32F103C8T6 as a migration candidate. Compare every used LQFP48 pin and electrical limit, create a GD32-specific firmware target, and repeat functional and production validation before approval.Can STM32 firmware run unchanged on APM32, CH32 or MM32 devices?Do not assume it can. Even when an application is based on a Cortex-M3 core and familiar peripherals, startup code, clock configuration, register behavior, interrupts, boot ROM, option bytes, programming algorithms and vendor libraries may differ. Maintain a separate build for each approved device and test all product functions.What should be checked before approving an STM32F103 substitute?Check the exact package pinout, VDD and VDDA limits, oscillator and reset circuits, boot straps, alternate functions, memory map, timers, analog performance, USB or CAN implementation, firmware support, programmer, errata and production fixtures. Then repeat the qualification affected by the change and release it under a controlled BOM and firmware revision.Can Kynix help source the original STM32F103C8T6 and alternative MCUs?Yes. Send us the exact part numbers and commercial requirements through the Kynix inquiry process. We can quote the original device and requested alternatives as separate items, allowing your purchasing and engineering teams to compare current sourcing options without treating the devices as automatically interchangeable.Official ReferencesSTMicroelectronics STM32F103C8 product pageSTMicroelectronics STM32F103x8/xB data sheetGigaDevice GD32F103xx data sheetGigaDevice GD32F10x selection guideGeehy APM32F103 product pageGeehy APM32F103x4/x6/x8 data sheetWCH Cortex-M general selection tableWCH CH32F103 data-sheet pageMindMotion MM32F103xx_n product pageMindMotion MM32F103xx_n data sheet
Kynix On 2026-08-05
In briefDiodes Incorporated lists BCR420UW6-7 as a SOT26 linear current sink for LED strings. With REXT open, its nominal output is 10 mA and the guaranteed limits at the stated test point are 9 mA and 11 mA. An added resistor raises the current. The OUT pin is rated to 40 V.[2]Do not use the 500 mA absolute-maximum output-current rating as a design target. DS37667 electrically characterizes the BCR420U at 150 mA with a 4.9 Ω external resistor. Although the family description discusses currents up to 350 mA, the document's 350 mA application example is specifically for the BCR421U. For BCR420UW6-7 designs, use the data-sheet curves, calculate dissipation and validate the selected operating point on hardware.[2]The Infineon BCR420U is a different manufacturer's device with a different full orderable part number, BCR420UE6327HTSA1. A similar base name is not evidence of a drop-in replacement. Infineon currently marks its version as discontinued, so manufacturer, full ordering code, package drawing, pin functions and electrical limits must all be checked before substitution.[10][11]On this pagePart identity and operating principleVerified specifications and current limitsSetting current with REXTThermal design and worked exampleBCR420U versus BCR421UMigration and alternative optionsDesign and sourcing checklistFrequently asked questionsReferences1. Part identity and operating principleBCR420UW6-7 is the reel ordering code listed by Diodes Incorporated for the BCR420UW6. The data sheet gives the top marking as “420,” followed by date-code characters, and specifies a SOT26 package.[2]The device integrates an NPN emitter-follower, an emitter resistor, diodes and bias resistors. It acts as a low-side linear current sink for an LED or LED string. No inductor, switching diode or output capacitor is required for the basic circuit. The trade-off is that voltage not used by the LED string is dissipated as heat in the regulator.Output current has a typical temperature coefficient of -0.2%/°C. This reduces current as the junction warms. The manufacturer also shows parallel devices as a way to obtain more current, but each device still needs an adequate and reasonably similar thermal path.[2]Do not confuse the manufacturer-specific ordering codesManufacturerFull orderable codePackage stated by manufacturerCurrent commercial statusDiodes IncorporatedBCR420UW6-7SOT26Use the Diodes product page and current purchasing documentationInfineon TechnologiesBCR420UE6327HTSA1SC74Discontinued on the Infineon product page as reviewed in August 2026The two devices share a family name and several headline values, but they are not the same full part number. Package naming alone is also insufficient to prove land-pattern compatibility. Compare the dimensioned package drawings, recommended footprints, pin assignments and electrical limits before approving a substitution.[2][10][11]2. Verified specifications and current limitsThe following values come from DS37667 Rev. 8-2. Conditions are included because a typical value without its test condition is not a complete design specification.[2]ParameterSymbolValueCondition or interpretationFactory-set current, REXT openIOUT9 / 10 / 11 mA min./typ./max.VOUT = 1.4 V, VEN = 24 V, REXT openCharacterized output currentIOUT150 mA typicalREXT = 4.9 Ω, VOUT > 2.0 V, VEN = 24 VAbsolute-maximum output currentIOUT500 mAStress limit, not a continuous operating recommendationOutput-voltage ratingVOUT40 VVoltage at the regulator output relative to groundBCR420U enable-voltage ratingVEN40 VAbsolute maximum; BCR421U is 18 VInternal resistorRINT85 / 95 / 105 Ω min./typ./max.IRINT = 10 mAVoltage across the current-setting networkVDROP0.85 / 0.95 / 1.05 V min./typ./max.IOUT = 10 mAMinimum voltage required at OUTVOUT(min)1.4 V typicalIOUT > 18 mAOutput-current change versus temperatureΔIOUT/IOUT-0.2%/°C typicalVOUT > 2.0 V, VEN = 24 VOutput-current change versus supply voltageΔIOUT/IOUT1%/V typicalVOUT > 2.0 V, VEN = 24 VPower dissipationPD1,190 mW or 912 mW50 mm × 50 mm or 25 mm × 25 mm of 1 oz copper, respectively; single-sided 1.6 mm FR4, still air, steady stateJunction-to-ambient thermal resistanceRθJA105°C/W or 140°C/WSame two board conditions as the power ratingsRecommended junction-temperature rangeTJ-55°C to +150°CRecommended operating rangeHow to interpret the current figures: 500 mA is an absolute maximum. The BCR420U has a directly characterized 150 mA operating point in the electrical table. The family text mentions 10 mA to 350 mA, but the 350 mA schematic on page 11 is explicitly a BCR421U example that raises enable voltage to supply adequate enable current. This distinction should be retained in any design review.[2]3. Setting current with REXTREXT is connected in parallel with the internal current-setting resistor. Leaving REXT open produces the nominal 10 mA output. Adding a smaller external resistor increases current.A useful first-order model is:IOUT ≈ VDROP ÷ (RINT ∥ REXT)This is an estimate, not the manufacturer's selection method. Using typical 10 mA values, 0.95 V ÷ 95 Ω equals 10 mA. At the characterized 150 mA point, however, 95 Ω in parallel with 4.9 Ω is approximately 4.66 Ω, and 0.95 V ÷ 4.66 Ω predicts about 204 mA. The simple model therefore overpredicts the actual characterized current by about 36% relative to the 150 mA value.Use the REXT-versus-IOUT curves in DS37667 or the calculator linked from the official product page for component selection. Then verify current across supply voltage, ambient temperature and unit variation on hardware. A resistor chosen from the simple formula alone can produce substantially less current than the calculation predicts.[1][2]The data sheet recommends a low-tolerance external resistor to improve the accuracy of the parallel current-sense network. Resistor tolerance and temperature coefficient should be included in the channel-current error budget, especially when visible brightness matching matters.4. Thermal design and worked exampleA linear current regulator dissipates the voltage left after the LED string. The governing equations from the application section are:VOUT = VS - VLEDPD = (VOUT × ILED) + (VEN × IEN)PD(max) = (TJ(max) - TA) ÷ RθJAIllustrative 24 V exampleAssume a 24 V rail, 100 mA LED current, a typical BCR420U enable current of 1.2 mA at VEN = 24 V, and 3.2 V per white LED at the chosen operating point. The LED forward voltage is an example assumption, not a BCR420UW6-7 data-sheet rating.Calculation3 × 3.2 V assumed6 × 3.2 V assumedTotal assumed LED forward voltage9.6 V19.2 VRemaining voltage at the current sink14.4 V4.8 VOutput-stage dissipation1.44 W0.48 WEnable-path dissipation0.0288 W0.0288 WTotal calculated dissipationApproximately 1.47 WApproximately 0.51 WResult against 1.19 W data-sheet conditionExceeds the stated conditionBelow the stated conditionFor the six-LED case, 0.51 W × 105°C/W gives an estimated junction rise of about 54°C under the data-sheet board condition. At 25°C ambient, the estimate is approximately 79°C junction temperature. This calculation is only as good as the assumed LED voltage and the match between the real PCB and the manufacturer's thermal test board.Do not apply the 1.19 W rating to a small copper island, multilayer stack-up, sealed enclosure or high-ambient installation without a new thermal analysis. Measure board or case temperature at the worst input voltage, LED forward-voltage corner and ambient condition. The negative current temperature coefficient can make an overheated design appear merely dimmer instead of producing an immediate hard failure.5. BCR420U versus BCR421UThe two variants share the SOT26 package drawing and pin arrangement in DS37667, but their enable networks and ratings differ.[2][3]ItemBCR420UW6-7BCR421UW6-7Typical bias resistor20 kΩ1.5 kΩAbsolute-maximum enable voltage40 V18 VPreset-current test conditionVEN = 24 VVEN = 3.3 VData-sheet PWM guidanceNot the MCU PWM variant described in DS37667Up to 25 kHz, 0.5% minimum duty-cycle example, 200:1 dimming range350 mA application exampleNot shownShown with increased enable voltageShared package and pin arrangement do not make the two variants automatically interchangeable. A board that applies 24 V to the BCR420U enable pin would exceed the BCR421U's 18 V absolute maximum. Before changing variants, review the enable source, PWM levels, external resistor, dissipation and worst-case output current.6. Migration and alternative optionsThe following parts are migration candidates, not asserted drop-in replacements. Each option requires a design review against the exact orderable part number and current manufacturer documentation.CandidateWhat remains similarWhat must change or be verifiedOfficial sourceBCR421UW6-7Same Diodes family, SOT26 package drawing and 10 mA preset18 V enable limit, MCU/PWM drive conditions, REXT selection and thermal operating pointProduct pageBCR420UW6Q-7Automotive-oriented SOT26 member with the same base functionUse the Q-suffix purchasing documents and obtain the required PPAP and qualification evidence. The current product page and DS38302 use inconsistent AEC qualification labels, so confirm the applicable standard and revision with Diodes Incorporated.Product page and data sheetBCR420UFD-7Same manufacturer and BCR420U functionU-DFN2020-6 package requires a new footprint, stencil and thermal validationProduct page and data sheetInfineon BCR420UE6327HTSA1Similar linear LED-driver concept, 10 mA preset and 40 V headline ratingDifferent full ordering code and manufacturer documentation; verify land pattern, pin details and electrical limits. Infineon marks the part discontinued.Product page and data sheetAL5809 seriesLinear constant-current control for LED stringsTwo-terminal fixed-current architecture, 2.5 V to 60 V terminal voltage, 15 mA to 150 mA orderable current options and different packages; no BCR420U-style REXT or enable pinProduct page and data sheetFor a repair, the lowest-risk route is the exact manufacturer and orderable part number already qualified in the assembly. For a redesign, start with required current, voltage headroom, control method, thermal path, qualification level and lifecycle status rather than searching by the shortened “BCR420U” name alone.7. Design and sourcing checklistRecord the manufacturer as Diodes Incorporated and the complete ordering code BCR420UW6-7.Confirm the SOT26 land pattern against the dimensioned package drawing in the current data sheet.Treat 500 mA as an absolute-maximum rating, not a continuous design current.Select REXT from the manufacturer's curves or calculator and verify the result on hardware.Calculate VOUT and PD at maximum supply voltage and minimum LED-string forward voltage.Use the thermal resistance for a board condition that is demonstrably comparable to the real PCB.Check the 40 V BCR420U enable limit and the 40 V output-voltage limit for normal operation and transients.If considering BCR421UW6-7, re-check its 18 V enable limit and PWM drive conditions.For automotive sourcing, specify the Q-suffix device and confirm PPAP plus the exact qualification standard in current manufacturer documents.Do not approve an alternate manufacturer from the shortened family name. Compare full orderable code, pinout, package dimensions, footprint, ratings, temperature behavior and lifecycle status.8. Frequently asked questionsWho makes BCR420UW6-7?BCR420UW6-7 is an orderable part number listed by Diodes Incorporated. Infineon has a device named BCR420U, but its full orderable code is BCR420UE6327HTSA1, not BCR420UW6-7.[2][10]Can BCR420UW6-7 continuously deliver 350 mA or 500 mA?Do not infer that from the headline numbers. The 500 mA figure is an absolute maximum. DS37667 characterizes BCR420U at 150 mA with REXT = 4.9 Ω, while the 350 mA application example is for BCR421U. Any high-current operating point is also limited by voltage headroom, enable drive and package dissipation.How should REXT be selected?Use the REXT-versus-IOUT curves in DS37667 or the calculator linked on the official Diodes product page. The simple 0.95 V divided by the parallel resistance model is useful for intuition but does not reproduce the characterized 150 mA point accurately.Can BCR421UW6-7 replace BCR420UW6-7?Not without a circuit review. The devices share a package drawing and pin arrangement, but BCR421U has an 18 V enable-pin limit versus 40 V for BCR420U and is intended for logic-level PWM control. A 24 V enable connection acceptable for BCR420U would exceed the BCR421U rating.Can the Infineon BCR420U replace BCR420UW6-7?Do not treat it as a drop-in replacement based on the shared base name. It has a different manufacturer-specific ordering code, separate data sheet and a current discontinued status. Approve any substitution only after a drawing-level footprint and pin review, electrical comparison and lifecycle assessment.Is the standard BCR420UW6-7 the automotive version?Diodes publishes separate Q-suffix orderable parts for automotive-oriented use. Specify the Q-suffix part and obtain the current PPAP and qualification documents required by the program. Because the current Q-variant product page and data sheet use different AEC standard labels, confirm the exact applicable qualification with Diodes Incorporated rather than copying a catalogue attribute.SourcingRequest quotes using the complete manufacturer and orderable part number. Avoid claims of current stock unless inventory has been checked at the time of the request.Submit a BCR420UW6-7 sourcing inquiry to Kynix9. ReferencesDiodes Incorporated, BCR420UW6 product page.Diodes Incorporated, BCR420UW6 / BCR421UW6 data sheet, DS37667 Rev. 8-2, July 2023.Diodes Incorporated, BCR421UW6 product page.Diodes Incorporated, BCR420UW6Q product page.Diodes Incorporated, BCR420UW6Q / BCR421UW6Q data sheet, DS38302.Diodes Incorporated, BCR420UFD product page.Diodes Incorporated, BCR420UFD / BCR421UFD data sheet, DS38588.Diodes Incorporated, AL5809 product page.Diodes Incorporated, AL5809 data sheet, DS36625 Rev. 5-2.Infineon Technologies, BCR420U product page.Infineon Technologies, BCR420U E6327 / BCR421U E6327 data sheet, Rev. 2.2, December 8, 2022.
Kynix On 2026-08-03
Quick-Reference Card: TMS320C6472 at a GlanceAttributeDetailComponent TypeSix-Core Fixed-Point Digital Signal Processor (DSP)ManufacturerTexas InstrumentsKey Spec3.7W typical power consumption at 3GHz total performanceSupply VoltageRefer to the official datasheet for core and I/O exact valuesPackage Options737-pin FCBGA (CTZ)Lifecycle StatusLegacy / No Ongoing Design Support (High BOM Risk)Best ForHigh-end industrial computing, blade servers, and medical imaging1. What Is the TMS320C6472? (Definition + Architecture)The TMS320C6472 is a six-core fixed-point digital signal processor (DSP) from Texas Instruments that delivers high-performance computing and process-intensive workload handling at a remarkably low 3.7W power footprint. While modern ARM-based SoCs have absorbed many DSP workloads, the C6472 remains a powerhouse in legacy blade servers and specialized test equipment where deterministic, multi-channel signal processing is non-negotiable.1.1 Core Architecture & Design PhilosophyAt its heart, this DSP relies on the C64x+ architecture, scaling it horizontally across six independent cores running at 500MHz, 625MHz, or 700MHz. TI designed this chip to eliminate data-starvation bottlenecks. Each core gets 608KB of local L2 RAM, backed by 768KB of shared L2 RAM. To move data fast enough to feed six cores, TI integrated a high-bandwidth DMA switch fabric and an Enhanced DMA (EDMA3) controller. This architecture prioritizes sustained, parallel math operations over general-purpose branching logic.1.2 Where It Fits in the Signal Chain / Power PathThe TMS320C6472 sits at the center of the digital processing chain. It typically acts as the primary number-cruncher downstream from high-speed ADCs or network interfaces (via Gigabit Ethernet or Serial RapidIO). It is usually driven by a host microprocessor for system control, while the DSP handles the heavy, deterministic math (like H.264 encoding or radar beamforming) before pushing the processed data out to a backplane or media gateway.2. Electrical Characteristics: The Numbers That MatterWhen designing around a multicore DSP, thermal density and memory bandwidth dictate your PCB layout and power delivery network.2.1 Power Supply & Consumption ProfileThe standout spec of the TMS320C6472 is its efficiency: 3.7W typical power consumption at 3GHz total performance (six cores at 500MHz). * Why it matters: In blade servers or dense telecom racks, thermal budgets are exceptionally tight. Hitting 3GHz of DSP compute for under 4 watts allows engineers to passively cool the IC or pack multiple DSPs onto a single PCIe accelerator card without melting the FR4.2.2 Performance Specs (Speed, Accuracy, or Efficiency)The chip features a 32-bit 533-MHz DDR2 SDRAM interface. * Why it matters: Six cores will quickly exhaust internal L2 cache during heavy video processing or medical imaging. The 533-MHz DDR2 interface ensures that external memory access doesn't become a crippling bottleneck, though careful EDMA3 configuration is required to maximize this throughput.2.3 Absolute Maximum Ratings — What Will Kill ItOperating Temperature: 0°C to 85°C (Commercial) or -40°C to 100°C (Extended). Do not exceed 100°C junction temperature.Voltage Rails: BGA processors require strict power sequencing. Applying I/O voltage before core voltage, or vice versa, can cause latch-up. Refer to the official datasheet for exact voltage values and sequencing timing requirements.3. Pinout & Package Guide3.1 Pin-by-Pin Functional GroupsPin GroupPinsFunctionPower & GroundVDD, VSS, etc.Core and I/O supply rails (Requires heavy decoupling)MemoryDDR2 bus32-bit 533-MHz SDRAM interfaceHigh-Speed I/OSRIO, MACSerial RapidIO and Gigabit Ethernet interfacesTelecom I/OTSIP, UTOPIALegacy telecom and media gateway interfacesDebugJTAGStandard IEEE 1149.1 boundary scan3.2 Package Variants & Soldering NotesPackagePitchThermal Pad?Soldering Method737-pin FCBGA (CTZ)0.8mm (Refer to datasheet)IntegratedReflow only (X-Ray inspection mandatory)Engineering Note: A 737-pin FCBGA is highly susceptible to mechanical stress. If this chip is used in high-vibration industrial environments, underfill is highly recommended to prevent solder ball cracking.3.3 Part Number DecoderTMS320: TI DSP FamilyC64: C64x+ Core Architecture72: Six-core variant(Suffixes will dictate speed grade, e.g., 500, 625, or 700MHz, and temperature range).4. Known Issues, Errata & Real-World Pain PointsWhy this section exists: Community forums, application notes, and field reports reveal problems the datasheet glosses over. This section saves you hours of debugging.Problem: No Ongoing Design SupportRoot Cause: TI has officially marked this product as having no ongoing design support for new projects. There will be no new software updates, bug fixes, or official content.Recommended Fix: You must rely on archived E2E forum posts and legacy documentation. For new designs, migrate to newer DSP families like the C66x series.Problem: CCS Register Display BugsRoot Cause: Users frequently report missing or incorrect register definitions (e.g., TSIP, PLL) in Code Composer Studio (CCS) target XML files.Recommended Fix: Manually patch the targetdb XML files (e.g., cslr_pllc.xml) provided by TI, or bypass the GUI and use the memory browser to view raw register addresses directly.Problem: Library Validation Issues (e.g., H.264)Root Cause: Certain TI libraries (like the H264 Decoder) were not validated out-of-the-box for the specific memory map of the C6472.Recommended Fix: Manually update the memory command files (.cmd) in your project to precisely match the C6472 memory map as defined in the datasheet.Problem: Toolchain Migration ErrorsRoot Cause: Migrating legacy projects from older CCS versions (CCS4) to newer ones (CCS5+) often triggers sysmem section errors and missing memory allocation functions.Recommended Fix: Reconfigure the linker command file and explicitly ensure the correct runtime support library (rts) is linked in the project properties.5. Application Circuits & Integration Examples5.1 Typical Application: Media Gateway / H.264 Video ProcessingIn a media gateway, the TMS320C6472 ingests raw video streams via the Gigabit Ethernet or Serial RapidIO ports. The EDMA3 controller is configured to ping-pong data between external DDR2 memory and the local L2 cache of the six cores. Each core processes a slice of the video frame (H.264 encoding) independently.Layout Consideration: The DDR2 routing must be strictly length-matched. The Gigabit Ethernet and SRIO differential pairs require controlled impedance (typically 100Ω differential) and minimal via transitions.5.2 Interface Example: Initializing the EDMA3 ControllerTo get data moving without stalling the C64x+ cores, the EDMA controller must be initialized via memory-mapped registers.// Pseudocode for EDMA3 initialization on C6472void init_EDMA3() { // 1. Enable EDMA3 power domain enable_peripheral_power(EDMA3_CC); // 2. Clear event registers HWREG(EDMA3_ECR) = 0xFFFFFFFF; // 3. Map Channel to Parameter RAM (PaRAM) assign_param_set(CHANNEL_1, PARAM_SET_1); // 4. Configure PaRAM for ping-pong buffer transfer configure_transfer_params(PARAM_SET_1, SRC_ADDR, DEST_ADDR, BYTES_TO_TRANSFER);}6. Alternatives, Replacements & Cross-Reference6.1 Pin-Compatible Drop-In ReplacementsDue to the complex 737-pin FCBGA package and specific multicore architecture, there are no direct drop-in replacements from other manufacturers.Part NumberManufacturerKey DifferenceCompatible?TMS320C6474Texas InstrumentsTriple-core (instead of six-core)? (Different pinout/capabilities)6.2 Upgrade Path (Better Performance)If redesigning a legacy system, the Texas Instruments TMS320C6670 is the natural upgrade path. It utilizes the newer C66x DSP generation, offering floating-point capabilities alongside fixed-point, drastically improving math performance and software flexibility.6.3 Cost-Down AlternativesIf exploring outside the TI ecosystem for multicore telecom/industrial DSPs, evaluate the Freescale (NXP) MSC8256 StarCore DSP or the Tilera TILE-Gx Multicore Processors. Note that migrating to these requires a complete software rewrite and toolchain change.7. Procurement & Supply Chain IntelligenceLifecycle Status: Legacy / No Ongoing Design Support. TI does not recommend this part for new designs (NRND equivalent).Typical MOQ & Lead Time: As a legacy FCBGA, if distributor stock is depleted, lead times can exceed 52 weeks, often requiring large MOQs directly from the foundry.BOM Risk Factors: Extremely high. Because TI has ceased software and design support, relying on this chip for a new product is a massive risk.Recommended Safety Stock: Procurement teams managing legacy blade servers or medical equipment should secure lifetime buy quantities immediately.Authorized Distributors: DigiKey, Mouser, Rochester Electronics (for legacy/EOL silicon).8. Frequently Asked QuestionsQ: What is the TMS320C6472 used for? The TMS320C6472 is primarily used in high-end industrial computing, mission-critical blade servers, medical imaging, and media gateways requiring heavy H.264 video processing.Q: What are the best alternatives to the TMS320C6472? For modern designs, the TI TMS320C6670 is the recommended upgrade path. Competitor alternatives include the Freescale (NXP) MSC8256 StarCore DSP.Q: Is the TMS320C6472 still in production? While it may still be manufactured for legacy customers, TI has officially stated there is "no ongoing design support," meaning it should be treated as NRND (Not Recommended for New Designs).Q: Can the TMS320C6472 work with 3.3V logic? High-speed DSPs typically use lower I/O voltages (e.g., 1.8V or 1.2V) to save power and increase speed. Refer to datasheet Table for exact I/O voltage tolerances; level shifters are likely required for 3.3V interfaces.Q: Where can I find the TMS320C6472 datasheet and evaluation board? The official TMS320C6472 datasheet can be found on Texas Instruments' product archive pages, though evaluation boards are largely obsolete and must be sourced from secondary markets.9. Resources & ToolsEvaluation / Development Kit: EVMC6472 (Check secondary markets like eBay or specialized legacy distributors)Reference Designs: TI E2E Community Archives (Search for C6472 memory map .cmd files)Community Libraries: Not applicable for standard maker libraries; requires TI Code Composer Studio (CCS) and specialized RTS libraries.Support: TI E2E Forums (Archived read-only threads)
Kynix On 2026-08-03
Quick-Reference Card: TLE4955 at a GlanceAttributeDetailComponent TypeDifferential Hall-Effect Speed SensorManufacturerInfineon TechnologiesKey SpecAdvanced vibration suppression with dynamic self-calibrationSupply Voltage3.3 V to 27 VPackage OptionsPG-SSO-2-53 (2-pin leaded package)Lifecycle StatusActive (AEC-Q100 qualified, ISO 26262-ready)Best ForAutomotive transmission, crankshaft, and camshaft position sensing1. What Is the TLE4955? (Definition + Architecture)The TLE4955 is a differential Hall-effect speed sensor from Infineon Technologies that provides highly accurate automotive transmission, crankshaft, and camshaft position sensing using a two-wire PWM current interface and advanced vibration suppression.1.1 Core Architecture & Design PhilosophyAt its core, the TLE4955 is a monolithic integrated circuit that houses two Hall elements spaced slightly apart. By measuring the difference in the magnetic field between these two plates, the IC inherently rejects common-mode stray magnetic fields. Infineon paired this differential front-end with an intelligent digital signal processor that handles dynamic self-calibration and adaptive hysteresis. This design philosophy is entirely focused on surviving the harsh realities of a gearbox: wild temperature swings, mechanical wear, and severe mechanical vibration.1.2 Where It Fits in the Signal Chain / Power PathThis sensor sits at the very edge of the signal chain, mounted directly against a ferromagnetic target wheel (like a transmission gear). It acts as the primary data acquisition node, converting physical gear tooth passing into a modulated current signal. Because it uses a 2-wire current interface, the signal is sent back to an Engine Control Unit (ECU) or Transmission Control Module (TCM) over the same wires that provide its power, minimizing wiring harness weight and cost.2. Electrical Characteristics: The Numbers That Matter2.1 Power Supply & Consumption ProfileThe TLE4955 operates on a wide 3.3 V to 27 V supply range. Why it matters: This wide range ensures the sensor remains fully operational during severe automotive voltage transients, such as cold-cranking events (where battery voltage plummets) or alternator load dumps. Since it's a 2-wire sensor, its "quiescent" and "active" current levels actually form the high and low states of the PWM signal transmitted to the ECU.2.2 Performance Specs (Speed, Accuracy, or Efficiency)The sensor boasts a magnetic operate point (BOP) of ±100 mT and features integrated direction detection. Why it matters: The high magnetic sensitivity allows for a much larger operating air gap between the sensor and the gear wheel. This gives mechanical engineers looser manufacturing tolerances for the transmission housing, driving down overall production costs.2.3 Absolute Maximum Ratings — What Will Kill ItAutomotive environments are brutal, but the TLE4955 is armored. It features integrated overvoltage protection up to 40 V and built-in reverse-polarity protection. However, prolonged exposure to voltages exceeding 40 V will destroy the internal clamping diodes. Furthermore, while the operating temperature is -40 °C to 150 °C, the junction can survive peaks up to 175 °C. Pushing continuous operation at 175 °C will rapidly degrade the IC's lifespan.3. Pinout & Package Guide3.1 Pin-by-Pin Functional GroupsBecause the TLE4955 uses a 2-wire current interface, the pinout is as simple as it gets.Pin GroupPinsFunctionPower/SignalVCCSupply voltage input and high-side signal currentGround/ReturnGNDGround return path and low-side signal current3.2 Package Variants & Soldering NotesPackagePitchThermal Pad?Soldering MethodPG-SSO-2-532.54 mm (typ)NoThrough-hole / Wave SolderingNote: The SSO (Single Small Outline) package is designed to be over-molded into a custom plastic sensor housing. Ensure the leads are not bent too close to the package body to avoid micro-cracking the epoxy casing.3.3 Part Number DecoderTLE: Infineon Automotive IC family4: Hall-effect technology955: Specific series generation (differential speed/direction sensor)4. Known Issues, Errata & Real-World Pain PointsWhy this section exists: Community forums, application notes, and field reports reveal problems the datasheet glosses over. This section saves you hours of debugging.Problem: EMC and ESD SusceptibilityRoot Cause: Harsh high-power environments, particularly in hybrid and EV automotive systems, can induce severe electromagnetic interference on the long wiring harnesses connected to the sensor.Recommended Fix: Ensure proper PCB/harness layout with external decoupling capacitors placed as close to the ECU connector as possible. For next-gen EV designs, consider migrating to newer generations like the TLE5028C, which features improved immunity.Problem: Requires Back-Biasing MagnetRoot Cause: The TLE4955 is a differential Hall sensor, but it does not contain an internal magnet. It cannot detect a plain steel gear wheel on its own.Recommended Fix: You must incorporate a back-bias permanent magnet (like SmCo or NdFeB) into your mechanical sensor housing assembly. Alternatively, search for a sensor variant that includes an integrated magnet.Problem: Vibration Artifacts (False Speed Readings)Root Cause: Severe transmission vibrations at low speeds or standstill can cause the gear teeth to dither back and forth, tricking standard sensors into outputting false speed pulses.Recommended Fix: Utilize the TLE4955's built-in vibration suppression algorithm. Ensure your mechanical design maintains the recommended operating air gap, as excessive air gaps weaken the magnetic signal and degrade the algorithm's effectiveness.5. Application Circuits & Integration Examples5.1 Typical Application: Automotive Transmission Speed SensingIn a typical automotive setup, the TLE4955 is placed against a target wheel. The ECU supplies battery voltage (e.g., 12V) to the VCC pin. The GND pin returns to the ECU through a precision sense resistor (e.g., 50Ω to 100Ω). As the gear teeth pass, the sensor modulates its current consumption. The ECU reads the voltage drop across the sense resistor to decode the PWM signal, extracting both rotational speed and direction.5.2 Interface Example: Connecting to a MicrocontrollerTo interface this 2-wire current sensor with a standard 3.3V MCU (like an STM32 or ESP32), you must convert the current signal to a voltage. Place a sense resistor between the sensor's GND pin and the system ground. Feed the voltage dropped across this resistor into a hardware comparator or an ADC pin.// Pseudocode for reading TLE4955 via MCU ADC/Comparator// Assuming a sense resistor converts the PWM current to a 0-3.3V logic levelvoid init_speed_sensor() { configure_gpio_interrupt(PIN_SENSOR_IN, RISING_EDGE); start_hardware_timer();}void on_sensor_interrupt() { uint32_t pulse_width = capture_timer_value(); // Decode PWM duty cycle to determine direction // Calculate frequency to determine speed decode_tle4955_pwm(pulse_width);}6. Alternatives, Replacements & Cross-Reference6.1 Pin-Compatible Drop-In ReplacementsPart NumberManufacturerKey DifferenceCompatible?TLE4957CInfineonDifferent calibration/protocol?? (Requires software update)6.2 Upgrade Path (Better Performance)If you are designing a next-generation transmission module, consider the Infineon TLE5555. It utilizes TMR (Tunneling Magnetoresistance) technology instead of the Hall effect, offering vastly superior jitter performance and allowing for even larger air gaps.6.3 Cost-Down AlternativesFor non-automotive or less critical industrial motor monitoring, you might evaluate alternatives from Allegro MicroSystems or TE Connectivity (G-MRCO Series). If you do not need a 2-wire PWM interface and can use a standard 3-wire open-drain output, parts like the Texas Instruments DRV5023 or DRV5033 can serve as highly cost-effective alternatives, though they lack the advanced vibration suppression of the TLE4955.7. Procurement & Supply Chain IntelligenceLifecycle Status: Active. The part is AEC-Q100 qualified and ISO 26262-ready, making it a staple in current automotive production.Typical MOQ & Lead Time: Automotive-grade sensors typically see lead times of 16 to 24 weeks. MOQs often align with full reel or tube quantities (e.g., 1,000+ units).BOM Risk Factors: High. This is a highly specialized, single-source component from Infineon. The specific PWM protocol and vibration algorithms make it difficult to swap out for a competitor's part without rewriting ECU firmware.Recommended Safety Stock: Given automotive allocation histories, a minimum of 6 months of safety stock is strongly recommended for active production runs.Authorized Distributors: Always source through authorized channels (e.g., Mouser, Digi-Key, Avnet, Arrow) to avoid counterfeit ICs that will fail automotive temperature qualifications.8. Frequently Asked QuestionsQ: What is the TLE4955 used for? The TLE4955 is primarily used for automotive transmission speed sensing, crankshaft/camshaft position sensing, and rotor position monitoring in industrial motors. It feeds critical speed and direction data to ECUs and TCMs.Q: What are the best alternatives to the TLE4955? For upgraded performance, the TMR-based Infineon TLE5555 is an excellent choice. If looking outside Infineon, Allegro MicroSystems' speed sensor portfolio or TE Connectivity's G-MRCO series are the closest functional competitors.Q: Is the TLE4955 still in production? Yes, the TLE4955 is in Active production. It is AEC-Q100 qualified and ISO 26262-ready, making it safe for long-term automotive designs.Q: Does the TLE4955 require an external magnet? Yes. The TLE4955 is a sensing element only; it requires a back-biasing permanent magnet integrated into your mechanical assembly to detect ferromagnetic gear teeth.Q: Where can I find the TLE4955 datasheet and evaluation board? The official datasheet and application notes regarding the PWM protocol can be found on the Infineon Technologies website or through authorized distributor portals.9. Resources & ToolsReference Designs: Look for Infineon Application Notes on "Back-Bias Magnet Design for Hall Speed Sensors" and "2-Wire PWM Interface Decoding."Community Libraries: Because of its specialized automotive nature, custom C code is usually required for MCU integration; standard Arduino libraries are rarely applicable.SPICE / LTspice Model: Magnetic simulation models (often for tools like ANSYS Maxwell) are sometimes available under NDA from Infineon to assist with target wheel and magnet mechanical design.
Kynix On 2026-07-31
Join our mailing list!
Be the first to know about new products, special offers, and more.
Feature Posts
ENC624J600-I/PT microcontroller: Datasheet, Features, Application[FAQ]2023-03-07
ATMEGA1280-16AU microcontroller: Datasheet, Features, Application[FAQ]2023-03-07
STM8S207CBT6 Microcontroller: Datasheet, Features, Application[FAQ]2023-03-06
2N7002P Mosfet: Datasheet, Pinout, Features [FAQ]2021-10-21
L298N Motor Driver: Datasheet, Arduino, Circuit [Video&FAQ]2021-10-21