circuit Related Articles
Stay Ahead with Expert Electronics Insights,
Industry Trends, and Innovative Tips
- Electronic Components
- News Room
- General electronic semiconductor
- Components Guide
- Sort by
- Robots
- Transmitters
- Capacitors
- IC Chips
- PCBs
- Connectors
- Amplifiers
- Memory
- LED
- Diodes
- Transistors
- Battery
- Oscillators
- Resistors
- Transceiver
- RFID
- FPGA
- Mosfets
- Sensor
- Motors, Solenoids, Driver Boards/Modules
- Relays
- Optoelectronics
- Power
- Transformer
- Fuse
- Thyristor
- potentiometer
- Development Boards
- RF/IF
- Semiconductor Information
- Sensors
- PCB
- transistor
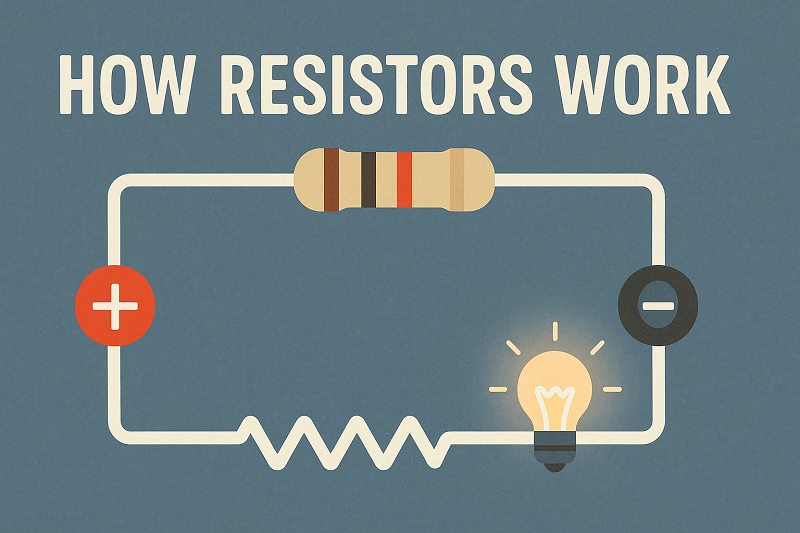
Catalog Ⅰ Introduction Ⅱ Resistor network in Series vs in Parallels 2.1 Resistor in Series Ⅲ Resistor Circuit in Series vs in Parallels 3.1 Resistor Circuit in Series 3.2 Resistor Circuit in Parallels Ⅳ Equation in Series vs Parallels 4.1 Series Resistor Equation 4.2 Parallel Resistor Equation Ⅴ Examples 5.1 Resistors in Series Example 5.2 Resistor in Parallels Ⅵ Applications Ⅶ Summary 7.1 Resistors in Series Summary 7.2 Resistors in Parallel Summary Ⅷ FAQ Ⅰ Introduction Individual resistors can be commonly connected to three types of circuits such as series, parallel, or a combination of series and parallel connections to form more complex resistor networks, the equivalent resistance of which is the mathematical combination of the individual resistors connected together. A resistor is not only a fundmental electronic component that can be applied to convert a voltage to a current or a current to a voltage but it can also be used to place a different weighting on the converted current and/or voltage by correctly adjusting its value, allowing it to be used in voltage reference circuits and applications. A single equivalent resistor can take place of resistors in series or complicated resistor networks. REQ, or impedance, ZEQ, and regardless of the resistor network's combination or complexity, all resistors follow the same basic rules defined by Ohm's Law and Kirchhoff's Circuit Laws. Resistors in Series | Electricity and Circuits | Don't Memorise Ⅱ Resistor network in Series vs in Parallels 2.1 Resistor in Series When resistors are daisy-chained together in a single line, they are connected in "Series." Because there is no other way for the current flowing through the first resistor to go, it has to pass through the second, third, and so on. The current that flows through one resistor should flow through the others as well because it can only take one path, so resistors in series have a Common Current flowing through them. The current flowing through a series of resistors will then be the same at all points in a series resistor network. As an example: Figure1:Current flowing through a series In the following example, resistors R1, R2, and R3 are connected in series between points A and B, with a common current, I, flowing through them. 2.2 Resistor in Parallels In contrast to the previous series resistor circuit, the circuit current in a parallel resistor network can take more than one path because there are multiple paths for the current. Parallel circuits are then classified as current dividers. Because the supply current can flow through multiple paths, the current may not be the same through all of the parallel network's branches. The voltage drop across all resistors in a parallel resistive network, on the other hand, so it is. Then, parallel-connected resistors have a common voltage across them, as do all parallel-connected elements. Figure2: Circuit current in a parallel Ⅲ Resistor Circuit in Series vs in Parallels 3.1 Resistor Circuit in Series Figure3: Resistor Circuit in series Because the resistors are linked in series, the same current flows through each resistor in the chain, and the total resistance, RT, of the circuit must equal the sum of all the individual resistors added together. That is Figure4: resistance and by taking the individual values of the resistors in our simple example above, the total equivalent resistance, REQ is therefore given as: REQ = R1 + R2 + R3 = 1kΩ + 2kΩ + 6kΩ = 9kΩ 3.2 Resistor Circuit in Parallels Figure5: resistor circuit in parallel The total resistance, RT, of the circuit in the previous series resistor network was equal to the sum of all the individual resistors added together. The equivalent circuit resistance RT is calculated differently for parallel resistors. Instead of the resistances themselves, the reciprocal (1/R) value of each is added together, with the inverse of the algebraic sum giving the equivalent resistance as shown. Instead of the resistances themselves, the reciprocal (1/R) value of each is added together, with the inverse of the algebraic sum giving the equivalent resistance as shown. Ⅳ Equation in Series vs Parallels 4.1 Series Resistor Equation Because it is the algebraic sum of the individual resistances, the total or equivalent resistance, RT, has the same effect on the circuit as the original combination of resistors. If two equal and of the same value resistances or impedances are connected in series, the total or equivalent resistance, RT, is equal to twice the value of one resistor. That is equal to 2R for two equal resistors in series, 3R for three equal resistors in series, and so on. Figure6:Series Resistor Equation If two series resistors or impedances are unequal and of different values, the total or equivalent resistance, RT, is equal to the mathematical sum of the two resistances. R1 + R2 is the answer. The equivalent resistance of three or more unequal (or equal) resistors connected in series is: R1 + R2 + R3 +..., etc. Figure7:Equivalent resistance One important thing to remember about resistors in series networks is to double-check your math. The total resistance (RT) of any two or more resistors connected in series is always greater than the value of the chain's largest resistor. In our previous example, RT = 9k, whereas the largest resistor value is only 6k. 4.2 Parallel Resistor Equation The algebraic sum of the inverses of the individual resistances is the inverse of the equivalent resistance of two or more resistors connected in parallel. If the two parallel resistances or impedances are equal and of the same value, the total or equivalent resistance, RT, is equal to half the value of one resistor. That is R/2 for two equal resistors in parallel, R/3 for three equal resistors in parallel, and so on. Figure8: Resistances or impedances Because the equivalent resistance is always less than the smallest resistor in the parallel network, as more parallel resistors are added, the total resistance, RT, will always decrease. Ⅴ Examples 5.1 Resistors in Series Example Calculate the voltage drops across X and Ya) Without RL connected b) With RL connected Figure9: series example As shown above, the output voltage Vout without the load resistor connected gives us the required output voltage of 6V, but when the load is connected, the output voltage drops to only 4V. (Resistors in Parallel). Then we can see that a loaded voltage divider network's output voltage changes as a result of the loading effect because the output voltage Vout is determined by the R1 to R2 ratio. However, as the load resistance, RL, approaches infinity (), the loading effect diminishes and the voltage ratio of Vout/Vs is unaffected by the addition of the load on the output. Then, as the load impedance increases, the loading effect on the output decreases. Attenuation is the effect of lowering a signal or voltage level, so when using a voltage divider network, it is essential to have cautiousness. This loading effect could be compensated for by using a potentiometer instead of fixed value resistors and adjusting the potentiometer accordingly. This method also compensates the potential divider for variations in resistor tolerances. 5.2 Resistor in Parallels Find the total resistance, RT of the following resistors connected in a parallel network. Figure10: Total resistance The total resistance RT across the two terminals A and B is calculated as: Figure11: Total resistance RT This reciprocal calculation method can be used to calculate any number of individual resistances connected in a single parallel network. If, on the other hand, there are only two individual resistors connected in parallel, we can use a much simpler and faster formula to find the total or equivalent resistance value, RT, and thus help reduce the reciprocal maths a little. Figure12: Single parallel network Ⅵ Applications Series We've seen how Resistors in Series can be applied to generate different voltages across themselves, and how this genre of resistor network can be used to create a voltage divider network. We can convert an analog quantity being sensed into a suitable electrical signal that can be measured by replacing one of the resistors in the voltage divider circuit above with a Sensor such as a thermistor, light-dependent resistor (LDR), or even a switch. Parallel The five resistive networks shown above may appear to be different, but they are all arranged as Resistors in Parallel, and thus the same conditions and equations apply. Ⅶ Summary 7.1 Resistors in Series Summary When two or more resistors are connected end-to-end in a single branch, Reputedly, they are connected in series. Resistors in series carry the same current, but the voltage drop across them is not the same as their resistance values result in different voltage drops across each resistor, as determined by Ohm's Law (V = I*R). Then there are series circuits, which are voltage dividers. Individual resistors in a series resistor network add together to give the series combination's equivalent resistance, (RT). A series circuit's resistors can be swapped without affecting the total resistance, current, or power to each resistor or the circuit. 7.2 Resistors in Parallel Summary When two or more resistors are connected in such a way that their terminals are connected to the terminals of the other resistor or resistors, they are connected in parallel. The voltage across each resistor in a parallel combination is the same, but the currents flowing through them are not because of their resistance value and Ohms Law. Parallel circuits are then used as current dividers. Reciprocal addition is used to find the equivalent or total resistance, RT, of a parallel combination, and the total resistance value is always less than the smallest individual resistor in the combination. Within the same combination, parallel resistor networks can be swapped without changing the total resistance or total circuit current. Resistors connected in a parallel circuit will continue to operate even if one of them is open-circuited. Ⅷ FAQ 1. How do you calculate resistors in series? In a series circuit you will need to calculate the total resistance of the circuit in order to figure out the amperage. This is done by adding up the individual values of each component in series. ... To calculate the total resistance we use the formula: RT = R1 + R2 + R3. 2 + 2 + 3 = 7 Ohms. R total is 7 Ohms. 2. Do you add up resistance in series? How do you know if a series resistor is parallel? The trick is to look at the nodes in the circuit. A node is a junction in the circuit. Two resistor are in parallel if the nodes at both ends of the resistors are the same. If only one node is the same, they are in series. 3. Which resistor gets the most current? which resistor has the most current passing through it? the 5-Ω resistor has the most current passing through it, since I = V/R. 4. What is resistor connected in parallel? Resistors are in parallel if their terminals are connected to the same two nodes. The equivalent overall resistance is smaller than the smallest parallel resistor. Written by Willy McAllister. 5. What happens to resistors in parallel? When resistors are connected in parallel, more current flows from the source than would flow for any of them individually, so the total resistance is lower. Each resistor in parallel has the same full voltage of the source applied to it, but divide the total current amongst them. 6. Why do resistors decrease resistance in parallel? Resistors in parallel In a parallel circuit, the net resistance decreases as more components are added, because there are more paths for the current to pass through. The two resistors have the same potential difference across them. ... The total current in the circuit is the sum of the currents through each branch.
kynix On 2021-10-12
Introduction As we all know, Resistors play a important role in limiting current in the circuit. Among then, pull-up resistors and pull-down resistors are often mentioned and frequently used in electronics. The pull-up is to clamp the uncertain signal to a high logical level through a resistor, which acts as a current limiter; while the pull-down resistor clamps the uncertain signal to a low logical level. Because there are only two states of high level and low level in digital circuits, it is uncertain at the initial stage of digital signals. Pull-up/ Pull-down Resistor - Explained ( with calculation ) Catalog Introduction Ⅰ Why Pull-down and Pull-up Resistor? Ⅱ Pull-up & Pull-down Resistor Circuits Ⅲ What the Role of Pull-up and Pull-down Resistor? Ⅳ Pull-up & Pull-down Resistor Applications Ⅴ How to Select Pull-up & Pull-down Resistors? Ⅵ FAQ Ⅰ Why Pull-down and Pull-up Resistor? Pull-up and pull-down resistors are often applied when interfacing a switch or some other input with a microcontroller or other digital gates. That is, in the initial stage of digital circuit power-on, because the high logical level and low level of the output state are uncertain, in order to make the circuit state normally, a pull-up resistor or pull-down resistor is needed to stabilize the uncertain circuit state. The low logical level is connected to GND inside the IC, and the high level is connected to the super resistance inside the IC.The pull-up resistor connects with the status port of the power supply. Simply put, the high voltage is applied to this point, where the potential will increase. The pull-down resistor means that the resistor is connected to the negative pole, and there is also the case of digital grounding. When the input port signal changes due to different circuit forms, the change will be fed back to the output port, so that the output port acquires a state that should have been completed, but the input port has no signal at this time and keep the original state.According to the above understanding, many people may feel awkward. Take an example from daily life, when you use the key to open the door, people enter but the door is not closed, at this time, you can add a switch to make the door close automatically. Figure 1. Schematic of Pull-up Resistor at Positive Input The above schematic diagram explains why the positive pole and the input terminal resistor can high the level. The two resistances of the port are assumed to be equivalent. We can get that the voltage of the port is 2.5V according to Ohm's law. By connecting the pull-up resistor (red part), the voltage of the port rises at this time, calculate the port voltage. Among them, 10K is connected in parallel with the later connected 1K, and the resistance must be greater than or equal to 1K, which is equivalent to the series relationship between 1K and the 10K resistor below, but the passing current is actually the same. Finally, the voltage of the two 10K resistors increases, and the terminal voltage also increases.The pin connected to the IC and power (or ground) is not necessarily a pull-down resistor. When this happens, many people may think that the red part of the figure is also a pull-down resistor. However, it is not connected in series with any pin or ground. In fact, it is used for circuit startup resistor, not pull-up/pull-down resistor. For the pull-up/pull-down resistors, it is only for the input port and the output port. Although some circuits will connect the pull-up and pull-down resistors to the redundant ports for stability, not all the resistors are connected to one pin of the IC all the time, and the other pin is connected to power or ground to represent the pull-up and pull-down resistors. Ⅱ Pull-up & Pull-down Resistor Circuits Look at the following analyses to figure out what are pull-up resistor and pull-down resistor in circuits. Pull-up resistors are used to ensure that a wire is pulled to a high logical level in the absence of an input, while pull-down resistors ensure the voltage between VCC and a microcontroller pin is actively controlled. Just check the details below. Figure 2. OC(TTL) Circuit,OD(COMS) Circuit When the I/O port of the IC is in high level, the impedance between the node and GND is very large, which can be understood as infinite. At this time, it is connected to VCC through a pull-up resistor (such as 4.7K ohm, 10K ohm resistor), and the voltage divider of the pull-up resistor is almost negligible. When the I/O port node is in low level, it can be directly connected to GND. At this time, VCC and GND are connected through the pull-up resistor, and the current passing through is very small, which can be ignored.The level value are relative to the ground level, so you should refer to the ground level value. See if those pins are connected to the ground, it has nothing to do with whether they are connected to peripheral devices.Connect a 10K ohm or 4.7K ohm pull-up resistor between the node and +5V to pull up the potential of this node. Often this node requires a single-chip microcomputer or other controller to control it (and this node is connected to I/O). If you simply want to make this node a high level, and the output impedance is very large, you can directly connect the power supply, but if the microcontroller wants to make this node low, that is, the node is grounded inside the microcontroller, so that the 5V power supply and the ground are short-circuited.In addition, when this node is required to be at a high level, the impedance between this node and the ground is generally very large. For example, with an impedance of 100K ohms, when connect a 10K ohm pull-up resistor, the voltage at this point is 100KΩ/(100K +10K)*5V=4.5V, so it can also get a high level.When the node is required to be low level, just connect it to the ground, and there is a 10K resistor between the power supply and the ground, so that it will not be short-circuited. When it is low, there is a loop formed by a load between the power supply and the ground. Sometimes this node will be connected with a resistor in series. Because the current flows to the place with low impedance, the current will flow to the ground through the resistor connected to the power supply instead of Flow to this resistance connected to the node, because the resistor connected to this node has a high impedance, so the potential at this point is in low level.It can be considered that, for the I/O port of the IC, controlling the high and low levels inside the IC is equivalent to controlling the O/O port to be connected to its internal GND or a very large resistor, such as 100K ohms. When the I/O port is the low level (0V), inside the IC, the pin that controls the O/O port of the IC chip is connected to GND.When the I/O port is at a high level, such as 5V, the I/O port pin is connected to a very large resistor in the chip, such as 100K ohms, and sometimes another one is connected in series at the I/O node. A resistor with a small resistance value, such as 68 ohms, because the current flows to a place with low impedance, when the I/O port and GND inside the chip are connected to a low level, the pull-up resistor and the GND inside the chip form a loop.At this time, the current at the I/O port node will flow to the GND inside the chip, because a small resistance resistor is connected in series at the node, which is high resistance relative to GND, so the current will not flow through this series resistor.Using a pull-down resistor, when the I/O port is in a high-impedance state, the pull-up resistor can keep it in a high-level state. That is, when the I/O port is in the high-impedance state, using a pull-down resistor to connect this port to GND. The high-impedance state has a large resistance value, which can be understood as disconnection, in fact, it is actually a large resistor inside the chip. The resistors are connected and pulled to the ground, so there is no current and the level value is 0. It can only work unless a high level value is given to this pin. Figure 3. Pull-up and Pull-down Resistor in MCU Ⅲ What the Role of Pull-up and Pull-down Resistor? As for the purpose of pull-up & pull-down resistors, generally speaking, the pull-up resistor increases the current, and the pull-down resistor is used to absorb the current.1) Increase the voltage level.When the TTL circuit drives the CMOS circuit, if the output high level of the TTL circuit is lower than the lowest high level of the CMOS circuit, then it is necessary to connect a pull-up resistor to the output terminal of the TTL to increase the value of the output high level. The OC gate circuit must add a pull-up resistor to increase the high-level value of the output.2) Increase the drive capability of the output pin.In order to enhance the drive capability of the output pins, pull-up resistors are often used on some single-chip pins.3) The N/A pin (the pin not connected) should be anti-static and anti-interference.On the CMOS chip, in order to prevent damage caused by static electricity, the unused pins cannot be left floating. Generally, a pull-up resistor is connected to reduce the input impedance, provide a leakage path, and improve the anti-electromagnetic interference ability of the bus. Because the pin is left floating, it is easier to receive electromagnetic interference from the outside world.4) Resistance matchIn the long-line transmission, the resistance mismatch can easily cause the reflected wave interference. In addition, the pull-down resistor makes the resistance match, which can effectively suppress the reflected wave interference.5) Preset space state/default potentialPull-up or pull-down resistors are connected to some CMOS input terminals to preset the default potential. When these pins are not used, these input terminals are pulled down to low level or pulled up to high level. The state when idle on the bus such as I2C is obtained by the pull-up and pull-down resistors.6) Improve the noise tolerance of the chip input signal.If the input terminal is in a high-impedance state, or in a floating state, a pull-down or pull-down resistor needs to be added at this time, so as to avoid the random level. Similarly, if the output terminal is in a passive state, a pull-down or pull-down resistor needs to be added. For example, the output terminal is only the collector of a transistor, thereby improving the noise tolerance of the chip input signal and enhancing the anti-interference ability through a pull-up resistor or pull-down resistor. Figure 4. Pull-up/ Pull-down Resistor Ⅳ Pull-up & Pull-down Resistor Applications When to use pull-up or pull-down resistors? Look at the following cases explained.1) If a pull-up & pull-down resistor is used for the input signal pin, the usual function is clamping the signal to a certain level to prevent the signal line from appearing in an uncertain state. In practical applications, the 10K ohm resistor is the most used pull-up resistor. Whether to use a pull-up resistor or a pull-down resistor depends mainly on the needs of the circuit system itself. For example, for a highly effective enable control signal, we hope that the circuit system be in an invalid state after power-on, and then a pull-down resistor will be used.Assuming that the enable signal is used to control the motor, if it is left floating, the signal line may be triggered falsely to a high level by other noise interference after power-on (or during operation), resulting in undesired rotation of the motor, and a pull-down resistor can be added at this time. Correspondingly, for the active-low reset control signal (RST#), if we want to be in an inactive state after power-on reset, a pull-up resistor should be used.2) Most chips with logic control functions (such as single-chip microcomputers, FPGAs, etc.) will integrate pull-up or pull-down resistors. Users can choose whether to turn on or not according to their needs. STM32 microcontroller GPIO mode includes pull-up or pull-down.3) According to the resistance value of the pull-up resistor, we can also divide it into strong or weak pull-up/down. The pull-up resistors integrated in the chip are usually weak pull-up (larger resistance), the smaller the pull-up resistance, the stronger the level capability (strong pull), and the stronger the ability to resist external noise (that is, if the unwanted interference noise is to change the strong pull signal level, the required energy must be strengthened accordingly ), but the smaller the pull-up resistance, the greater the corresponding power consumption, because the normal signal requires more energy to change the state of the signal line. In terms of energy consumption, both pull-up /down resistors are the same.4) There is no strict definition of how many ohms are the boundary between strong pull and weak pull. Generally, the pull-up resistors we use are weak pulls, so we can still use external control signals to pull up/down the signal lines as needed.The extreme of the strong pull resistance is the zero, that is, the signal line can directly connected to the power supply or ground.5) There are more knowledge points involved when the pull-up resistor is used as an output (or input and output), but the essential function is also to clamp the level. The most common output pull-up resistor appears in the open collector (OC) Or open drain (OD) structure pin.6) The current sink capability and current source capability are also called the drive capability of the chip pins. For any given chip, the pin drive capability is limited. If the load driven by the pin is large, it may cause the output level to be incorrect (the predetermined level cannot be output).7) OC (OD) pin output structure is different (OC structure exists in the transistor, and OD structure exists in the field effect transistor FET). The output of most comparator chips is an OD/OC output structure, and the signal pins of many chips or modules that feed back the system status are also in this structure, so that users can pull up the level to the corresponding level according to the actual needs of the circuit system. With the power supply voltage VCC, the level conversion can be omitted. Figure 5. Pull up Resistor with Example Ⅴ How to Select Pull-up & Pull-down Resistor? When select pull-up & pull-down resistors, you can consider the following three aspects:1) Considering power saving, sink current capability of the chip should be large enough, the resistance is large and the current is small.2) It is necessary to ensure sufficient drive current, so the resistance is small and the current is large.3) For high-speed circuits, excessive pull-up resistors may have smooth edges.Considering the above three points comprehensively, the resistance value is usually selected between 1K and 10K. The same principle applies to pull-down resistors. Ⅵ FAQ 1. What is pull-down and pull-up resistor?A pull-up resistor connects unused input pins (AND and NAND gates) to the dc supply voltage, (Vcc) to keep the given input HIGH. A pull-down resistor connects unused input pins (OR and NOR gates) to ground, (0V) to keep the given input LOW. 2. What is difference between pull up and pull-down resistor?A pull-up resistor connects unused input pins (AND and NAND gates) to the dc supply voltage, (Vcc) to keep the given input HIGH. A pull-down resistor connects unused input pins (OR and NOR gates) to ground, (0V) to keep the given input LOW. 3. When to use pull-up or pull-down resistors?Pull-up and pull-down resistors are often used when interfacing a switch or some other input with a microcontroller or other digital gates. Most microcontrollers have built-in programmable pull-up and/or pull-down resistors, so fewer external components are needed. 4. What is the function of a pull-up resistor?In electronic logic circuits, a pull-up resistor or pull-down resistor is a resistor used to ensure a known state for a signal. It is typically used in combination with components such as switches and transistors, which physically interrupt the connection of subsequent components to ground or to VCC. 5. What is the purpose of pull-down resistor?What is Pull-down Resistors. Similarly to pull-up resistors, pull-down resistors ensure the voltage between VCC and a microcontroller pin is actively controlled when the switch is open. However, instead of pulling a pin to a high value, such resistors pull the pin to a low valued instead. 6. How do you calculate pull-down resistors?To calculate the pull-down resistor value, it's slightly different from the pull-up resistor value. Knowing that current is 100uA, we'll take 0.5v as our pull-down voltage since the input is 0.8v. Thus, applying our R = V/I once again, but this time we don't have to minus, so our formula remains constant. 7. Why does I2C need pull-up resistor?As discussed in the I2C Basics module, the resistors that are commonly seen on I2C circuits sitting between the SCL and SDA lines and the voltage source are called pull up resistors. ... A pull up resistor is used to provide a default state for a signal line or general purpose input/ouput (GPIO) pin. 8. Which port has no built in pull-up resistor?Input/Output (I/O) pin − All the circuits within the microcontroller must be connected to one of its pins except P0 port because it does not have pull-up resistors built-in. 9. What is pull up and pull down in Arduino?Introduction: Understanding the Pull-up/Pull-down Resistors With Arduino. ... With a pull-up resistor and with the button unpressed you make a logic state ON and with the button pressed you make a logic OFF. With a pull - down resistor and a pressed button you make an ON logic state and OFF logic state when its unpressed. 10. What happens if the pull up resistor for an I2C signal is too small?Too small of a value will once again prevent the output drivers from sinking enough current to pull the pin all the way down to 0.
kynix On 2021-10-07
Introduction A resistor is a passive two-terminal electrical component. After it is connected to the circuit, the resistance is fixed, which can limit the current through the branch connected to it. On one hand, the resistance that cannot be changed is called a fixed resistor, on the other hand, the resistances of potentiometers or variable resistors are changeable. The main physical characteristic of a resistor is to transform electrical energy into thermal energy. It can also be said that it is an energy-consuming element, because internal energy is generated when current passes through it. Figure 1. Use Resistor in Circuit Catalog Introduction Ⅰ Functions of Resistor Ⅱ Three Basic Principles for Resistor Selection Ⅲ The Role of Resistors in Transistor Circuits 3.1 Why Should a Resistor Be Added to the Base of the Transistor? 3.2 Pull-down Resistor in Transistor Circuits Ⅳ FAQ Ⅰ Functions of Resistor In short, the function of resistance is to limit current, divide current, divide voltage, and convert electric energy into internal energy (heating) in the circuit. According to Ohm's law, through calculations, resistors in parallel and series connections can be used to achieve the desired current and voltage. Also there are different resistors and switches combined to produce voice-activated switches, photosensitive switches, infrared switches and so on. How to Use Resistors in circuits? 1) Limit CurrentIn order to prevent the components connected in series from being burnt out by the excessive current and to ensure the normal operation of the electrical appliances, a variable resistor can usually be connected in series in the circuit.2) Current DiversionThe resistor is connected in parallel to the component or circuit that needs to be shunted, and the voltage does not change. The function of this resistor is to divide current.3) Voltage DiversionGenerally, electrical appliances are marked with a rated voltage value. If the power supply is higher than it, the electrical appliance cannot be directly connected to the power supply for a normal operation. In this case, a resistor with suitable resistance can be connected in series in the circuit to share a part of the voltage, therefore the electrical appliance can work at the rated voltage. At this time, the role of the resistor is to divide the voltage.4) Provide Bias VoltageIn the transistor circuit, the resistor is connected between the base of it and the working voltage. At this time, the power supply provides a bias voltage to the base through the resistor, and the resistance can determine the bias voltage. The role of the resistor in the circuit at this time is to provide a bias voltage.5) Negative FeedbackUsed in the resistance between the base and collector of the transistor, then the feedback branch of the negative feedback circuit is formed in the circuit. At this time, the resistor plays a negative feedback role in the circuit.6) OscillationResistor and capacitor form an RC circuit, which can be combined in parallel and in series.7) Damping EffectConnecting a resistor in parallel in the LC resonant circuit can reduce the Q value, at this time, resistor plays a damping effect.8) DecouplingThe use of resistors in multi-stage amplifier circuits can prevent harmful low-frequency interference, which play a decoupling effect.9) Convert Electrical Energy into Internal Energy (Heating)When the current passes through the resistor, it will convert all (or part) of the electrical energy into internal energy, which will generate heat. This principle is often used in electric stoves and heaters in our lives.10) Convert Current into VoltageWhen current flows through the resistor, a voltage will be generated across the resistor. As shown in the figure below, the collector load resistor R2 plays this role, converting the current flowing through the resistor R2 into a voltage and outputting it from U0. Figure 2. Resistor Circuit Ⅱ Three Basic Principles for Resistor Selection 1) Choose resistors that are manufactured by a certification body that implement high-level standards.2) Choose resistors produced by manufacturers with functional advantages, quality advantages, efficiency advantages, price advantages, and service advantages.3) Choose a manufacturer that can meet the above-mentioned requirements in the model catalog. Ⅲ The Role of Resistors in Transistor Circuits 3.1 Why Should a Resistor Be Added to the Base of the Transistor? First of all, we must understand the basic principle of the transistor. It is a current-controlled element, which is different from the MOFET, a voltage-controlled element. The transistor has three working areas: cut-off area, amplification area and saturation area. Take NPN transistor as an example, the voltage difference(UBE)of BE is about 0.6V (the actual size depends on the model of the component). When UBE<0.6V , the transistor is off; when UBE=0.6V, the transistor is in the amplification or saturation region. Figure 3. Schematic Diagram of the NPN Transistor Current When the transistor is in the amplification area, the added resistance between the base and VCC is a bias resistance. The following explains why the base should be added when the transistor is used as a switch. What is the difference between transistor and MOSFET circuits when adding a resistor.The following figure is the most commonly used circuit diagram of NPN transistors. The common input terminal is the I/O port of the microprocessor (microcontroller, DSP, ARM, etc.). Figure 4. NPN Transistor Take the microcontroller I/O port with 0/5V input as an example. Why must a resistor be connected in series with the base? Can it work without a resistor? Here the resistor is a current control element. When the transistor is in an amplified or saturated state, the voltage of the UBE is 0.6V, and the base current can be calculated according to the input voltage U. The calculation formula is Ib=(U-0.6 )/R1. It can also be seen from the formula that if the current limiting resistor R1 is not connected, when the input voltage is greater than 0.6V, the base current will be very large to burn the tube.Moreover, the resistor cannot be used casually. It needs to be calculated according to the input voltage and the characteristics of the tube. For example, the amplification factor β of the transistor is 50, the maximum current of the collector is 500mA, and the input voltage is 5V. If the design requires the transistor to be in a saturated state, then Ic=500mA, Ib=Ic/β=10M=mA, where the current-limiting resistance R1=(5V-0.6V)/Ib=430Ω. If it is required to input 5V, the collector current is about 200mA, then Ib=Ic/β=200mA/50=4mA can be calculated, finally the current-limiting resistance R1=(5V-0.6V)/Ib=1075Ω (1K can be selected Standard resistance). Note: The above figure is used to explain the example, but it is not very reliable. A more reliable connection method should be to connect a large resistor (such as 10K, or 20K) between the base and the ground. When there is no input, pull the base down quickly to ensure that the tube is in a stable cut-off state.If the NPN transistor in the figure above is replaced with an N-channel MOS tube, the principle is the same. When a high level is input, the tube is turned on, and when a low level is input, the tube is turned off. Figure 5. MOSFET Circuit Since the MOSFET is a voltage-controlled device, the current of the gate (G) is very small and can be ignored, so it can work normally without connecting the resistor R1.The figure after remove the resistor is shown in the below: Figure 6. MOSFET Circuit without Resistor Note: In actual applications, a resistor is generally connected in series to improve reliability. The product reliability is very important. Without current-limiting resistor, when the MOS is damaged by voltage breakdown, the components on the control terminal will be affected easily, especially the processor, is easily damaged by high current. 3.2 Pull-down Resistor in Transistor Circuits 🔺For TransistorsThe transistor is a current-type driving component, so a current-limiting resistor is connected to the base, generally less than 10K, and the typical values are 3.3K, 4.7K, 5.1K, 6.8K, etc. What is the function of this pull-down resistor?The following figure shows the transistor 8050 switching circuit. The transistor will be turned on when the I/O port outputs a high level, and the transistor will not be turned on. If the I/O port does not output a high level, the base will always be pulled low without a 68K pull-down resistor, that is to say it is in the cut-off state. The circuit may be in an unstable state, especially when it is initialized at the moment of power-on. It is easy to generate noise and easily cause the transistor to malfunction, especially for some general input/output ports. Therefore, this resistor is actually a bias resistor, which makes the base to be pulled down when there is no driving signal, making the circuit more reliable. Figure 7. Pull-down Resistor in Transistor Circuit Although the pull-down resistor can make the circuit more reliable, tit cannot be too large or too small. If the resistance too large, the base current will not be enough to drive the transistor. On the contrary, if it is too small, the bias voltage will be less than the transistor conduction voltage. In general, this resistance is not more than 100K.Sometimes we see that a capacitor is connected in parallel with this resistor. In fact, this is generally designed in high-speed signal switching circuits. Adding a capacitor can improve performance, as shown below: Figure 8. RC Circuit 🔺For MOSFETUnlike transistors, MOS transistors are voltage-controlled components, which are driven by voltage. We all know that there is parasitic capacitance between the two pins of MOS transistors. In fact, the key of MOS transistors’ conduction is the charging and discharging of capacitors. Therefore, for the N-type MOS, it will be turned on when Vgs is greater than a certain value, but for the P-type MOS, it will be turned on when the value of Vgs is less than a certain value.Therefore, due to the capacitive effect between the three pins, when the MOS is constantly turned off, the parasitic capacitance voltage can be properly discharged, which is similar to the role of a bleeder resistor and is a kind of protection for the MOS. Figure 9. MOSFET Circuit Ⅳ FAQ 1. What is the function of the resistor?A resistor has the ability to reduce voltage and current when used in a circuit. The main function of a resistor is to limit current flow. Ohm's law tells us that an increase in a resistors value will see a decrease in current. 2. How do resistors work?A conductor has low resistance, while an insulator has much higher resistance. Devices called resistors let us introduce precisely controlled amounts of resistance into electrical circuits. ... A resistor works by converting electrical energy into heat, which is dissipated into the air. 3. Why do you need resistors?A resistor controls the flow of the electrical current within a circuit. ... Resistors are essential to many electoral circuits, and they can be applied to a myriad of different applications. Protect against voltage spikes. Resistors also protect components against voltage spikes. 4. What role do resistors play in electronic devices?A resistor is a passive two-terminal electrical device that resists the flow of current. It is probably the simplest element in an electronic circuit. It is also one of the most common components as resistance is an inherent element of nearly all electronic circuits. They are usually color-coded. 5. What is a good example of a resistor?A few examples include limiting electric current, voltage division, heat generation, matching and loading circuits, gain control, and setting time constants. They are commercially available with resistance values over a range of more than nine orders of magnitude. 6. What happens if I use a higher ohm resistor?The cases where using a higher value resistor will damage a circuit exist, but are a bit less usual than the cases where it may simply produce a weaker result than desired, or a different frequency response than desired. 7. What is a resistor simple explanation?A resistor is an electrical component that limits or regulates the flow of electrical current in an electronic circuit. Resistors can also be used to provide a specific voltage for an active device such as a transistor. ... The most common type in electronic devices and systems is the carbon-composition resistor. 8. What happens when a resistor blows?Blowing Up a Resistor. By applying too high a voltage to a resistor, the resistor will draw too much current. This causes excessive power to be dissipated in the resistor which makes it go up in flames and a cloud of smoke as this video shows. 9. How is a resistor connected in a circuit?Resistors are said to be connected in “Series”, when they are daisy chained together in a single line. Since all the current flowing through the first resistor has no other way to go it must also pass through the second resistor and the third and so on. 10. Do resistors change voltage?The larger the resistor, the more energy used by that resistor, and the bigger the voltage drop across that resistor. Ohm's Law can be used to verify voltage drop. In a DC circuit, voltage equals current multiplied by resistance. V = I R.
kynix On 2021-09-24
IntroductionThe Temperature Sensor, a measuring instrument, uses various physical properties of a substance to convert the thermal quantity into the physical quantity, including expansion, resistance, capacitance, electromotive force, magnetic properties, frequency, optical characteristics and thermal noise. Many materials and components change with temperature, so there are quite a few materials that can be used as temperature sensors. Here are four temperature sensors in detail.Temperature Sensors ExplainedCatalogIntroductionⅠ Temperature Sensor Types Overview1.1 What is Thermocouple?1.2 What is Thermistor Sensor?1.3 What is Resistance Temperature Detector (RTD)?1.4 What is IC Sensor?1.5 Temperature Sensor Cons and ProsⅡ How to Test: Measuring IndexesⅢ FAQⅠ Temperature Sensor Types OverviewThere are many types of temperature sensors, which can be divided into contact type and non-contact type according to the measurement method; thermistor and thermocouple according to the characteristics of sensor materials and electronic components.The contact temperature sensor needs to maintain thermal contact with the measured medium, so that the two can perform sufficient heat exchange to reach the same temperature. This type of sensor mainly includes resistance type, thermocouple, PN junction temperature sensor and so on. The non-contact temperature sensor does not need to be in contact with the measured medium, but achieves the purpose of temperature measurement through the heat radiation or convection of the measured medium.Here is a detailed introduction to the commonly used four: Thermocouples, Thermistors, Resistance Temperature Detector (RTD), IC Sensor.Figure 1. Temp Sensors (Resistance Changes with Temperature)1.1 What is Thermocouple?Thermocouples are the most commonly used temperature sensors in measurement. Its main advantages are wide temperature range and adaptability to various atmospheric environments, and it is strong, low in price, does not require power supply, and is also the cheapest. The thermocouple consists of two different metal wires connected at one end. When one end of the thermocouple is heated, there is an electric potential difference in the thermocouple circuit, and the measured electric potential difference can be used to calculate the temperature.Figure 2. Metal JunctionsThe thermocouple sensor has two contacts. The measurement end (sometimes called the hot end) is where the two metals connect. The reference junction (also called the cold end) is connected to the measurement circuit. When there is a temperature difference between two ends, an mV signal proportional to the temperature difference is generated. The mV value increases with increasing temperature. The relationship between mV and temperature is non-linear.The thermocouple connector can be constructed by connecting the thermal junction to the outer sheath for grounding or ungrounding (insulating from the sheath). A grounded thermocouple responds faster, but the thermocouple will contact the processing voltage. Therefore, it is important to isolate the measurement circuit to prevent the formation of ground loops and to avoid measurement errors.Figure 3. Thermocouple for Temperature MeasurementInside the temperature component, the thermocouple is usually embedded in magnesium oxide (MgO) and a metal sheath, then insert it into the thermowell or protective tube. This helps protect the sensor from environmental pollution. When magnesium oxide is contaminated with water and salt, even thermocouples that are not grounded will eventually be grounded.As above mentioned, the relationship between voltage and temperature is nonlinear, so it is necessary to make a second measurement for the reference temperature (Tref), and use the test equipment software or hardware to process the voltage-temperature conversion inside the instrument to finally obtain the thermocouple temperature (Tx). Thermocouple is the simplest and most versatile temperature sensor, but its sensitivity is relatively low, which is easy to be affected by environmental interference signals, and the temperature drift of the preamplifier. So it is not suitable for measuring small temperature changes, that is, it is not suitable for high-accurate measurement and application.In actual use, the thermocouple measuring circuit can measure any temperature except 0°C. The measuring circuit must measure the temperature of the cold junction and restore the temperature to 0°C. This kind of electrical compensation is called cold junction compensation (or reference junction compensation). Most thermocouple measurement circuits do this.If the application requires a thermocouple instead of a thermistor, a higher-grade thermocouple is better. In addition, their cost difference is small, and high-quality wire can provide higher stability.🔺Table 1: Thermocouple Types and Application RangesThermocouple TypeApplication Range (℃ / ℉)E95-900℃ (200-1650℉)J95-760℃ (200-1400℉)K95-1260℃ (200-2300℉)N95-1260℃ (200-2300℉)R870-1450℃ (1600-2640℉)S980-1450℃ (1800-2640℉)T0-350℃ (32-660℉) 1.2 What is Thermistor Sensor?The main component of the thermistor sensor is the thermistor, which absorbs heat radiation around.Thermistors are made of semiconductor materials, mostly with a negative temperature coefficient, that is, the resistance decreases with increasing temperature. Temperature changes will cause large resistance changes, so it is the most sensitive temperature sensor. However, the linearity of the thermistor is extremely poor and has huge effects with the production process. So the manufacturer cannot give a standardized thermistor curve.The thermistor is very small and responds quickly to temperature changes. But it needs to use a current source, and its small size also makes it extremely sensitive to self-heating errors.Figure 4. Thermistor SensorThe thermistor measures the absolute temperature on the two lines, with better accuracy, but it is more expensive than a thermocouple, and the measurable temperature range is also smaller than that of a thermocouple. A commonly used thermistor has a resistance value of 5kΩ at 25°C, and a temperature change of 1°C causes a resistance change of 200Ω. Note that the lead resistance of 10Ω only causes a negligible error of 0.05°C. It is very suitable for current control applications that require fast and sensitive temperature measurement. Small size is benefit for applications with space requirements, but care must be taken to prevent self-heating errors.Figure 5. Resistance-TemperatureThe thermistor also has its own measurement tips. With small size, it can quickly stabilize, and will not cause thermal load. However, it is not strong enough, and large currents can cause self-heating. Since the thermistor is a resistive device, any current source will cause heat on it due to power. Power is equal to the product of current squared and resistance. Therefore, a small current source must be used. If the thermistor is exposed to high heat, it will cause permanent damage. 1.3 What is Resistance Temperature Detector (RTD)?RTD is a precision temperature sensor, made of high-purity conductive metal (such as platinum, copper or nickel) or alloy. Its resistance increases with increasing temperature and decreases with decreasing temperature, similar to a thermistor. RTD is like a thermoelectric converter, converting temperature changes into voltage changes. By passing a constant temperature current through the temperature sensor, an output voltage that increases linearly with temperature can be obtained. The most suitable metal for RTD is a pure metal that remains stable within a given temperature range. The resistance-temperature change relationship is preferably linear. The larger the temperature coefficient (it is defined as the resistance change caused by unit temperature), the better, and it must be able to resist thermal fatigue and respond sensitively to temperature changes. A typical RTD has a protective sleeve and a probe. The protective sleeve is mainly used to protect the RTD from being damaged by the measured medium, which is usually made of stainless steel, carbon steel, inconel or cast iron, and its use temperature can reach 1100°C.Figure 6. Resistance Temperature Detector (RTD)It is currently the most accurate and stable sensor, and its linearity is better than thermocouples and thermistors. However, RTD is also a temperature sensor with slow response speed and more expensive price. So it is most suitable for applications that have strict requirements on accuracy, but speed and price are not critical. 1.4 What is IC Sensor?IC sensors can work in a temperature range of -55°C to +150°C, and precise one can operate at temperatures up to +200°C. It is commonly used in fitness tracking applications, wearable products, computing systems, data loggers, and automotive applications. The most common integrated IC temperature sensors are analog output devices, digital interface devices, remote temperature sensors, and those integrated ICs with thermostat functions.Figure 7. IC Sensors (Thermometer)Analog output devices (usually output voltage, but some also output current) are most like passive solutions when they need an ADC to process the output signal. Digital interface devices most often use a two-wire interface (I2C or PMBus) and have a built-in ADC. In addition to including a local temperature sensor, remote temperature sensors also have one or more inputs to monitor the remote diode temperature—they are most often placed in highly integrated digital ICs (for example, processors or field programmable gate arrays FPGA). When reached the temperature threshold, the thermostat can provide a simple alarm.Here are the details of two common types:🔺Analog Output Temperature SensorThe integrated sensor is made using silicon semiconductor integration process, so it is also called a silicon sensor or a monolithic integrated temperature sensor. It is a dedicated IC that integrates a temperature sensor on a chip and can take temperature measurement and then output analog signals. The main features of this sensor are single function (only measuring temperature), small temperature measurement error, low price, fast response speed, long transmission distance, small size, micro power consumption, etc., which are suitable for long-distance temperature measurement, control and measurement. What’s more, non-linear calibration doesn’t required, and the peripheral circuit is simple.🔺Digital Output SensorDigital temperature sensor is the product of microelectronics technology, computer technology and automatic test technology (ATE). The intelligent temperature sensor contains temperature sensor, A/D converter, signal processor, memory (or register) and interface circuit. Some products also come with multiplexers, central controller, random access memory and read-only memory. The characteristic of the intelligent temperature sensor is that it can output temperature data and related temperature control quantities, adapts to various microcontrollers (MCU). It realizes the test function through software on the basis of hardware, and its intelligent harmony also depends the level of software development.1.5 Temperature Sensor Cons and Pros🔺Table 2: Advantages and Disadvantages of thermocouples, RTDs, thermistors and IC sensors.CriteriaThermocoupleRTDThermistorIC SensorTemperature-250℃ to +750℃-100℃ to +500℃-267℃ to +2316℃-55℃ to +200℃AccuracyBestDepends on calibrationGoodGoodLinearityGoodWorstGoodBestSensitivityLessBestWorstGoodCircuityComplexDepends on accuracy/power requirementsComplexSimplestPower ConsumptionHigh when takingLow-highLowest Ⅱ How to Test: Measuring Indexes1) Measurement accuracy: 0.01 level2) Resolution 0.1uV and 0.1mΩ3) Scan switch parasitic potential: ≤0.4μV4) Temperature range: Water tank: (room temperature +5~95)°C; Oil tank: (95 ~ 300)°C; Low & constant temperature bath: (-80 ~ 100)°C; High temperature furnace: (300~1200)°C5) Temperature control stability: better than 0.01℃/10min (oil tank, water tank, low temperature constant temperature tank); 0.2℃/min (tube type verification furnace)6) Total uncertainty: For thermocouple verification, measurement uncertainty is better than 0.7 ℃, repeatability error <0.25 ℃; For thermistor verification, measurement uncertainty is better than 50 mk, repeatability error <10 mk7) Working power supply: AC220V±10%, 50Hz, and well protected grounding.8) High temperature furnace power: about 2kW9) Constant temperature bath power: about 2kW10) Power of microcomputer measurement and control system: <500 Ⅲ FAQ1. What is temperature sensor and how it works?How do temperature sensors work? They are devices to measure temperature readings through electrical signals. The sensor is made up of two metals, which generate electrical voltage or resistance once it notices a change in temperature. ... Temperature is the most common physical measurement type in industrial applications. 2. What happens when a temperature sensor goes bad?If the coolant temperature sensor goes bad it can send a false signal to the computer and throw off the fuel and timing calculations. ... This will cause the computer to think the engine is cold, even when it is not, and as a result will use more fuel than necessary. 3. Which temperature sensor is best?The most well-known are Pt100 (with a resistance of 100 ohms at 0°C) and Pt1000 (with a resistance of 1,000 ohms at 0°C). The Pt1000 offers better accuracy and a larger tolerance to long wire lengths than the Pt100. Compared to thermocouples, resistance sensors offer better accuracy and a more linear response. 4. What is the application of temperature sensor?Within our homes, temperature sensors are used in many electrical appliances, from our refrigerators and freezers to help regulate and maintain cold temperatures as well as within stoves and ovens to ensure that they heat to the required levels for cooking, air confectioners/heaters. 5. How do I know if my temperature sensor is bad?What Signs May Signal Your Coolant Temperature Sensor May Be Failing.Poor Fuel Economy.Irregular Temperature Readings.Black Smoke from Your Exhaust.Your Engine is Overheating.Your Check Engine Light is On. 6. How important sensors are nowadays?Intelligent sensor systems are omnipresent in our everyday lives. They provide security, save lives and improve our quality of life. As more and more areas of life are automated and networked, the importance of innovative sensor technologies will also increase in the future. 7. What should I consider when choose a temperature sensor?Several factors must be considered when selecting the type of sensor to be used in a specific application: temperature range, accuracy, response time, stability, linearity, and sensitivity. 8. What is the value range of a temperature sensor?The effective operating range is -50 to 250 °C for glass encapsulated thermistors or 150°C for standard thermistors. 9. What are the pros and cons thermocouple?Advantages and disadvantages of thermocoupleAdvantages of thermocouple: Simple working principle, Short response time, Low price, Wide temperature ranges, Rugged construction, Self-powered, Small size.Disadvantages of thermocouple: Nonlinearity, Accuracy, Interference can cause errors. Old technology, Needs calibration, Corrosion. 10. What is difference between PT100 and RTD?There is no difference a PT100 is a version of a RTD (resistance temperature detector). What is an RTD? A resistance temperature detector, also known as an RTD or resistance thermometer, is a type of temperature sensor. ... A PT100 sensor is the most common type of Resistance Thermometer (RTD).
Lydia On 2021-09-23
CatalogⅠThe Definition of Fuse Box1.1 What is the fuse box1.2 History and problem of Fuse Boxes1.3 The working principle of fuse boxⅡ The fuse box in a carⅢ How to Replace Fuse Box?Ⅳ The difference of fuse box in UK and North America4.1 United Kingdom4.2 North AmericanⅤFuse Box vs Circuit Breaker5.1 What is the Circuit Breaker5.2 The Difference and ApplicationⅥ Frequently Questions About Fuse Box ⅠThe Definition of Fuse Box1.1 What is the fuse boxFuse boxes are metal boxes that hold fuses, which are safety devices that shut off power when the fuse's design is exceeded. Fuses function by passing an electric current through a metal strip. If the electrical current exceeds the metal strip's limitations, the strip melts and the power is out of work.Figure1: What does the fuse box look like? 1.2 History and the problem of Fuse Boxes Before the 1960s, fuse boxes were commonly installed in homes. The majority of them have now been replaced with electrical panels.Fuse boxes are likely unmaintained and have numerous electrical wiring issues, such as cloth wiring or knob & tube, due to their age.Furthermore, because fuses had to be replaced every time one blows, many electricians upgraded/recommended that homeowners install electrical panels. Finally, fuses quickly earned a bad reputation among insurance companies due to homeowners replacing fuses with sticks of copper or larger-than-necessary fuses in order to stop blowing fuses. If the overloaded current continues to flow rather than being shut off, replacing fuses with oversized fuses or pieces of copper can quickly become hot and start a fire. 1.3 The working principle of fuse boxFuse boxes can protect electrical circuits from damage and short circuits caused by exposure to the elements. Fuses are applied to control and protect electrical currents flowing through wires to electrical components.The fuse is connected to a central fuse box, which houses the wiring for the entire home's electricity. Under normal conditions, the fuse allows electricity to freely pass between circuits across the filament. Ⅱ The fuse box in a car Fuse boxes in automobiles consist of engineering plastics such as PVC and PBT. Each material has varying degrees of resistance to high temperatures. Automotive fuse boxes required high-temperature materials because some automotive fuse boxes have to be installed in the engine compartment due to the high temperature during operation. In order to choose the correct fuse box, we should consider the current size of the car fuse used, the size requirements of the fuse, and the raw materials. The majority of vehicles have two fuse boxes. One is in the engine compartment to safeguard engine components such as the cooling system, anti-lock brake pump, and engine control unit. The other is usually located inside or beneath the dashboard on the driver's side of the cab to protect the internal electrical equipment. Avoiding the influence of external factors, the fuse box is equipped with various fuses and relays in a convenient location. Unless the vehicle has significant physical damage or electrical problems, it is usually unnecessary to replace the fuse box. This vedio shows that how to replace fuse box in a vehicle Ⅲ How to Replace Fuse Box?Materials Needed• Owner's manual• Socket set and wrench• Screwdriver set• Pen and tape for labeling wires (optional but recommended) Step 1: Unplug the battery cable. Disconnect the negative terminal from the battery. As a result, no electricity will flow through the system during the installation process.Set the negative cable aside in a location where it will not come into contact with any metallic objects. Figure2: battery cable Step 2: Find and open the fuse box. Locate the fuse panel by opening the hood. It will have a cover over the fuses that you must remove to gain access to the panel.Nota bene: On most makes and models, the fuse function diagram is located on the inside of the panel's lid. It may come in handy at some point. Figure3:Locate the fuse box Step 3: Turn off the fuse box's power supply. Locate and disconnect the power supply to the fuses once the lid has been removed and set aside.It's possible that the power supply is routed through the bottom. In that case, skip stepping 4 to remove the fuse box housing to gain access to the wires, then return to step 3 before continuing.It is most likely a single or set of red wires connected to a terminal via a bolt, similar to the battery. Remove the connections and set them aside.Note: You may want to tape and label them for ease of reinstallation. Figure4:power supply Step 4: Unplug the panel's housing. Remove any bolts that are holding the fuse box in place.They will be located around the perimeter and perhaps different lengths, so pay attention to where each bolt is located as you remove it.Keep bolts in a secure location while working. What is more, keep the bolts together with a magnetic tray, plastic bag, or container until you need them again. Figure5: the panel's housing Step 5: Unplug the wiring harnesses and label them. After removing the housing, you'll notice that there are more wires connected to the fuse box and routed to the various systems and sensors they protect. Begin removing them one by one.As you disassemble the panel, it is highly recommended that you label them properly using the fuse diagram. It reduces confusion and protects you from replacing parts that will be damaged by crossed wires. Figure6: fuse diagram Step 6: Confirm replacement and fuse transfer. The replacement of fuse box should be rated and designed specifically for your vehicle. Figure7: the panel's housing Examine both parts to ensure that your replacement is a perfect match. After you've confirmed this, installing with labeled wires should be a breeze.Use the fuses from the old box if you don't have new fuses and relays for the panel. Make sure that you place them in the exact location for which they are rated. Look to the cover of your panel for guidance on this. Figure8: check the faulty Note: Before you decide to reuse your fuses, make sure they are in good working order. Look for a broken filament inside the fuse's viewing window. If it is discolored or broken, the fuse is faulty, and you will need to replace it. Step 7: Reconnect all of the system's wires. After you've installed the fuses, you can begin reconnecting the various wires to all of the systems that the fuses protect.Begin with any in the most difficult-to-reach positions and finish with the easiest ones.If you labeled the wires as you disconnected them, compare the label to the diagram and reconnect the wires. Crossing these wires can result in permanent damage to the systems to which they are connected.Different systems and fuses are rated for varying amperages. After reconnecting the wires, double-check that they are securely connected. Ⅳ The difference of fuse box in UK and North America4.1 United KingdomOlder electrical consumer units (also known as fuse boxes) in the United Kingdom are installed with either semi-enclosed (rewirable) fuses (BS 3036) or cartridge fuses (BS 1361). (Consumers usually received short lengths of 5 A-, 15 A-, and 30 A-rated wire wound on a piece of cardboard.) Modern consumer units typically use miniature circuit breakers (MCBs) rather than fuses, though cartridge fuses still worked in some applications where MCBs are prone to nuisance tripping. 4.2 North AmericanFuse boxes were used in buildings wired before 1960 in North America. These Edison base fuses, like Edison-base incandescent lamps, would screw into a fuse socket. 5 amperes, 10 amperes, 15 amperes, 20 amperes, 25 amperes, and 30 amperes were Later fuse boxes included rejection features in the fuse-holder socket, commonly known as Rejection Base (Type S fuses), which have smaller diameters that vary depending on the rating of the fuse, to prevent the installation of fuses with an excessive current rating. This means that only the preset (Type S) fuse rating can be used to replace fuses.This is a tri-national North American standard (UL 4248-11, CAN/CSA-C22.2 NO. 4248.11-07 (R2012), and NMX-J-009/4248/11-ANCE). By screwing in a tamper-proof adapter, existing Edison fuse boards can be easily converted to only accept Rejection Base (Type S) fuses. This adapter screws into the existing Edison fuse holder and has a smaller diameter threaded hole to accept the Type S rated fuse. ⅤFuse Box vs Circuit Breaker5.1 What is the Circuit BreakerA circuit breaker is another genre of safety device that has an internal switch mechanism that tripped automatically in the case of an electrical surge. An electromagnet or a bimetallic strip connected to a simple switch is applied to the basic residential circuit breaker.When the switch is ON, an electrical current can flow from a bottom terminal to an upper terminal. Unsafe levels of electrical current in an electromagnet generate a magnetic force strong enough to turn a metal lever in the switch to OFF, breaking the current. Bimetallic strips consist of two strips of two different metals; excessive current causes the thinner of the two strips to bend, causing the switch to be thrown to the off position and the connection to be broken.Circuit breakers, unlike fuses, can be reused. To re-establish the flow of electricity to the home, simply turn the circuit breakers back to the ON position. This simple switch action makes it simple to manually turn off electricity to individual circuits when working on the wiring in a specific part of the home. 5.2 The Difference and ApplicationFuses are generally more inexpensive and Many hardware stores can purchase them. However, circuit breakers have other applications as well, protecting against more than just overheating, such as against electric shock as well.Check out the main differences and applications in the table below, based on practical factors like operation time and functionality.CharacteristicsFuse Box Circuit BreakerFunctionDetection&interruptionInterruption OnlyOperation PrincipleBased on a conducting material’s healing propertyBased on an electromechanical principle – a switching mechanismOperation Mode• Completely automatic• Needs manual replacement after the operation • Needs comprehensive equipment (relays) for automatic operation• Resets quickly after the operationResponse Time~ 0.002 seconds0.1-0.2 secondsBreaking CapacitySmallLargeRepresentationProtection Protects against overload Protects against overload & short-circuits ApplicationLow current electronic equipmentLarge current power equipment Ⅵ Frequently Questions About Fuse Box 1. Is a fuse box necessary?Fuses leave more room for DIY errors.Putting a larger size fuse in the box than what it is equipped for can lead to electrical fires. Since circuit breakers do not need to be replaced, they do not have the same danger. 2. What is the fuse box called?consumer unitA fuse box, also sometimes known as a consumer unit, should be easy to find and is where the electricity in your home is controlled and distributed. 3. How long does a fuse box last?It is a potential lifesaver as it can detect small leakage currents in the range of 5–30 mA and can disconnect in less than 300ms which may prevent electrocution and injury. If your fuse box is greater than 25 years old it may not have an RCD. 4. Which is better fuse box or circuit breaker?In terms of circuit breaker vs fuse box, a circuit breaker is more advanced and can be used over and over again. While they don't respond as quickly as fuses, circuit breakers do not have to be replaced. The exception, of course, is replacing older or outdated circuit breakers. 5. Are fuse boxes still legal?Fuses have not been installed in homes for many decades. Electrical codes change every three years to continually improve the safety of electrical systems that are installed. As a result, no fuse panel currently in use in any home in the United States would comply with minimum code standards in effect today.
kynix On 2021-08-18
IntroductionPrinted Circuit Board(PCB) is a board of most modern electronic devices that has lines and pads that connect various points together. Even if it is a small board, its manufacturing process is very cumbersome and exquisite. Here will introduce the PCB manufacturing process steps by steps with pictures and video.How is PCB made?The following are the detailed PCB producing processes:IntroductionStep 1. PCB CAD FileStep 2. Plate ProductionStep 3. PCB Inner LayersStep 4. Board Punching and CheckingStep 5. LaminationStep 6. DrillStep 7. Copper Chemical Precipitation on the HolesStep 8. PCB Outer LayersStep 9. Computer Control and Copper ElectroplatingStep 1. PCB CAD FileThe first step in PCB production is to organize and check the PCB layout. The PCB manufacturers get the CAD files from the PCB design company, and they will convert them into a unified format-Extended Gerber RS-274X or Gerber X2, because each CAD software has its own unique file format. Then the electronic engineers will check whether the PCB layout conforms to the manufacturing process, and whether there are any defects and other issues.Figure 1. PCB CAD FileWhen making a PCB at home, the PCB layout can be printed on paper with a laser printer, and then transferred to the copper clad laminate. During the printing process, because the printer is prone to lack of ink and breakpoints, it is necessary to manually fill up the ink with an oil-based pen. Figure 2. PCB Laser PrintingHowever, the factory generally uses photocopying to print the PCB layout on the film. If it is a multi-layer PCB, the layout film photocopied on each layer will be arranged in order.Figure 3. PCB Film Arranged in OrderThen the film will be punched with alignment holes. Alignment holes are very important, which is essential to align the materials of each layer of the PCB.Step 2. Plate ProductionClean the copper plate. If there is dust, it may cause the final circuit to be short-circuited or broken.Figure 4. Clean the Copper PlateThe figure below is an example of an 8-layer PCB, which is actually made up of 3 copper clad laminates plus 2 copper films, and then glued them together with prepregs. The production sequence is to start with the middle board (4th- and 5th-layer of circuits), continuously stack together, and then fix. The production of 4-layer PCB is similar, including one core board and two copper films.Figure 5. 8-layer PCB Plate DisplayStep 3. PCB Inner LayersFirst, make the two-layer circuit of the middle core board. After the copper clad laminate is cleaned, it will be covered with a photosensitive film on the surface. This film will solidify when exposed to light, forming a protective film on the copper foil.Figure 6. PCB CoreInsert the two-layer PCB layout film and the double-layer copper clad laminate into the upper PCB layout film to ensure that the upper and lower PCB layout films are stacked accurately.Figure 7. PCB Layout Film PlacingThe machine irradiates the photosensitive film on the copper foil with a UV lamp. The transparent film is cured under the light, and there is still no cured photosensitive film. The copper foil covered under the cured film is the required PCB layout, which is equivalent to the function of the laser printer ink of the manual PCB. In addition, the copper foil covered by the black film will be corroded away, and the cured transparent film will be preserved.Figure 8. Cured Photosensitive FilmClean the uncured photosensitive film with lye, and the required copper foil circuit will be covered by the cured film.Figure 9. Clean Uncured Photosensitive FilmThen use a strong base, such as NaOH, to etch away the unnecessary copper foil.Figure 10. Copper Foil EtchingTear off the cured photosensitive film to expose the copper foil of the required PCB layout.Figure 11. Tear Off the Cured Photosensitive FilmStep 4. Board Punching and CheckingThe core board has been successfully produced. Then punch alignment holes on it to facilitate with other materials.Figure 12. Punch Alignment Holes on PCBOnce the core board is pressed together with other layers, it cannot be modified. So PCB checking is very important. The machine will automatically compare with the PCB layout drawing to find out the error.Figure 13. PCB Layout Drawing ComparisonThe first two layers of PCB boards have been made.Step 5. LaminationA new raw material is introduced here called Prepreg, which is the adhesive among the core boards(PCB layers>4), as well as the core board and the outer copper foil, and it also plays a role in insulation.Figure 14. PCB Prepreg and CopperThe lower copper foil and the two layers of prepreg have been fixed in advance through the alignment hole and the lower iron plate, and then the finished core board is also placed in the alignment hole, and finally the two layers of prepreg, a layer of copper foil and a layer of pressure-bearing aluminum plate covers the core plate.Figure 15. Fixed PCB Prepreg and CopperIn order to improve work efficiency, this factory will stack three different PCB boards together before fixing them. The upper iron plate is magnetically attracted to facilitate alignment with the lower iron plate. After the two layers of iron plates are successfully aligned by inserting the alignment pins, the machine compresses the space between the iron plates as much as possible, and then fixes them with nails.Figure 16. Fixed PCB LayersThe PCB boards clamped by the iron plates are placed on the holder, and then sent to the vacuum heat press for laminating. The high temperature can melt the epoxy resin in the prepreg and fix the core boards and copper foils together under pressure.Figure 17. PCB Layers LaminationAfter the lamination, remove the upper iron plate that presses the PCB. Then remove the pressure-bearing aluminum plate. The aluminum plate also plays the role of isolating different PCBs and ensuring the smoothness of the outer copper foil of the PCB. Finally the PCB taken out at this time will be covered by a layer of smooth copper foil.Figure 18. Remove the Upper Iron Plate and Aluminum PlateStep 6. DrillSo how to connect 4 layers of copper foils that are not in contact with each other in the PCB? First, make the through-hole through the PCB, and then metalize the hole wall to conduct electricity.Figure 19. PCB DrillPut a layer of aluminum plate on the punching machine, and then put the PCB on it. Since drilling is a relatively slow process, in order to improve efficiency, according to the number of layers of the PCB, 1 to 3 identical boards are stacked for drilling together. Finally, cover the uppermost PCB with a layer of aluminum plate. The upper and lower of aluminum plates are used to prevent the copper foil on the PCB from tearing when drilling.Figure 20. PCB DrillNext, you only need to select the correct drilling program on the computer, and the rest is done automatically by the drilling machine. The drill bit is driven by air pressure, and the maximum rotation speed can reach 150,000 revolutions per minute. Because such a high rotation speed is sufficient to ensure the smoothness of the hole wall.Figure 21. Drill ProgramThe replacement of the drill bit is also automatically completed by the machine according to the program. The smallest drill bit can reach a diameter of 100 microns, while the diameter of a human hair is 150 microns.Figure 22. Drill ReplaceIn the previous process, the molten epoxy was squeezed out of the PCB, so it needed to be cut off. Here the profiling milling machine cuts its periphery according to the correct XY coordinates of the PCB.Figure 23. Cuts PCB PeripheryStep 7. Copper Chemical Precipitation on the HolesSince almost all PCB designs use perforations to connect different layers of lines, a good connection requires a 25-micron copper film on the hole wall. The thickness of the copper film needs to be realized by electroplating, but the hole wall is composed of non-conductive epoxy resin and glass fiber board. So the first step is to deposit a layer of conductive material on the hole wall, and form a 1 micron copper film on the entire PCB surface by chemical deposition. The entire process such as chemical treatment and cleaning is controlled by the machine.Step 8. PCB Outer LayersNext, the PCB outer layer is transferred to the copper foil. The process is similar to the transfer principle of the previous PCB inner core board. The PCB layout is transferred to the copper foil by photocopying film and photosensitive film. The only difference is positive films will be used as boards.The transfer of the internal PCB layout described above uses the subtractive method, and the negative film is used as the board. The PCB is covered by the cured photosensitive film as a circuit, and the uncured film is cleaned. After the exposed copper foil is etched, the PCB layout circuit is protected by the cured film. The transfer of the outer PCB layout adopts the normal method, and the positive film is used as the board. The non-circuit area is covered by the cured photosensitive film on the PCB. After cleaning the uncured film, electroplating is performed. Where there is a film, it cannot be electroplated, and where there is no film, copper is plated first and then tin is plated. After the film is removed, alkaline etching is performed, and finally the tin is removed. So the circuit pattern remains on the board because it is protected by tin.Put the cleaned PCB on both sides of the copper foil into the laminating machine, and the photosensitive mold will be pressed onto the copper foil.Figure 24. LaminatorFix the printed PCB layout film of the upper and lower layers through the holes, and put the PCB board in the middle. Then, the photosensitive film under the light-transmitting film is cured by the irradiation of the UV lamp, which is the circuit that needs to be reserved.Figure 25. PCB Expose to the UV LightAfter cleaning off the unnecessary and uncured photosensitive film, inspect the PCB board.Figure 26. PCB CheckingClamp the PCB with clips, and electroplate the copper. As mentioned earlier, in order to ensure that the holes have sufficient conductivity, the copper film plated on the hole walls must have a thickness of 25 microns, so the entire system will be automatically controlled by the computer to ensure its accuracy.Figure 27. PCB Copper PlatingStep 9. Computer Control and Copper ElectroplatingAfter the copper film is electroplated, the computer gives instructions to electroplate a thin layer of tin. Then, check to ensure that the thickness of the plated copper and tin is correct.Figure 28. Electroplated Copper and Tin InspectionNext, a complete automated assembly line completes the etching process. Then, clean the cured photosensitive film on the PCB.Figure 29. Clean Cured Photosensitive FilmThen use a strong alkali to clean the unnecessary copper foil covered by it.Figure 30. Clean the Unnecessary Copper FoilFinally, use the tin stripping solution to strip the tin plating on the PCB layout copper foil. After cleaning, the 4-layer PCB layout is complete. Frequently Asked Questions about PCB Manufacturing Process1. Which are the techniques of PCB manufacturing?There are several PCB manufacturing methods that a PCB can be submitted to before reaching the final product. These methods include preparing the board's surface, placing components, soldering, cleaning, and inspection and testing. 2. What is PCB design process?Step 1 – The DesignStep 2 – Printing the DesignStep 3 – Creating the SubstrateStep 4 – Printing the Inner LayersStep 5 – Ultraviolet LightStep 6 – Removing Unwanted CopperStep 7 – Inspection.Step 8 – Laminating the Layers 3. Which software is best for PCB design?Top 8 Best PCB Design Software of 2021PROTEL (Altium Designer)PADS (PowerPCB)ORCADAllegroEagle (Easily Applicable Graphical Layout Editor)KicadEasyEdaFritzing 4. What is a PCB layer?A PCB is defined as a number of copper layers in a well defined sequence. Copper layers of a PCB are usually just named layers or also called SIGNAL layer. However, to define the complete PCB, other layers are required. They are usually named by their functionality and position. 5. What are the components of a PCB?Some common PCB components include:Battery: provides the voltage to the circuit.Resistors: control the electric current as it passes through them. They’re colour coded to determine their value.LEDs: light emitting diode. Lights up when current flows through it, and will only allow current to flow in one direction.Transistor: amplifies charge.Capacitators: these are components which can harbour electrical charge.Inductor: stores charge and stops and change in current.Diode: allows current to pass in one direction only, blocking the other.Switches: can either allow current or block depending if they are closed or open.
kynix On 2021-08-16
Join our mailing list!
Be the first to know about new products, special offers, and more.
Feature Posts
How Resistors Work: From Basic Principles to Advanced Applications2025-07-30
DC Switching Regulators: Principles, Selection, and Applications2025-05-30
FPGA vs CPLD: In-depth Analysis of Architecture, Performance and Application2025-05-07
MOSFET Technology: Essential Guide to Working Principles & Applications2025-05-04
SMD Resistor: Types, Applications, and Selection Guide2025-04-30