smt Related Articles
Stay Ahead with Expert Electronics Insights,
Industry Trends, and Innovative Tips
- Electronic Components
- News Room
- General electronic semiconductor
- Components Guide
- Sort by
- Robots
- Transmitters
- Capacitors
- IC Chips
- PCBs
- Connectors
- Amplifiers
- Memory
- LED
- Diodes
- Transistors
- Battery
- Oscillators
- Resistors
- Transceiver
- RFID
- FPGA
- Mosfets
- Sensor
- Motors, Solenoids, Driver Boards/Modules
- Relays
- Optoelectronics
- Power
- Transformer
- Fuse
- Thyristor
- potentiometer
- Development Boards
- RF/IF
- Semiconductor Information
- Sensors
- PCB
- transistor
IntroductionHave you ever wondered about the tiny, yet incredibly powerful components that make our modern electronics tick? In a world increasingly dominated by compact and high-performance devices, SMT capacitors stand out as unsung heroes. From your smartphone to advanced medical equipment, these miniature powerhouses are everywhere, playing a crucial role in ensuring stable and efficient operation. But what exactly are they, and why are they so vital? For a broader understanding of the technology behind these components, you can refer to the Wikipedia article on Surface-mount technology [5].This comprehensive guide will demystify SMT capacitors, offering authoritative answers on their selection, diverse applications, and effective troubleshooting. We’ll explore the fundamental differences between SMT and traditional capacitors, delve into their working principles, and provide practical insights into their lifespan and optimal selection. By the end of this article, you’ll gain a deeper understanding of these essential components and be better equipped to navigate the complexities of modern electronics.Figure 1: A collection of surface mount capacitors, showcasing their compact size.SMT Capacitor Applications and Selection GuideSMT capacitors are the unsung heroes of modern electronics, enabling the miniaturization and high performance we’ve come to expect from our devices. Their widespread adoption is a testament to their versatility and efficiency across a myriad of applications. Understanding where and how these tiny components are used, alongside the critical factors for their selection, is paramount for anyone involved in electronics design or repair.SMT Capacitor Types: A Diverse Portfolio for Every NeedWhen you delve into the world of SMT capacitors, you’ll quickly discover a diverse portfolio, each type optimized for specific performance characteristics and applications. For a general overview of electronic components [7], you can refer to Kynix’s resources. The most common types you’ll encounter include:Multilayer Ceramic Chip Capacitors (MLCCs): These are by far the most ubiquitous SMT capacitors [1]. Their compact size, high capacitance values, and excellent high-frequency characteristics make them ideal for a vast array of applications, from decoupling power supplies to filtering noise in sensitive circuits. MLCCs are non-polarized, meaning they can be installed in any orientation, simplifying assembly. For more detailed technical specifications on MLCCs, you can consult resources like Murata’s MLCC product information [6]. You can also find a wide range of Ceramic Capacitors [10] on Kynix.Figure 2: A close-up view of various SMT ceramic capacitors, showcasing their typical appearance.Tantalum Chip Capacitors: Known for their high capacitance-to-volume ratio and stable performance across a wide temperature range, Tantalum Capacitors [8] are often chosen for power supply filtering and timing circuits where stable capacitance is critical [2]. It’s crucial to remember that tantalum capacitors are polarized and must be installed with the correct polarity to prevent damage.Aluminum Electrolytic Chip Capacitors: Offering even higher capacitance values than ceramic or tantalum capacitors for a given size, these are frequently used in power supply filtering and energy storage applications [2]. Like tantalum capacitors, they are polarized.Film Capacitors (SMD type): While less common in the SMT form factor, film capacitors are utilized in specialized applications demanding high precision, superior stability, and low dissipation factors, such as in audio circuits or precision timing [2].SMT Capacitor Selection Guide: Navigating the Critical ParametersChoosing the right SMT capacitor is a critical decision that directly impacts the performance, reliability, and longevity of your electronic circuit. It’s not merely about matching capacitance; a holistic approach considering several key parameters is essential. Here’s a breakdown of what to consider:Capacitance Value: This is the fundamental parameter, dictating how much electrical charge the capacitor can store. Values are typically expressed in Farads (F), microfarads (µF), nanofarads (nF), or picofarads (pF). The specific circuit function—be it filtering, timing, or decoupling—will determine the required capacitance.Voltage Rating: This specifies the maximum continuous DC voltage the capacitor can withstand without damage. A crucial professional tip here: always select a capacitor with a voltage rating significantly higher than your circuit’s maximum operating voltage, ideally 1.5 to 2 times higher, to ensure reliability and prevent premature failure.Tolerance: This indicates the permissible deviation from the nominal capacitance value, expressed as a percentage (e.g., ±5%, ±10%). Precision applications, such as timing circuits, demand tighter tolerances.Dielectric Material: The insulating material between the capacitor plates profoundly influences its characteristics, including stability, temperature behavior, and frequency response. For MLCCs, common dielectrics include:Class 1 (e.g., C0G/NP0): These offer exceptional stability, low loss, and excellent temperature characteristics, making them perfect for resonant circuits, filters, and timing applications, though they typically have lower capacitance values.Class 2 (e.g., X7R, X5R): While providing higher capacitance values, their capacitance can vary with temperature, voltage, and time. They are well-suited for general-purpose applications like decoupling and bypassing.Equivalent Series Resistance (ESR): This represents the internal resistance of the capacitor. A lower ESR is generally desirable, especially in high-frequency or high-current applications, as it reduces power loss and heat generation.Equivalent Series Inductance (ESL): This parasitic inductance becomes significant at higher frequencies and can lead to self-resonance. SMT capacitors inherently offer lower ESL compared to their through-hole counterparts, making them superior for high-frequency designs.Size/Package: SMT capacitors adhere to standardized package sizes (e.g., 0402, 0603, 0805, 1206). The choice depends on the available PCB real estate and the thermal dissipation requirements. Larger packages often accommodate higher capacitance and voltage ratings.Temperature Characteristics: How the capacitance changes with temperature is vital for applications operating in fluctuating thermal environments.Reliability and Lifetime: For critical applications, understanding the capacitor’s expected lifespan is paramount. Factors like ripple current, operating temperature, and voltage derating directly impact longevity.How to Choose the Best SMT Capacitor: A Practical ApproachChoosing thebest SMT capacitor involves a systematic approach, balancing electrical requirements with physical constraints and reliability considerations. Here’s a practical guide:Define Your Application: Clearly understand the role the capacitor will play. Is it for power supply decoupling, signal filtering, timing, or energy storage? This will narrow down the suitable types and required characteristics.Consider Operating Conditions: Account for the maximum operating voltage, current, and temperature range. Always apply appropriate derating factors to ensure long-term reliability.Evaluate Frequency Requirements: For high-frequency circuits, prioritize capacitors with low ESR and ESL, such as MLCCs with C0G/NP0 dielectrics.Space Constraints: Select a package size that fits comfortably on your PCB while allowing for proper heat dissipation and assembly.Cost vs. Performance: Balance your budget with the required performance. Sometimes, a slightly more expensive capacitor can significantly improve circuit stability and lifespan.Supplier and Availability: Choose components from reputable manufacturers with good documentation and reliable supply chains.SMT Capacitor Common Issues and TroubleshootingEven the most robust electronic components can encounter issues, and SMT capacitors are no exception. While generally reliable, understanding their common failure modes and effective troubleshooting techniques is crucial for maintaining circuit integrity and extending device lifespan. Have you ever encountered a mysterious circuit failure and wondered if a tiny capacitor was the culprit? For more insights into SMT Surface Mount Technology [9] in general, Kynix provides a comprehensive overview.SMT Capacitor Common Issues: What Can Go Wrong?Several factors can lead to the malfunction or failure of SMT capacitors. Recognizing these common issues can significantly aid in diagnosis:Cracking: This is arguably one of the most prevalent issues, particularly with ceramic SMT capacitors (MLCCs) [3]. Cracks can arise from mechanical stress during PCB assembly (e.g., excessive board flexing, improper handling) or thermal stress during soldering (e.g., rapid heating/cooling, improper reflow profiles). A cracked capacitor can lead to increased leakage current, intermittent opens or shorts, or even complete failure.Figure 3: A common failure mode: a cracked SMT electrolytic capacitor.Short Circuits: A capacitor failing in a short-circuit mode is a serious problem, often caused by overvoltage, manufacturing defects, or internal dielectric breakdown. A shorted capacitor will draw excessive current, potentially damaging other components in the circuit.Open Circuits: Less common than shorts, an open capacitor means it has lost its capacitive function. This can result from physical damage, internal connection failures, or severe degradation over time.Capacitance Degradation: Over extended periods, especially with electrolytic and tantalum capacitors, the actual capacitance value can decrease, and the Equivalent Series Resistance (ESR) can increase. This degradation is often accelerated by high temperatures, excessive ripple current, or continuous operation near the voltage limit.Polarity Reversal (for polarized capacitors): Tantalum and electrolytic SMT capacitors are polarized, meaning they must be installed with the correct orientation. Incorrect installation can lead to rapid failure, often accompanied by visible signs like bulging, venting, or even explosion. Important Note: Always double-check the polarity markings before soldering polarized capacitors.Solder Joint Issues: Poor soldering techniques can result in intermittent connections, opens, or shorts. Issues liketombstoning (where one end of the component lifts off the pad during reflow) are common with small SMT components.Troubleshooting Steps: Diagnosing SMT Capacitor ProblemsWhen faced with a circuit malfunction, systematically troubleshooting SMT capacitors can help pinpoint the problem. Here’s a step-by-step approach:Visual Inspection: Begin with a thorough visual check. Look for any obvious signs of damage such as cracks, bulges, discoloration, or burn marks on the capacitor body. For polarized capacitors, verify correct orientation. Sometimes, the problem is literally staring you in the face.Continuity Test (Power Off): With the circuit completely powered off, use a multimeter in continuity mode to check for short circuits across the capacitor terminals. A shorted capacitor will show very low resistance, indicating a direct path for current flow where there shouldn’t be one.Capacitance Measurement (Power Off): If your multimeter has a capacitance measurement function, use it to measure the actual capacitance value. Compare this reading to the nominal value. For accurate in-circuit measurements, especially for smaller capacitors, you might need to desolder the component, as parallel components can skew the reading.ESR Measurement: For electrolytic and tantalum capacitors, measuring the Equivalent Series Resistance (ESR) can be a strong indicator of degradation. A significantly high ESR value suggests a failing capacitor, even if its capacitance value appears to be within tolerance.Voltage Measurement (Power On): If the circuit can be safely powered on, measure the voltage across the capacitor. Ensure it remains within the component’s rated voltage. Fluctuations or unexpected voltage levels can point to a capacitor issue or a problem elsewhere in the circuit.Thermal Imaging: For intermittent issues or components that are suspected of overheating, thermal imaging can be an invaluable tool. Overheating capacitors often indicate excessive current flow or internal resistance.Reflow Profile Check: If you are experiencing recurring cracking issues with ceramic capacitors during manufacturing, it’s crucial to review and optimize your reflow soldering profile. Improper heating and cooling rates are common culprits for thermal stress-induced cracks.SMT Capacitors vs. Traditional Capacitors: A Comparative AnalysisThe evolution of electronics has seen a significant shift from traditional through-hole components to surface-mount technology (SMT). This transition is particularly evident in capacitors, where SMT capacitors have largely replaced their through-hole counterparts in many applications. But what are the fundamental differences, and why does one often prevail over the other? Let’s dive into a comparative analysis.FeatureSMT CapacitorsTraditional (Through-Hole) CapacitorsPhysical SizeSignificantly smaller, enabling miniaturizationLarger, requiring more PCB real estateAssembly MethodAutomated pick-and-place, reflow solderingManual insertion, wave solderingPCB DensityHigh component density, compact designsLower component density, less space-efficientHigh-Frequency PerformanceSuperior due to lower parasitic inductance/capacitanceLess ideal for high frequencies due to higher parasiticsManufacturing CostLower for high-volume automated productionHigher due to manual labor in assemblyMechanical RobustnessGenerally less mechanically robust, susceptible to cracking from board flexMore mechanically robust, better suited for high vibration environmentsHeat DissipationCan be challenging due to smaller surface areaBetter heat dissipation due to larger size and leadsRepair/ReworkMore challenging to repair/rework manuallyEasier to repair/rework manuallyTypical ApplicationsModern compact electronics, high-frequency circuitsHigh-power, high-voltage, or harsh environment applicationsKey Differences Summarized:Physical Form Factor: The most apparent distinction lies in their physical construction. SMT capacitors are leadless, designed to be mounted directly onto the surface of a Printed Circuit Board (PCB). In contrast, traditional capacitors possess leads that are inserted through holes drilled in the PCB and then soldered on the opposite side.Assembly Process: The assembly process is where SMT capacitors truly shine in modern manufacturing. They are perfectly suited for automated pick-and-place machines and reflow soldering, which significantly reduces manufacturing time and cost for high-volume production. Traditional components, on the other hand, often require manual insertion, making their assembly more labor-intensive and slower.Space Efficiency: The compact nature of SMT capacitors allows for much denser circuit board designs. This miniaturization is crucial for the ever-shrinking size of electronic devices, from smartphones to wearables. If you’re designing a device where every millimeter counts, SMT is the clear winner.Electrical Performance: In terms of electrical performance, SMT capacitors generally exhibit superior characteristics, especially at higher frequencies. Their shorter lead lengths minimize parasitic inductance and capacitance, which can degrade signal integrity in high-speed circuits. This makes them the preferred choice for applications demanding high-frequency operation and minimal signal distortion.While traditional capacitors still hold their ground in specific niches, particularly in high-power, high-voltage, or mechanically demanding applications, the advantages of SMT capacitors in terms of size, automated assembly, and high-frequency performance have made them the dominant choice in the vast majority of contemporary electronic designs.How to Test and Calculate SMT CapacitorsUnderstanding how to test and calculate the values of SMT capacitors is fundamental for anyone working with electronics. This section will delve into the working principles, lifespan considerations, selection standards, soldering techniques, and compatibility aspects, along with practical guidance on testing and calculating capacitance.SMT Capacitor Working Principle: The Core of Energy StorageAt its heart, an SMT capacitor operates on the same fundamental principle as any other capacitor: it stores electrical energy in an electric field. Imagine two conductive plates separated by an insulating material, known as a dielectric. When a voltage is applied across these plates, an electric field forms, causing positive charges to accumulate on one plate and negative charges on the other. The dielectric prevents these charges from flowing directly, effectively holding the energy. When the voltage source is removed, this stored energy can be released, creating a current flow through an external circuit. In SMT capacitors, this elegant principle is miniaturized, often by stacking multiple layers of dielectric and electrodes, as seen in MLCCs, to achieve significant capacitance in a tiny footprint.For a visual explanation of how capacitors work, watch this video:SMT Capacitor Life and Selection Standards: Ensuring Longevity and ReliabilityThe lifespan and reliability of SMT capacitors are paramount, especially in applications requiring long-term stability. Several factors critically influence how long an SMT capacitor will perform optimally:Temperature: This is arguably the most impactful factor. For every 10°C reduction in operating temperature below the rated maximum, the lifespan of many capacitors, particularly electrolytic and tantalum types, can approximately double. Conversely, operating above the maximum rated temperature drastically shortens their life.Applied Voltage: Consistently operating a capacitor near its maximum rated voltage accelerates degradation. A common professional tip is to apply a voltage derating, typically operating the capacitor at 50-70% of its rated voltage, to significantly extend its lifespan and enhance reliability.Ripple Current: In power supply applications, ripple current can cause internal heating due to the capacitor’s Equivalent Series Resistance (ESR). Excessive ripple current leads to increased temperature and reduced lifespan.Mechanical Stress: As discussed earlier, mechanical stress during assembly or operation can induce cracks, especially in ceramic capacitors, compromising their long-term integrity.Reliability is often quantified by metrics like FIT (Failures In Time) rate, which indicates the number of failures per billion device operating hours. Industry standards such as AEC-Q200 (for automotive applications) and MIL-PRF specifications (for military and aerospace) ensure that components meet stringent reliability requirements under harsh conditions.SMT Capacitor Soldering Techniques: Precision for PerformanceProper soldering is not just about making an electrical connection; it’s about ensuring the long-term reliability and performance of SMT capacitors. Both automated and manual methods demand precision:Automated Reflow Soldering: This is the industry standard for high-volume production. Solder paste is applied, components are placed by pick-and-place machines, and the assembly passes through a reflow oven. The reflow profile—the precise temperature curve over time—is critical. A carefully controlled profile prevents thermal shock, which can cause cracking in ceramic capacitors, and ensures optimal solder joint formation. Important Note: Rapid heating or cooling can severely damage components.Manual Soldering: For prototyping, rework, or small batches, hand soldering is common. It requires a fine-tipped soldering iron, fine-gauge solder, flux, and tweezers. The technique involves tinning one pad, placing the component, soldering the first side, and then soldering the second side. Minimal heat application for the shortest duration is key to prevent overheating.For a practical demonstration of SMT capacitor soldering, check out this video:SMT Capacitor Compatibility with Other Components: A Harmonious IntegrationSMT capacitors are designed for seamless integration within complex electronic circuits. Their compatibility with other components is both electrical and mechanical:Electrical Compatibility: This involves matching voltage and current ratings, ensuring the capacitor’s frequency response (including ESR and ESL) is suitable for the circuit’s operating frequencies, and considering temperature characteristics. For polarized capacitors, correct orientation is non-negotiable to prevent damage to both the capacitor and surrounding components.Mechanical Compatibility: This refers to matching the capacitor’s package size to the PCB footprint and ensuring adequate spacing for assembly and thermal management. In high-speed designs, the proximity of SMT capacitors to ICs is crucial for effective power supply decoupling and maintaining signal integrity, minimizing noise and electromagnetic interference (EMI).SMT Capacitor Specifications: Decoding the DatasheetUnderstanding the specifications listed in a SMT capacitor datasheet is crucial for proper selection and application. Key specifications typically include:Capacitance (C): The nominal capacitance value, usually in pF, nF, or µF.Rated Voltage (Vdc): The maximum DC voltage the capacitor can continuously withstand.Tolerance: The permissible deviation from the nominal capacitance, e.g., ±5%, ±10%.Dielectric Type: Such as C0G, X7R, X5R for ceramic capacitors, indicating temperature stability and voltage dependence.ESR (Equivalent Series Resistance): The internal resistance, critical for high-frequency and power applications.ESL (Equivalent Series Inductance): The parasitic inductance, important for high-frequency performance.Operating Temperature Range: The temperature range over which the capacitor is designed to operate reliably.Dissipation Factor (DF): A measure of the capacitor`s energy loss, often expressed as a percentage.Insulation Resistance (IR): A measure of the capacitor`s ability to resist DC leakage current.Package Size: Standardized dimensions (e.g., 0402, 0603, 0805, 1206).Figure 4: Different types of SMT capacitors with their identification codes.SMT Capacitor Capacity Calculation: Basic PrinciplesWhile specific circuit designs will dictate the exact capacitance required, the fundamental formula for capacitance is:C = Q / VWhere: * C is capacitance (in Farads) * Q is the charge stored (in Coulombs) * V is the voltage across the capacitor (in Volts)For parallel plate capacitors, capacitance can also be calculated as:C = (ε * A) / dWhere: * ε (epsilon) is the permittivity of the dielectric material * A is the area of the plates * d is the distance between the platesIn practical circuit design, engineers typically use simulation tools and design guidelines to determine the optimal capacitance values for specific functions like filtering, timing, or decoupling. For example, for a simple RC filter, the time constant (τ) is given by τ = R * C, which helps in calculating the required capacitance for a desired cutoff frequency.How to Test SMT Capacitors: A Practical GuideTesting SMT capacitors is essential for verifying their functionality and diagnosing circuit issues. While specialized equipment offers precise measurements, basic tests can be performed with a standard multimeter:Visual Inspection: Always start here. Look for physical damage, cracks, bulges, or discoloration. For polarized capacitors, confirm correct orientation. Sometimes, the problem is literally staring you in the face.Continuity Test (Power Off): With the circuit unpowered, set your multimeter to continuity mode. Touch the probes to the capacitor’s terminals. A healthy capacitor will show a brief continuity (charging) and then return to an open circuit. A continuous beep indicates a short circuit, meaning the capacitor is faulty.Capacitance Measurement (Power Off): Many modern multimeters have a capacitance function. Desolder the capacitor from the circuit for the most accurate reading. Connect the probes to the capacitor terminals and read the value. Compare it to the nominal value. A significant deviation indicates a problem.ESR Measurement (for Electrolytic/Tantalum): An ESR meter is a dedicated tool for measuring Equivalent Series Resistance. High ESR is a common indicator of a failing electrolytic or tantalum capacitor, even if its capacitance value seems acceptable. If you don’t have an ESR meter, some advanced multimeters might offer this function.Leakage Current Test: For critical applications, a leakage current test can be performed using a DC power supply and a sensitive ammeter. A healthy capacitor should have very low leakage current. High leakage indicates a degraded dielectric.Pro Tip: When testing capacitors in-circuit, remember that other components connected in parallel can affect your readings. For definitive results, it’s often best to desolder the capacitor before testing.Editor’s Review: My Experience with SMT CapacitorsHaving worked with countless electronic designs over the years, I’ve witnessed firsthand the transformative impact of SMT capacitors. I recall a particular project involving a compact drone controller where space was at an absolute premium. Traditional through-hole components simply wouldn’t fit without compromising the design. Switching to SMT capacitors not only allowed for the necessary miniaturization but also significantly improved the high-frequency performance of the control signals, leading to a much more responsive and stable flight. It’s truly remarkable how these tiny components can make such a monumental difference. However, I’ve also learned the hard way about the importance of proper soldering techniques; a single tombstoned capacitor can lead to hours of frustrating debugging. My advice? Invest in a good fine-tipped soldering iron and practice, practice, practice. The precision required is well worth the effort for the performance gains.Common Traps When Buying SMT CapacitorsNavigating the market for SMT capacitors can be tricky. Here are some common pitfalls to avoid:Ignoring Voltage Derating: As discussed, operating a capacitor too close to its maximum voltage rating drastically shortens its lifespan. Always apply a safety margin.Overlooking ESR/ESL: For high-frequency or power applications, neglecting these parasitic values can lead to unexpected circuit behavior and instability.Mismatching Dielectric Types: Using a Class 2 ceramic capacitor (like X7R) in a precision timing circuit that requires the stability of a Class 1 (C0G/NP0) will lead to performance issues.Buying from Unverified Sources: Counterfeit components are a real problem. Always purchase from reputable distributors to ensure quality and authenticity.Disregarding Temperature Characteristics: If your device operates in a wide temperature range, ensure your chosen capacitor maintains its performance across that range.SMT Capacitor Buying Checklist: How to Choose the Best for Your ProjectTo simplify your selection process, use this checklist:Required Capacitance Value: (e.g., 100nF, 10µF)Minimum Voltage Rating: (e.g., 25V, 50V) - remember derating!Tolerance: (e.g., ±5%, ±10%)Dielectric Type: (e.g., C0G, X7R, Tantalum, Aluminum Electrolytic)ESR/ESL Requirements: (Crucial for high-frequency/power)Package Size: (e.g., 0402, 0603, 0805)Operating Temperature Range: (e.g., -40°C to +85°C)Polarized or Non-Polarized: (If polarized, ensure correct type)Supplier Reputation: (Always choose trusted sources)Cost vs. Performance Balance: (Align with project budget and needs)SMT Capacitor Market InsightsThe global SMT capacitor market is projected to grow significantly, driven by the increasing demand for compact electronic devices and the expansion of 5G technology and IoT. Recent statistics indicate that the market for ceramic SMT capacitors alone is expected to reach over $12 billion by 2027, with a compound annual growth rate (CAGR) of approximately 6% [4]. This growth underscores the continued reliance on these components for future technological advancements.ConclusionIn the intricate tapestry of modern electronics, SMT capacitors are far more than just passive components; they are foundational elements that enable the compact, high-performance devices we rely on daily. From their diverse types and applications to their nuanced selection criteria and troubleshooting methodologies, understanding these miniature powerhouses is essential for anyone navigating the complexities of circuit design and repair.We’ve journeyed through the critical distinctions between SMT capacitors and their traditional counterparts, highlighting the advantages of miniaturization, automated assembly, and superior high-frequency performance that have cemented their dominance. We’ve also explored their fundamental working principles, the factors influencing their lifespan, and the vital standards that ensure their reliability. The insights into soldering techniques and compatibility underscore the precision required to harness their full potential.As technology continues its relentless march towards greater miniaturization and higher performance, the role of SMT capacitors will only become more pronounced. Their ongoing evolution promises even more compact, efficient, and reliable solutions for the electronic systems of tomorrow. By embracing the knowledge shared in this guide, you are not just understanding a component; you are gaining a deeper appreciation for the silent enablers of our connected world.Are you ready to optimize your next electronic design with the perfect SMT capacitor? The future of electronics is small, powerful, and built on these indispensable components. Embrace the challenge, and innovate with confidence.Frequently Asked Questions (FAQ)What is the primary advantage of SMT capacitors over traditional capacitors?The primary advantage of SMT capacitors lies in their significantly smaller size, which enables higher component density on Printed Circuit Boards (PCBs). This miniaturization is crucial for developing compact and lightweight electronic devices, alongside their suitability for automated assembly processes, leading to cost efficiencies in mass production.Can I replace a traditional capacitor with an SMT capacitor?While it’s technically possible in some cases, it’s not a direct one-to-one replacement without careful consideration. You would need to ensure electrical compatibility (capacitance, voltage rating, frequency response) and mechanical compatibility (footprint on the PCB). Often, redesigning the PCB layout is necessary to accommodate the SMT package.How do I identify the value of an unmarked SMT capacitor?Identifying the value of an unmarked SMT capacitor can be challenging. For ceramic capacitors, it’s often impossible without specialized equipment or knowledge of the circuit. For some tantalum or electrolytic SMT capacitors, there might be a three-digit code or a color band. The most reliable method is to consult the circuit’s schematic diagram or use an LCR meter to measure its capacitance after desoldering it from the circuit.What causes SMT capacitors to crack?SMT capacitors, particularly ceramic types, are prone to cracking due to mechanical stress (e.g., excessive board flexing during assembly or handling) or thermal stress (e.g., rapid heating or cooling during soldering processes). Proper handling and adherence to recommended reflow profiles are crucial to prevent cracking.Are SMT capacitors more reliable than through-hole capacitors?In many aspects, SMT capacitors can be more reliable, especially in high-frequency applications due to their lower parasitic inductance and capacitance. However, their reliability is highly dependent on proper manufacturing processes, including precise soldering and careful handling to avoid mechanical stress. Traditional capacitors might offer greater mechanical robustness in high-vibration environments.References[1] AnyPCBA - SMD Capacitors: A Comprehensive Guide to Types, Identification and Applications [2] Elprocus - SMD Capacitor : Working, Types, Advantages and Disadvantages [3] Johanson Dielectrics - Capacitor Cracks: Still with Us After All These Years [4] Market Research Future - Ceramic Capacitor Market Research Report [5] Wikipedia - Surface-mount technology[6] Murata - Ceramic Capacitor[7] Kynix - List of Basic Electronic Components[8] Kynix - What are Tantalum Capacitors?[9] Kynix - What Is SMT Surface Mount Technology(Vedio)?[10] Kynix - Ceramic Capacitors Online Ordering
Kynix On 2025-08-13

What is the pcb?What is the pcb assembly?Video about the pcb assemblyWhat are the differences between the PCB and PCBA?Types of pcb assemblySMT assemblyBGA assemblyThrough-hole assemblyMixed assemblyRigid-flex printed circuit board assemblyConclusion of SMT assembly VS BGA assembly VS Through-hole assembly VS Mixed assembly VS Rigid-Flex PCBAFrequently Asked Questions – FAQsWhat is the pcb?The fundamental component of the majority of contemporary electronic gadgets are printed circuit boards, or PCBs. Printed circuit boards are the base on which all other electronic components are assembled, ranging from simple single-layered boards used in your garage door opener to the six-layer board in your smart watch to the 60-layer, extremely high density and high-speed circuit boards used in super computers and servers. The PCB serves as a mounting surface for semiconductors, connections, resistors, diodes, capacitors, and radio equipment, all of which "speak" to one another.PCBs are the best choice for these applications because of their mechanical and electrical qualities. Roughly 90% of the PCBs produced today are rigid, making them the most common type of PCB in the world. Some PCBs are flexible, allowing the circuits to be stretched and folded into shape. Other times, flexible circuits are employed in applications where they can withstand hundreds of thousands of bend cycles without failing. Ten percent or so of the market is made up of these flexible PCBs. A tiny subset of these kinds of circuits are referred to as rigid flex circuits, which have firm parts of the board that are perfect for mounting and connecting components and flexible parts that offer the benefits of flexible circuits that were previously mentioned.What is pcb What is the pcb assembly?PCBA = assembly of PCB. A surface encapsulation procedure is used to integrate various electrical components on the circuit board. The box assembly comes next, which joins the finished product's outer case and assembled PCB. In other words, the PCB bare board travels via the SMT top section before traveling through the full DIP plug-in process, also known as PCBA. In contrast to PCB'A, which adds a slant point, which is the norm in Europe and America, this approach is widely employed in the nation. PCBA stands for printed circuit board assembly. If a market is viable, mass production for new electronic designs would typically follow prototype pcb assembly (Sample PCBA) to verify designs.PCB Assembly Video about the pcb assemblyVideo Description: This is a great explanation of the printed circuit board (PCB) and electronics manufacturing process in the context of IOT. What are the differences between the PCB and PCBA?The terms "bare circuit board" (PCB) and "circuit board plug-in assembly" (PCBA) both relate to the SMT technique. A finished board is one, and a naked board is the other. According to the number of signal layers, PCB (Printed Circuit Board), made of epoxy glass resin material, is divided into 4, 6, and 8 layers. The most typical layer counts are 4 and 6. The bare board has chip components like chips attached to it. PCBA can be thought of as a finished circuit board, and it can only be produced if the circuit board's manufacturing process is concluded. PCBA=Printed Circuit Board +Assembly. Types of pcb assemblySMT assemblyBGA assemblyThrough-hole assemblyMixed assemblyRigid-Flex PCBA SMT assemblyWhat is the SMT assembly?SMT, or surface mount technology, is its full name. SMT is a technique for attaching parts or components to circuit boards. SMT has replaced other methods in PCB assembly due to its superior results and increased efficiency. Through-hole assembly was mostly utilized in the past by PCB producers to add components. But SMT has introduced welding technology to replace the previous assembling technique. And all electronic businesses, including those in computers, telephones, smartphones, home appliances, etc., use PCBs made using the SMT assembly process. Printing solder paste, mounting components, reflow soldering, AOI, or AXI are all components of the basic SMT assembly process.SMT Assembly The advantages of SMT assemblySmall size and lightweightThe total size and weight of the PCBs are reduced by directly attaching the components to the board using SMT technology. This assembly process enables us to fit more components into a small area, resulting in smaller designs and improved performance. High reliabilityAfter the prototype has been validated, the entire SMT assembly process is almost fully automated using precise equipment, which reduces the possibility of human error. SMT technology ensures the consistency and dependability of the PCBs because of automation. Cost-savingSMT assembly is often carried out using automated equipment. Even though the machines' input costs are expensive, the automatic machines assist in reducing manual steps throughout SMT operations, which considerably increases production efficiency and, over time, lowers labor costs. Additionally, through-hole assembly requires less materials, which lowers the cost. SMT assembly capabilities of PCBGOGOA fully automated SMT workshop for bulk production is owned by PCBGOGO. We also offer manual welding services for difficult items, prototyping, and small quantity orders. For PCB assembly, we have FR4 board, aluminum board, flexible board, and rigid-flex board options. Other assembly types, besides SMT assembly, include BGA assembly, through-hole assembly, mixed assembly, and kit assembly. The following files should be included with your SMT orders: a Gerber file (used for PCB fabrication), a BOM list, a CPL list, or a PNP list (pick and place). BGA assemblyWhat is BGA?An integrated circuit is packaged using a surface-mount device called a ball grid array (BGA), sometimes known as a chip carrier. Devices like microprocessors are permanently mounted using BGA packaging. A BGA can offer more connector pins than a dual in-line or flat package can accommodate. Instead of simply the edge, the entire bottom surface of the gadget can be used. Additionally, compared to a perimeter-only type, the traces connecting the package's leads to the wires or balls that connect the die to the package are typically shorter, improving performance at high speeds.BGA Assembly The advantages of BGA assemblyHigher-density circuitsThrough-hole circuits got more densely populated, making it practically impossible to solder them precisely without crossover or short-circuits. Heat conductionBGA circuits minimize overheating issues by facilitating significantly easier heat transfer from the integrated circuit externally. Lower inductanceThe likelihood of interference issues in a BGA circuit is considerably reduced because each solder ball typically only measures a few millimeters in size. Through-hole assemblyWhat is a through-hole assembly?Electronic circuits are created using the through-hole assembly technique, in which the components are inserted using leads. It describes the installation procedure in which the leads are inserted into the pre-drilled holes and the components are soldered to the board using either wave soldering or manual soldering.PCB design evolved over time from single-sided to double-sided, and finally to multi-layer boards. It is challenging to adapt through-hole assembly to the needs of contemporary electronics. In today's PCB production, SMT technology has essentially taken the place of through-hole construction. However, some applications, including those for electrolytic capacitors, connections, and big transformers, still require through-hole installation.Through-hole AssemblyThe advantages and disadvantages of Through-hole assemblyHigh reliabilityAs opposed to SMT components, which are simply soldered on the PCB's surface, through-hole assemblies require leads that are inserted into the holes to secure the components to the board, which results in higher environmental stress. As a result, through-hole assembly provides a stronger physical connection, making it the preferred method for the aerospace sector and the military, both of which have high dependability requirements. Easy for manual operationBecause replacing or moving through-hole components is simpler, this assembly technique is frequently utilized in applications that call for PCB testing and PCB prototyping. Higher durabilityIndustrial machinery and equipment frequently use through-hole components due to their strong heat resistance and high stress tolerance. Through-hole LEDs are used in the LED lights on enormous billboards because they are strong and bright. Lower manufacturing efficiencyDue to the extra step of drilling and hold the components using leads, through-hole assembly is time-consuming, which causes higher costs and lower production efficiency. Limited PCB designDrilled holes must penetrate all layers of the board in through-hole assembly, which makes multi-layer PCBs unsuitable since it makes layout design and PCB manufacturing more challenging. Additionally, the board would be larger overall than SMT PCBs, which would limit its range of applications. Mixed assemblyWhat is the mixed assembly?Although surface mount technology has taken over as the primary mounting technique in PCB manufacture, some components are still incompatible with SMT assembly. The same board must then be used for SMT assembly and THT assembly. A mixed assembly is what is referred to as a blend of assembly technologies without the usage of solder paste during production.The majority of the components are welded in surface mount configuration on the board, although mixed PCB assembly is required for some specific components that are not available in the SMT process.Mixed AssemblyThe advantages of Mixed assemblyThrough-Hole, SMT, and BGA components are housed on the PCB in a mixed assembly.SMT (Surface Mount Technology) or single- or double-sided mixed technology for PCB assembly BGAs have one or two sides, as well as micro-BGA.100% X-ray inspection during installation and rework.Small-quantity PCB board components include all varieties of BGAs, QFNs, CSPs, 0201, 01005, POP, and Pressfit Components.SMT and through-hole polarized capacitors are examples of part polarity capacitors.Rework capabilities include the ability to remove and replace BGAs and MBGAs, as well as having experience with ceramic and plastic BGAs. Rigid-flex printed circuit board assemblyWhat is Rigid-Flex PCBA?Printed circuit boards that combine rigid and flexible board technologies are known as rigid-flex boards. Depending on the application's design, the majority of rigid flex boards are made up of many layers of flexible circuit substrates that are outwardly or internally attached to one or more rigid boards. The flexible substrates are typically formed into the flexed curve during manufacturing or installation and are intended to be in a constant state of flexibility.Rigid-Flex PCBAThe advantages of Rigid-Flex PCBABy using 3D, space requirements can be reduced.The size of the board and the weight of the entire system can be decreased by doing away with the requirement for connectors and cables between the various rigid pieces.There is frequently a lower part count when space is maximized.Lower solder junctions guarantee more reliable connections.Assembling rigid boards is easier than handling flexible boards.PCB assembly procedures that are simpler.Simple modular interfaces to the system environment are provided by integrated ZIF contacts.Simpler test conditions are used. a thorough test is conducted before installation is possible.Rigid-Flex boards greatly lower the cost of logistics and assembly.It is feasible to make mechanical designs more sophisticated, which raises the degree of freedom for ideal housing solutions. Conclusion of SMT assembly VS BGA assembly VS Through-hole assembly VS Mixed assembly VS Rigid-Flex PCBA Which one is better in PCBA: SMT, BGA, or Through-hole?Through-hole technology might be the most effective for low-volume PCB fabrication (like prototyping). For components that must withstand high stress, through-hole is frequently viewed as the superior option since wire leads provide a solid link. The preferred mounting method for front connectors, where USB cables and cords will be plugged in, is frequently via hole. However, drilling holes costs more and requires soldering on both sides of the PCB, which extends the production cycle. On multi-layer boards, through hole connectors can reduce the available routing space.Multiple advanced functions, effective performance, and enhanced speed are required for modern electronic gadgets, all in a smaller device. Even with more electronic components, the assembly still needs to be thinner. BGA packages are the best choice for these needs. For instance, BGAs are typically used in the manufacturing of ICs having more than 200 I/O connections. Surface Mount is a superior option when production volumes are high since SMD components take up less space, resulting in a more compact, component-dense circuit board. SMT is a more dependable method than manual assembly using through-hole technology because SMDs are amenable to automation utilizing pick-and-place robotic machines—no drilling is necessary. The industry standard method for back connectors is SMT. SMT does have some drawbacks, too. For example, it is not recommended for connecting high-stress components, and it necessitates an initial investment in pricey technology for mass production.Overall, SMT is more cost-effective and time-efficient. The comparison between SMT assembly and THT assemblyFirst, SMT components are fully automated and welded onto the board using a reflow machine. While wave-soldered and hand-soldered techniques are both traditional approaches in the THT assembly process, THT assembly requires pre-drilling holes in the board and employing leads to link the components and circuits.Second, only wave soldering is permitted for PCBs with through-hole components; reflow or wave soldering are not permitted for PCBs with surface mount devices (SMDs). Therefore, if both SMT components and THT components are used on the board, there are extra stages in the assembly process. Typically, SMT is carried out first, followed by THT assembly.Thirdly, SMT assembly can be completed quickly and accurately thanks to advanced and precise machinery. SMT is more suited to high-density and tiny size PCB applications due to its ability to precisely insert thin and small components on the board. Additionally, THT is favoured by components with high requirements for dependability and huge size since it offers more durable connections than SMT components.SMT assemblies have a number of advantages, including high productivity, high precision, light weight, and low cost. SMT is quicker and more cost-effective for mass production. THT assemblies are often very dependable, have a high stress tolerance, are heavier, and cost more. THT is the ideal assembly technique for prototype and small-scale PCB production. The comparison between SMT assembly and Rigid-Flex PCBAElectrical components are put directly onto the surface of a printed circuit board using surface-mount technology (SMT) (PCB). Because SMT components can have smaller leads or no leads at all, they are often smaller than their through-hole counterparts.Photolithographic technology is used to create flexible printed circuits (FPC). Stiff flex printed circuit boards are circuit boards that combine rigid and flexible board technology. Depending on the application's design, the majority of rigid flex boards are made up of many layers of flexible circuit substrates that are outwardly or internally attached to one or more rigid boards.All in all, SMT is more cost-effective and time-efficient and Rigid-Flex PCBA is time-consuming and expansive. Frequently Asked Questions – FAQsWhat is PCB board?Copper conductors are used to make electrical connections between components on a printed circuit board (PCB), which is an electronic assembly. Electronic components are mechanically supported by printed circuit boards, allowing a device to be housed in an enclosure. What are the differences between the rigid pcb and flexible pcb?From their names, it may be deduced that stiff PCBs and flex PCBs differ most significantly. Flex PCBs can be bent or otherwise shaped to fit inside the designated system while rigid PCBs cannot be bent or otherwise shaped. When properly engineered, flexible circuits can be repeatedly stretched for hundreds of thousands of cycles without breaking. Flex boards are more expensive on average, but they are necessary for applications with constrained space requirements, such as consumer electronics, medical devices, space applications, and automotive applications. The affordability of rigid circuit boards is a major factor in their popularity. Because rigid circuit boards take up less space, manufacturers can save a lot on traditional electronics, especially consumer electronics. What does PCB assembly mean?A printed wiring board (PWB), on the other hand, is a board that is devoid of components and is used in electronics that do not require complicated functionality. A printed circuit board (PCB) is a completely constructed board that has all the circuitry required to go into an electronic device. What is PCB SMT assembly?The technique of soldering electronic components to a printed circuit board (PCB) is known as SMT assembly technology. Small amounts of molten solder paste are utilized in this procedure to join the component leads to pads on the PCB surface. What is PCB BGA assembly?Ball grid array, sometimes known as BGA, is a type of packaging used to mount components with hundreds of pins, such as microprocessors. It also goes by the name Ball Grid Array. BGA assembly is the process of directly mounting the BGA packages or integrated circuits (ICs) onto the BGA board and soldering them in place.
kynix On 2022-08-31
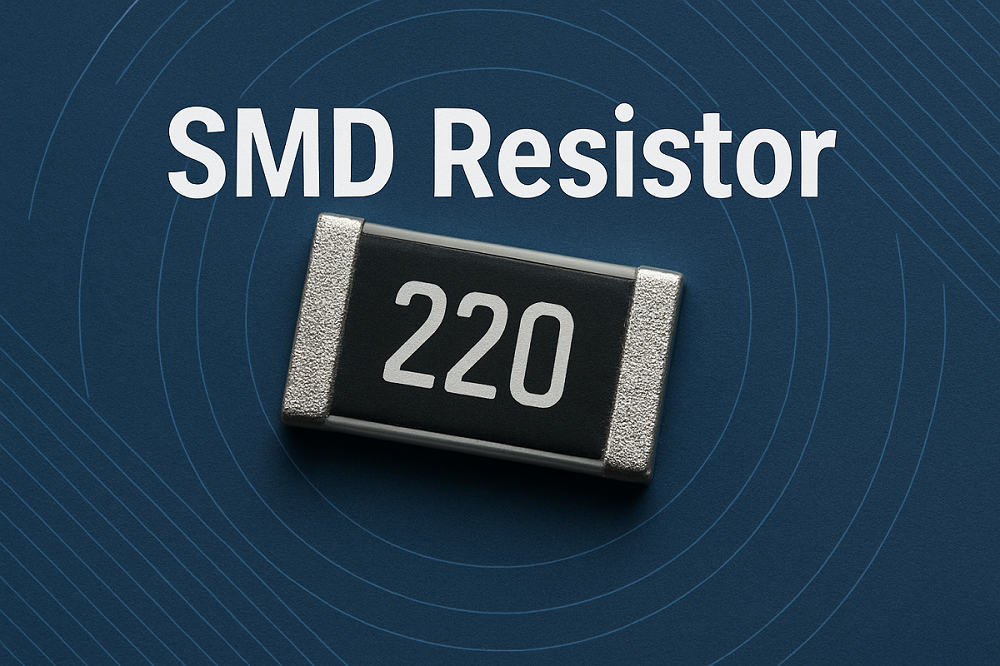
2026 Executive Summary: Reading SMD Resistor CodesHow do you read SMD resistor codes? For standard 3-digit codes, the first two numbers are significant digits, and the third is the multiplier (10^x). For 4-digit codes (precision), the first three are significant. The EIA-96 system uses a two-digit code and a letter multiplier. This authoritative guide covers all calculation methods, updated for 2026 industry standards.What are SMD Resistors? (2026 Overview)SMD Resistor, also known as a Chip Resistor, is a surface-mount passive component essential for modern high-density electronics. Manufactured by sintering metal powder and glass glaze on a ceramic substrate, these components offer superior resistance to humidity, high temperatures, and vibration compared to legacy through-hole parts. As of 2026, they are the industry standard for everything from AI hardware to smartphones. While different resistors feature varied specifications, the critical question remains: how are these microscopic resistance values marked and decoded? Figure 1. Structure of SMD ResistorsⅠ How to Read Resistor Markings: 4 Key MethodsTo master resistor identification, one must understand the four global standards used to denote resistance values. These methods are governed by IEC 60062 standards:1. Direct Marking MethodThis method prints the actual numbers and unit symbols directly on the resistor surface. The allowable error (tolerance) is expressed as a percentage. If no deviation is marked, the standard tolerance is typically ±20%.2. Text Symbol MethodThis approach uses a combination of Arabic numerals and text symbols to indicate the nominal resistance and tolerance. The number preceding the symbol represents the integer value, while the number following represents the decimal. Tolerance characters are standardized: D (±0.5%), F (±1%), G (±2%), J (±5%), K (±10%), M (±20%).3. Digital Method (Most Common for SMD)This method uses a 3-digit or 4-digit code. Read from left to right, the initial digits represent the significant figures (effective values), and the final digit is the exponent (multiplier), indicating the number of zeros to add. The unit is always Ohms (Ω).4. Color Code Marking MethodWhile rare on modern SMDs (except MELF packages), color bands are the standard for through-hole resistors. The bands represent values and multipliers:Black (0), Brown (1), Red (2), Orange (3), Yellow (4)Green (5), Blue (6), Violet (7), Gray (8), White (9)Tolerance: Gold (±5%), Silver (±10%), Colorless (±20%)Figure 2. Universal Resistor Color Code DiagramReading Tip: For a four-band resistor, the last band (usually gold/silver) is the tolerance. The first two bands are digits, and the third is the multiplier. For five-band precision resistors, the first three are digits, the fourth is the multiplier, and the fifth is the tolerance. Ⅱ Calculating SMD Resistor Values (Step-by-Step)2.1 Understanding Character Code MarkingsVideo: SMD Resistor Coding ExplainedMarking chip resistors requires a compact system due to the component's microscopic size. While large packages may use full numbers, 0603, 0805, and 1206 packages use coded systems. Here is the 2026 standard breakdown for decoding these values:The 3-Digit System (Standard Tolerance ±5%):1. The first and second digits represent the significant resistance figures.2. The third digit is the multiplier (10^x).Decoding Guide by Third Digit:• Ends in 0: No extra zeros. Example: 100 = 10 Ω.• Ends in 1: Add one zero (x10). Example: 101 = 100 Ω.• Ends in 2: Add two zeros (x100). Example: 102 = 1,000 Ω (1 kΩ).• Ends in 3: Add three zeros (x1,000). Example: 103 = 10,000 Ω (10 kΩ).• Ends in 4: Add four zeros. Example: 104 = 100 kΩ.• Ends in 5: Add five zeros. Example: 105 = 1 MΩ.• Ends in 6: Add six zeros. Example: 106 = 10 MΩ.The 4-Digit System (Precision Tolerance ±1%):For higher precision, three significant digits are used. Example: 1001 means 100 + one zero = 1000 Ω (1 kΩ).Note: Ultra-small packages like 01005, 0201, and 0402 are physically too small for markings. These must be measured with a multimeter or tracked via reel tape labeling.2.2 Real-World Calculation ExamplesCase 1: 3-Digit Code (±5% Tolerance)This uses two significant digits followed by a multiplier.Calculation: 153 → 15 followed by 3 zeros → 15,000 Ω = 15 kΩDecimal Values: "R" represents the decimal point. Code 6R8 → 6.8 ΩCase 2: 4-Digit Code (±1% Tolerance)Common on packages like 0805, 1206, and 2512. The first three digits are significant.Calculation: 2372 → 237 followed by 2 zeros → 23,700 Ω = 23.7 kΩDecimal Values: 3R24 → 3.24 ΩCase 3: EIA-96 System (The "Cryptic" Code)Used for 1% tolerance resistors on small 0603 packages where 4 digits won't fit. This system uses a two-digit code (referencing a lookup table) and a letter multiplier.Format: [Code] [Letter]Example Multipliers: Y=0.01, X=0.1, A=1, B=10, C=100, D=1000, E=10000.E-96 Series Standard Resistance Lookup Table (Partial)ValueCodeValueCodeValueCode100011471721533102021501822134105031541922635107041582023236110051622123737113061652224338115071692324939118081742425540121091782526141124101822626742127111872727443130121912828044133131962928745137142003029446140152053130147143162103230948 ValueCodeValueCodeValueCode316494646568181324504756669882332514876771583340524996873284348535116975085357545237076886365555367178787374565497280688383575627382589392585767484590402595907586681412606047688792422616197790993432626347893194442636497995395453646658097696EIA-96 Calculation Examples:Code 29B: Lookup "29" in table → Value 196.Multiplier "B" → x10.Result: 196 × 10 = 1.96 kΩCode 10X: Lookup "10" in table → Value 124.Multiplier "X" → x0.1.Result: 124 × 0.1 = 12.4 ΩCase 4: The Underlined Code (Special 0603 Case)Sometimes you see a standard 3-digit code with a line under it on an 0603 package. This usually indicates the manufacturer uses the E-24 series values (loose tolerance) rather than E-96, but the calculation is standard.122 = 12 × 100 = 1.2 kΩ680 = 68 × 1 = 68 Ω (Note: 680 does not mean 680 ohms here, it means 68 and zero extra zeros). Ⅲ How to Identify Damaged SMD Resistor Values?When a resistor is burned or the marking is unreadable, use these four forensic engineering methods to deduce the value:1. Parallel Circuit ComparisonPCB designs, especially in power supplies and audio amplifiers, often use symmetrical channels. • Example: In an LCD backlight driver, if the resistor in Channel A is burnt, check the corresponding position in Channel B. Often R17 = R51, or R23 = R48. Measure the intact sibling component to find the value.2. Circuit Context Analysis (Pull-Up/Pull-Down)For Microcontroller (MCU) circuits, resistors connected to GPIO pins are typically "pull-up" or "pull-down" resistors used to stabilize logic levels.• Common Values: 3.3kΩ, 4.7kΩ, 10kΩ.• Deduction: If the resistor connects a data line to VCC or GND, replacing it with a 10kΩ resistor is a safe starting point for testing.3. Reference Similar SchematicsIf the exact schematic is unavailable, search for schematics of devices using the same main IC. Manufacturers often use the "Reference Design" provided by the chipmaker, meaning the peripheral resistor values will be identical across different brands.4. The Potentiometer Test (Advanced)If all else fails, trace the circuit diagram. Temporarily solder a high-value potentiometer (variable resistor) in place of the damaged part. Power on the device and slowly adjust the resistance while monitoring voltage levels until the circuit functions correctly. Remove the potentiometer, measure its set resistance, and replace it with the closest standard fixed resistor. Ⅳ Top SMD Resistor Manufacturers (2026 Updated)Reliability is paramount in 2026 electronics. The following brands are currently recognized as Tier-1 manufacturers for automotive, industrial, and consumer electronics:YAGEO: Global leader in chip resistors (acquired KEMET).Vishay: Known for high-precision, military-grade foil resistors.Panasonic: Industry standard for high-reliability automotive parts.KOA Speer: Major supplier for automotive and industrial markets.Bourns: Famous for circuit protection and resistors.TE Connectivity: Specialist in harsh environment resistors.Other Notable Brands: ROHM, Ohmite, Welwyn, TT Electronics, UNI-ROYAL (Uniohm). ⅴ Frequently Asked Questions (FAQ)1. What is an SMD resistor used for?SMD (Surface Mount Device) resistors limit current, divide voltage, and stabilize signal lines in compact electronic circuits. They are essential for miniaturizing devices like smartphones, wearables, and IoT sensors where traditional through-hole components would be too bulky. 2. How do I calculate the value of a 3-digit SMD resistor?Use the formula: [1st Digit][2nd Digit] x 10^[3rd Digit]. For example, "103" means 10 x 10^3 (1000) = 10,000 Ohms or 10kΩ. 3. What does "R" mean in a resistor code like 4R7?The letter "R" represents the decimal point. It is used when the resistance value is too small to use a multiplier code. Therefore, 4R7 equals 4.7 Ohms. 4. What is the difference between 103 and 1002 markings?Both equal 10kΩ, but the marking indicates tolerance. "103" (3-digit) typically indicates ±5% tolerance. "1002" (4-digit) indicates higher precision, typically ±1% tolerance. 5. How do I read the cryptic "01A" or "29B" codes?These are EIA-96 codes for 1% precision resistors on small 0603 parts. You cannot read them directly; you must use an EIA-96 lookup table. The number refers to a value code, and the letter is the multiplier. 6. Why do some SMD resistors have no markings?Resistors in package sizes 0402, 0201, and 01005 are physically too small to print legible text. To identify these, you must measure them with a multimeter or refer to the manufacturer's reel tape packaging. 7. What does SMD stand for?SMD stands for Surface Mounted Device. It refers to the component itself. SMT (Surface Mount Technology) refers to the manufacturing process of placing these components onto a PCB. 8. What materials are SMD resistors made of?Most SMD resistors are "Thick Film" or "Thin Film" types. They consist of a ceramic substrate (alumina) coated with a resistive paste (metal oxides and glass). This is fired in a kiln, laser-trimmed to the exact value, and then coated with a protective layer.{ "@context": "https://schema.org", "@type": "Article", "mainEntityOfPage": { "@type": "WebPage", "@id": "https://www.kynix.com/Blog/How-to-Read-the-Value-of-SMD-Resistor-Example-Explained.html" }, "headline": "How to Read SMD Resistor Codes: The 2026 Guide to 3-Digit, 4-Digit & EIA-96 Markings", "image": "https://www.kynix.com/editor_u/image/20211027/2021102711243403.jpg", "author": { "@type": "Organization", "name": "Kynix Electronics" }, "publisher": { "@type": "Organization", "name": "Kynix Electronics", "logo": { "@type": "ImageObject", "url": "https://www.kynix.com/logo.png" } }, "datePublished": "2021-10-27", "dateModified": "2026-01-08", "description": "Learn how to calculate SMD resistor values using 3-digit, 4-digit, and EIA-96 codes. Includes updated 2026 lookup tables and troubleshooting steps for damaged components.", "articleBody": "SMD Resistor, called Chip Resistor, is one type of resistors..."}{ "@context": "https://schema.org", "@type": "FAQPage", "mainEntity": [{ "@type": "Question", "name": "What is an SMD resistor used for?", "acceptedAnswer": { "@type": "Answer", "text": "SMD (Surface Mount Device) resistors limit current, divide voltage, and stabilize signal lines in compact electronic circuits like smartphones and IoT devices." } }, { "@type": "Question", "name": "How do I calculate the value of a 3-digit SMD resistor?", "acceptedAnswer": { "@type": "Answer", "text": "Use the formula: [1st Digit][2nd Digit] x 10^[3rd Digit]. For example, 103 means 10 x 1000 = 10,000 Ohms (10kΩ)." } }, { "@type": "Question", "name": "What does 'R' mean in a resistor code like 4R7?", "acceptedAnswer": { "@type": "Answer", "text": "The letter 'R' acts as a decimal point. 4R7 represents 4.7 Ohms." } }, { "@type": "Question", "name": "How do I read EIA-96 codes like 01A?", "acceptedAnswer": { "@type": "Answer", "text": "EIA-96 codes require a lookup table. The number represents a significant value, and the letter represents a multiplier. For '01A', 01 is 100 and A is x1, resulting in 100 Ohms." } }]}{ "@context": "https://schema.org", "@type": "HowTo", "name": "How to Read a 3-Digit SMD Resistor Code", "description": "Step-by-step guide to calculating resistance from standard 3-digit markings found on most chip resistors.", "step": [{ "@type": "HowToStep", "name": "Identify the Significant Digits", "text": "Read the first two numbers on the resistor. These are your significant digits (e.g., in '103', the significant digits are '10')." }, { "@type": "HowToStep", "name": "Identify the Multiplier", "text": "Read the third number. This indicates the power of 10 to multiply by (or how many zeros to add). In '103', the multiplier is 3 (10^3 or 1000)." }, { "@type": "HowToStep", "name": "Calculate the Result", "text": "Multiply the significant digits by the multiplier. 10 x 1000 = 10,000 Ohms (10kΩ)." }]}
Karty On 2021-10-27
CatalogⅠ What is Coolant Temperature SensorⅡ Function and Structure of Coolant Temperature SensorⅢ The Working Principle of Coolant Temperature SensorⅣ Application of Coolant Temperature Sensor in Vehicles 4.1 Location on Automobiles 4.2 Ways of Testing Coolant Temperature SensorⅤ How to Replace the Faulty Coolant Temperature SensorⅥ Frequently Asked Questions about Coolant Temperature Sensor Analysis Ⅰ What is Coolant Temperature SensorEvery driver is aware that coolant/antifreeze is applied to keep an engine operating at peak efficiency. However, how do cooling systems recognize when the engine is at the proper operating temperature? We take a closer inspection at coolant temperature sensors in this guide, providing information on what they do and how they work, as well as step-by-step instructions for diagnosing and replacing a faulty sensor. A coolant temperature sensor (CTS) (also known as an ECT sensor or ECTS (engine coolant temperature sensor)) measures the temperature of the coolant/antifreeze mix in the cooling system, indicating how much heat the engine is producing. The sensor communicates with the vehicle's ECU and continuously monitors coolant temperature to ensure that the engine is operating at the proper temperature. Ⅱ Function and Structure of Coolant Temperature Sensor The coolant temperature sensor is installed on the water jacket of the engine block or cylinder head, contracting with the coolant directly. The CTS is applied to detect the temperature of the engine coolant. The internal part is equipped with a negative thermistor with negative temperature characteristics. The feature of a negative thermistor is that the higher the temperature, the smaller the resistance, the lower the temperature, the greater the resistance.Figure1: the circuit image of coolant temperature sensor The signal of the coolant temperature sensor is a correction signal, and its function is to inspect the temperature of the engine coolant. The temperature of the engine coolant transmit the signal to the ECU, and the ECU measured temperature and correct the fuel injection volume according to the signal indication. When the cold car starts or the engine warms up, the ECU will correct the fuel injection.When the car is hot, the ECU will correct to inject the leaner mixture; the same way, when the engine coolant temperature signal is detected, the ECU controls the cooling and the fan is turned on and off. Ⅲ The Working Principle of Coolant Temperature Sensor Generally, the structure of the coolant temperature sensor seems to be a negative thermistor. Therefore, its temperature is inversely proportional to resistance, and its voltage is also inversely proportional to resistance. The range of temperature changes: -40 to 195°C. When the engine cools down from the start of the cold car to the hot car, the parameters of the fluid temperature sensor gradually increase, and the vehicle is idling when the engine is completely warmed up. The coolant temperature should be 85~105℃ when operating, if the parameter of CTS is -40℃, it indicates that there is a short-circuit in CTS. If the parameter is higher than 185℃, it means that there was the same failure as-40℃. The voltage change range is 0 ~ 5V. When the temperature parameter is -40℃, the corresponding voltage is 4.98V,while the temperature parameter is 185℃, the corresponding voltage is 0.02V. The cooling system in a car with an internal combustion engine keeps the engine at the proper temperature and prevents it from overheating. The temperature of the liquid coolant is measured by an engine coolant temperature sensor or ECT. A Negative Temperature Coefficient (NTC) thermistor is a type of engine cooling temperature sensor in which the electrical resistance decreases as the temperature rises. The ECT sensor's tip protrudes into a cooling system passage and is submerged in coolant.This vedio show that how coolant temperature sensor works Ⅳ Application of Coolant Temperature Sensor in Vehicles4.1 Location on Automobiles Many automobiles have multiple coolant temperature sensors. The primary ECT sensor (ECT sensor 1) is usually located near the thermostat in the cylinder head or block, or on the thermostat housing. Sensor for electrocardiography (ECT) the engine computer, or PCM, is connected to the ECT sensor. A second coolant temperature sensor could be installed in the radiator or in another part of the engine. Instead of or in addition to the ECT sensor, some cars use a cylinder head temperature or CHT sensor. The CHT sensor (shown in the photo) works in the same way, but it measures the temperature of the cylinder head metal rather than the coolant temperature. This enables the CHT sensor to accurately measure the temperature of the engine even when coolant is lost. This may help prevent overheating in some cases. The main computer is connected to an ECT sensor (powertrain control module or PCM). The PCM provides a constant reference voltage (typically 5 volts) and monitors the ECT sensor signal. When the temperature reaches a pre-determined level, the PCM adjusts the engine performance and operates the electric radiator fans based on this signal. If the sensor signal is missing or outside of the expected range, the PCM illuminates the Check Engine light and records the associated trouble code. 4.2 Ways of Testing Coolant Temperature SensorTesting the ECT/CHT Sensor Resistance: One method is to measure the sensor's resistance at various engine temperatures and compare the results to the service manual's specifications.We tested the resistance of the ECT sensor in this car, for example. Only when the sensor is disconnected from the circuit can the resistance be measured. The reason for this is that measuring the resistance of any electrical component that is still connected to the circuit will result in inaccurate results. When the engine was cold, the resistance was 2,953 Ohm. After the engine was fully warmed up, it dropped to 248.5 Ohm; see photo. This sensor complies with the manufacturer's specifications. Of course, the resistance specifications differ from car to car. Figure2:one way to test the resistance of senser Checking the ECT/CHT Sensor Voltage:With the ignition on, another way to test the sensor is to measure the voltage across the sensor terminals. The voltage of the engine coolant temperature (ECT) sensor is measured. The voltage of the ECT sensor is being checked. The engine computer is linked to the sensor (PCM). The reference voltage (typically 5 volts) is supplied by the PCM, and the sensor ground is provided by another wire. The ground as well as the reference voltage must be checked first. The voltage drops as the sensor's resistance decreases as the engine warms up. We probed the ECT sensor inversely in this photo to keep it connected to the circuit. We measured 3.96 Volt when the car was cold. The voltage dropped to 0.988 Volt on a fully warmed-up engine. The multimeter will read 5 volts when the sensor is disconnected. If you don't see any voltage, the circuit is either open or shorted to the ground. One of the wires in the sensor harness, for example, could break or rub against a metal part, causing a short. Figure3: another way to test sensor Voltage 4.3 Symptoms of a bad or failing coolant temperature Poor fuel economy Poor fuel economy is one of the first signs of failure with the coolant temperature sensor. If the coolant temperature sensor fails, it can send a false signal to the computer, causing fuel and timing calculations to be thrown off. It's not uncommon for the coolant temperature sensor to fail and send a signal to the computer that's always cold. This will trick the computer into thinking the engine is cold when it isn't, causing it to consume more fuel than is necessary. The poor fuel economy will suffer as a result, and engine performance may suffer as a result. Black smoke from engine Black smoke from the vehicle's exhaust is another sign of a possible problem with the coolant temperature sensor. If the coolant temperature sensor fails and sends a cold signal to the computer, the computer may become confused and enrich the fuel mixture unnecessarily. If the fuel mixture becomes too rich, it will burn up in the exhaust pipes, resulting in black smoke. In severe cases, the black smoke may be so awful that the vehicle can not be started. Overheating engine An overheating engine is another sign of a problem with the coolant temperature sensor. The coolant temperature sensor can also fail in such a way that it sends an always-hot signal. This can cause the computer to compensate for a lean signal incorrectly, resulting in overheating, misfires, and even engine ping. Check Engine Light comes on Another sign of a problem with the coolant temperature sensor is an illuminated Check Engine Light. If the computer detects a problem with the sensor's signal or circuit in some vehicles, the Check Engine Light will illuminate. The Check Engine Light will stay illuminated until the trouble is resolved. Ⅴ How to Replace the Faulty Coolant Temperature SensorBegin with a cold engine. Drain the cooling system by jacking the car up and using jack stands. Wear safety glasses and glovesMterials:1. coolant collection pan2. flat head screwdriver3. new coolantTools:1. eyewear and golves 2. pliers3. funmel4. jack standsTip: Only do this job when the engine is completely cold and hasn't been running for at least an hour. Because you'll be underneath the car and the risk of coolant splashing in your face is high, it's a good idea to protect your face with a safety shield. If the engine is not cold, wear safety glasses and gloves to protect your hands from the hot coolant. Step1: Locate the SensorThe CTS is usually found near the radiator or thermostat housing in the front of the engine. You may need to use a light or torch to locate it because it's a small component that's often found lower down inside the engine bay. If it's near the thermostat housing, removing the engine cover can also help you find it.Figure4: firstly, locate the coolant sensor Step2: Remove the Connector Cable from the Terminal A connector connects the CTS to the ECU, which you must unfasten and remove. Do this with caution, as the plastic connector and wiring can be brittle and require replacement if they break. Remove the connector and place the cable somewhere out of the way.Figure5: release the connector Step3: Loosen and Remove the Old Sensor Coolant sensors are installed similarly to spark plugs, so they must be unscrewed to be removed. Carefully loosen the sensor in an anticlockwise direction with a deep socket and ratchet, without applying too much pressure. A squirt of release spray can aid in the unsticking of stuck sensors. Remove the sensor from the socket by unscrewing it by hand once it is loose. Because coolant is likely to leak at this point, have a new one on hand or consider draining the coolant if necessary.Figure6: Remove the clip and old sensor Step4: Install the New Sensor Clean the area with a rag or cloth to remove any dust or debris that could influence the new CTS' performance. Set the new sensor in the threads and hand-twist clockwise to ensure it is securely seated in the socket. Tighten the sensor with a torque wrench to the amount specified in the manufacturer's instructions.Figure6: install the new coolant sensor Step5 : Reinstate the Connector Cable The only thing left to do now is reconnect the cable after the new sensor has been installed. Make sure the connector is clean and free of debris before carefully plugging it into the new sensor and tightening any clips to ensure a good connection. Start the engine to ensure the new sensor is working, and as it warms up, keep an eye on the temperature gauge on the dash to ensure the correct temperature is maintained.Figure7: reconnect the cableⅥ Frequently Asked Questions about Coolant Temperature Sensor Analysis1. Can you drive with a bad coolant sensor?It is possible to drive a vehicle with a faulty coolant temperature sensor as the management system defaults to a static reading. A vehicles coolant sensor is a critical component used by the engine management system. It directly effects, cooling and fueling of the engine and therefore effects how the engine performs. 2. What does the coolant temperature sensor do?A coolant temperature sensor (CTS) (also known as an ECT sensor or ECTS (engine coolant temperature sensor) is used to measure the temperature of the coolant/antifreeze mix in the cooling system, giving an indication of how much heat the engine is giving off. 3. What causes a coolant temperature sensor to fail?The engine may run in fail-safe mode:Many Check Engine light codes related to the (ECT) sensor; could also be caused by other reasons. Such as a bad thermostat or issues with the cooling system; including even a leaking head gasket. Therefore, The problem must be properly diagnosed. 4. How long do coolant temp sensors last?About 100,000 miles. Often, the engine coolant temperature sensor must be replaced at about 100,000 miles. If you don't properly maintain the engine cooling system, the sensor could fail much earlier. 5. Do you need to drain coolant to change coolant temperature sensor?Open the radiator valve and drain about two to three quarts of coolant. You only need to remove enough to drop the level below the sensor. Then close the drain valve. This will minimize coolant waste when you remove the sensor. 6. Can you run a car without a temperature sensor?Generally it should be ok to drive without the thermostat fitted, as it will only cause the engine to take longer to reach operating temperature. The thermostat is designed to allow the engine to reach ideal operating temperature as quickly as possible, so it would not be recommended to drive without it. 7. Can a bad coolant temp sensor cause rough idle?A faulty coolant sensor that always reads cold may cause the fuel control system to run rich, pollute and waste fuel. A coolant sensor that always reads hot may cause cold drive ability problems such as stalling, hesitation and rough idle. ... This also affects engine performance and fuel economy. 8. Does coolant temp sensor affect AC?In a properly operation system the engine coolant temperature should not affect the cooling of the air conditioner. The A/C condenser is located in front of the radiator and is first to receive the incoming airflow.
kynix On 2021-07-28
IntroductionIC packaging refers to the material that contains a semiconductor device. The package is a case that surrounds the circuit material to protect it from corrosion or physical damage and allow mounting of the electrical contacts connecting it to the printed circuit board (PCB). Let's take a look at some of the different types of packaging options you can use to enhance your product & customer experience.CatalogIntroductionⅠ How Do You Find the Right IC Packages?Ⅱ What are IC Made Up of?Ⅲ How Many Types of IC Packages Are There?3.1Through-hole Technology (THT)3.2 Surface-mount Technology (SMT)3.3 Through-Hole vs Surface MountⅣ IC Packages Selection SummaryⅠ How Do You Find the Right IC Packages?There was a lot of change in the way electronics components appeared or packaged, from bulky vacuum tubes to lightweight SMD ICs. Because IC packaging indicates the dimension and shape of a chip, to minimize the number of components on board, manufacturers are actively working to reduce the size of ICs, and multiple components are also being increasingly incorporated into LSI, VLSI, and ULSI designs. Almost all components are currently available in two or three different package forms, from which the engineer can pick the one that best fits device application. We will learn about the various IC package forms in this article and where they can be useful.Types of IC | IC Package Types ExplainedⅡ What are IC Made Up of?Before introducing the various forms of IC packages, we can learn about the process of IC manufacturing firstly. ICs consist of monolithic, hybrid, or film circuits, as a matter of fact. The development steps for the IC are as follows:LithographyIt is a technique for defining a pattern in which a photoresist material is added to the wafer surface evenly and then baked to harden. Later, light is projected and selectively extracted via a reticulum containing mask details.EtchingThe undesired materials are separated from the wafer surface.DepositionMaterials are added to the wafer through the process of Physical Vapor deposition and chemical vapor deposition.Chemical Mechanical PolishingA planarization technique by the application to the wafer surface of a chemical slurry with etchant agents.OxidationOxygen (dry oxidation) or HO (wet oxidation) molecules convert silicon layers to silicon dioxide on top of the wafer in the oxidation process.Ion implantationThe most commonly used method for the semiconductor incorporation of dopant impurities. The ionized particles are accelerated and targeted at the semiconductor wafer via an electrical field.DiffusionFor annealing bombardment-induced lattice defects, a diffusion phase following ion implantation is used.IC Design & Manufacturing Process OverviewⅢ How Many Types of IC Packages Are There?A very huge variety of integrated circuits have different packaging requirements. Based on how they are placed on a circuit board, the packages are divided into two types.3.1Through-hole Technology (THT)Through-hole MountingThey are designed to trap the lead pins on one side of the board and smolder on the other side. Compared to other forms, they are larger in scale. These are mainly used in electronic equipment to compensate for the limitations of board space and expense. One example of through-hole mount packages is dual inline packages.DIP and ZIPThrough-hole mount packages come in ceramic and plastic forms to add up to the classification.The most widely used IC packages are Dual Inline Packages (DIP). As in 28-pin ATmega328, the pins are positioned parallel to each other, extending perpendicularly and laid out on a rectangular black plastic housing. The pins are 0.1 inches apart. Additionally, because of the variation in the number of pins in various packages, the box differs in size. They range in number from 4 to 64. These pins are positioned in a way that they can be changed without short-circuiting each other or even smoldering into PCBs at the center of a breadboard.The few common types are Plastic Dual In-Line Package (PDIP) and Molded Dual In-Line Package (MDIP). There are several types of DIP packages. It can further be categorized as:Norm - The most prevalent packaging is this. The pins are spaced apart by 0.1". Skinny - The space between the terminal rows in this box is 7.62mm.Shrink - Identical to the regular ones, but 1.778 mm is the lead pitch. Smaller in size, they use packaging with high pin density.Zig-Zag in Line Packages (ZIP)- Pins are inserted perpendicular to the circuit board in this kind of package. In the box, these pins are aligned perpendicularly and are closer to each other. This style of packaging was short-lived and was primarily used in RAM chips that were dynamic. CER-DIP comprises other types of through-holed packages in which the lead pitch is 2.54 mm and the body is molded with ceramics. Also, glass is the sealing medium used here. The lead pitch of the Pin Grid Array (PGA) is 2.54 mm and the body is made of ceramic. The pins from the body are arranged vertically and can be positioned on a grid. Typically, this one fits a multi-pin kit.3.2 Surface-mount Technology (SMT)Surface Mount DefinitionThe technology of installing or positioning the components directly onto the printed circuit board surface is accompanied by surface mount packaging. While this manufacturing process helps to rapidly do stuff, it also raises the likelihood of defects. This is due to component miniaturization and also because they are placed very close to each other. This, in fact, results in the detection of the deficiency in the entire process becoming extremely significant. Again, ceramic or plastic molding is often used in Surface Mount packaging.Types of SMTThe following are the various types of surface mount packages that use plastic molds:(1) Small Outline L-leaded PackageThis type has leads of the gull-wing type that draw in a L fashion from the body in either direction and can be placed directly on the frame. QFP (Quad Flat L-leaded Packages)-These are SOP-like. The only difference, however, is that the leads are drawn out in 4 directions instead of 2 and are directly placed on the frame. They even come with a heat sink and a heat spreader built in.(2) Ball Grid Array (BGA)A ball grid array (BGA) is a type of surface-mount packaging (a chip carrier) used for integrated circuits. BGA packages are used to permanently mount devices such as microprocessors. A BGA can provide more interconnection pins than can be put on a dual in-line or flat package. As for BGA soldering, the solder balls on the package have a very carefully controlled amount of solder, and when heated in the soldering process, the solder melts. Surface tension causes the molten solder to hold the package in the correct alignment with the circuit board, while the solder cools and solidifies.3.3 Through-Hole vs Surface MountThe two kinds of packaging have their individual advantages and disadvantages - primarily through-hole mounting and surface mounting. Here's a comparison with different variables between through-hole and surface mount devices that adjust the need for the form of IC packages.1. Size - In contrast with through-hole packages, surface mount packages are smaller.2. Component density - Component density as well as attachment density are comparatively higher for surface mounting packages.3. Assembly- In contrast to through-hole packages that can not afford even the smallest of errors when making holes, minor errors are immediately corrected by the molten solders that bring components close together due to stress in surface mounting packages. This is because, once made, the alignment can not be changed.4. Electromagnetic compatibility - The ability of various electronic devices and components, even in the presence of other devices that produce electromagnetic waves, to operate correctly. Packages for surface mounting have better EMC performance.5. Cost - Because of automated processes, the manufacturing cost is often lower than that of through-hole packages.Surface mount packages do not, however, operate together with a simple plugin on the breadboard. They need a pin-led carrier to be installed. Or worse, they can need special PCBs customized separately for various prototypes.Ⅳ IC Packages Selection SummaryICs are put into protective packages to allow easy handling and assembly onto PCBs and to protect the devices from damage. Therefore, a suitable package type is important for ic applications. First of all, let us emphasize enough how important it is to have good packaging. To allow smooth handling and installation on the printed circuit boards, integrated circuits are placed into packages. To prevent any kind of harm and corrosion, it is extremely imperative to bring ICs into packages. The packages also assist in the dissipation of the heat generated. This is, however, the final part of the entire fabrication process. Consider certain important factors, such as assembly capacity, strength, cost, and connectivity, before deciding on the type of packaging that best suits you.With the ever-present innovations, several kinds of semiconductor integrated circuits packages have appeared. The motive is to choose for yourself the correct type of IC package that is affordable and yet does not compromise with efficiency. Most important thing, chips with the same electronic parameters may have different package types. Frequently Asked Questions about Types of IC Packages1. What is IC package design?IC packaging refers to the material that contains a semiconductor device. The package is a case that surrounds the circuit material to protect it from corrosion or physical damage and allow mounting of the electrical contacts connecting it to the printed circuit board (PCB). 2. What are the different types of IC packages?DIP (Double In-line Package)SOP/SOIC/SO (Small Outline Package)QFP (Quad Flat Package)QFN/LCC (Quad Flat Non-leaded Package)BGA (Ball Grid Array Package)CSP (Chip Scale Package) 3. What is the most common type of digital IC package?DIP (Dual in-line packages)DIP, short for dual in-line package, is the most common through-hole IC package you'll encounter. These little chips have two parallel rows of pins extending perpendicularly out of a rectangular, black, plastic housing. 4. How many types of IC are there?TwoThere are two main types of integrated circuits: digital ICs or analog ICs. 5. What are the types of packaging materials?Different Types of Packaging Materials1) Plastic. The most common packaging methods in industries is plastic.2) Aluminum. Aluminum is widely used for products such as sodas, beer, canned goods and animal foods.3) Cardboard. Most products that are packaged in cardboard boxes are first wrapped in another type of packaging such as bubble wrap or foam.4) Glass5) Foam
kynix On 2021-01-18
With the development of science and technology, electronic products are changing with each passing day. Also, electronic assembly technology is facing challenges. Following the development of electronic technology, people work harder to make innovations in electronic assembly technology. And in this context, a flexible circuit board invented used which made of the thin-and-flexible polymer film. It can complete the application of surface mounting technology and bend without affecting the normal circuit operation. Clear Flexible Printed Circuit Catalog I. Brief IntroductionII. Five Main Materials for Flexible Circuit Board2.1 Insulating Firm2.2 Bonding Sheet2.3 Copper Foil2.4 Overburden2.5 Reinforcement PlateFAQ I. Brief Introduction Today's flexible electrons are all made of SMT technology, so they are thin and exquisite with insulation thickness of fewer than 25 μm. It can be bent arbitrarily and rolled into a cylinder. And it makes full use of three-dimensional volume. It breaks the stereotype of the traditional area of use and creates the ability to make full use of the shape of the volume, which can significantly enhance the effective density of use in the length of the conductor currently routinely used per unit area, forming a high-density assembly. In recent years, flexible circuit technology has been applied in various fields, such as radio communication, computer, and automobile electronic equipment. Unlike in the past, flexible circuits have been used as substitutes for rigid cables, and they have been used as substitutes for rigid circuits and printed circuit boards (PCB) in applications where thin or three-dimensional circuits are required. In order to meet the requirements of rigid and flexible applications, it is combined flexible circuit technology in the rigid circuit board, making flexible circuit board used widely. The functions of the flexible circuit board can be divided into four categories, including the lead line, printed circuit, connector, and IntegraTIon of FuncTIon, which covers the computer, Computer peripheral auxiliary system, civil electrical appliances and cars, and other areas. For different applications, the material of the flexible circuit board should select carefully. And the followings are some rules of the five main materials of the flexible circuit board. II. Five Main Materials for Flexible Circuit Board 2.1 Insulating FirmThe insulating film is flexible and can be used as the insulation carrier of the circuit board to form the basic layer of the circuit. When selecting the flexible dielectric film, the heat resistance, overlay, thickness, mechanical properties and electrical properties of the material should be tested. Insulation film is usually available on the market, the most common is polyimide and polyester materials. Of all the flexible circuit manufacturers in the United States, nearly 80% use polyimide film as the material for flexible circuits, and about 20% use polyester film. Because polyimide material is nonflammable, stable geometry, high anti-tear, and able to withstand high temperature during welding. 2.2 Bonding Sheet It is made up of two insulating films coated with adhesive, the ability is gluing the film to the foil, and the film to the film in the flexible circuit, In order to provide mechanical support and eliminate stress during insertion of components and connectors. It also can provide protection and electrical insulation. Different types of adhesive sheets can be used for different film substrates, such as polyester bonding sheets and polyimide bonding sheets are different, for example, the polyimide substrate has epoxy resin and acrylic acid. 2.3 Copper FoilCopper foil is a conductor layer that is coated on the insulating substrate and then selectively etched to form a conductive line. The vast majority of this copper foil is rolled copper foil or electrolytic copper foil. The ductility and bending resistance of the rolled copper foil is better than that of the electrolytic copper foil. The elongation of the rolled copper foil is 20%~45% and the electrolytic copper foil is 4%~40%. The commonly used thickness of copper foil is 35um (1oz), also they have 18um (O.5oz), 70um (2oz), or even 105um (30z). According to different applications, we have to choose different forms of copper foil. If only to replace wires and connectors, and to reduce manufacturing time and cost, the best choice is electrolytic copper foil. The electrolytic copper foil will increase the weight of copper to level the load capacity of the current, thus obtaining the suitable width of the copper sheet. 2.4 OverburdenThe brand, Novaclad, created by Sheldahl, applies the vacuum metal spraying technology which is a patent. It is a technology that applying a thin layer of pure copper to the surface of a polyimide film, then electroplating into a specific thickness to form the substrate of Novaclad. The base material is used in Novaflex, a flexible circuit without adhesive. After all the circuits have been made, a layer of Novaflex insulation is applied. The Novaflex is designed to work under harsh conditions, and Novaflex without adhesive provides better flexibility, chemical resistance, high-temperature properties, and maximum heat dissipation properties. 2.5 Reinforcement PlateThe reinforced plate to the local position of the flexible plate plays the role of super supporting and strengthening the flexible film substrate, which is convenient for the connection, fixation, or other functions of the PCB. According to different needs, the reinforcement board materials commonly use polyester, polyimide sheet, epoxy fiberglass cloth plate, phenolic-aldehyde paper board, steel plate, aluminum plate, etc. FAQ 1.What is a flexible circuit board?A flexible printed circuit board features a combination of several printed circuits as well as components that are positioned on a flexible substrate. These circuit boards are also known as flex circuit boards, flex PCBs, flex circuits, or flexible printed circuits. 2. What is flex circuit used for?Flex circuits are often used as connectors in various applications where flexibility, space savings, or production constraints limit the serviceability of rigid circuit boards or hand wiring. A common application of flex circuits is in computer keyboards; most keyboards use flex circuits for the switch matrix. 3. What are flexible circuit boards made of?Flexible circuits are thin, light-weight electrical circuits that conform to small spaces and contoured shapes. They consist of conductive strips of metal, usually copper, encapsulated with an insulating dielectric material made of polyimide or a solder mask. 4. Where are flexible PCBS used?a. Automobiles.b. Consumer electronics including smartphones, SLR cameras and camcorders,c. Medical systems and devices such as heart monitors, pacemakers and the bionic knee.d. Motion systems.e. GPS systems.f. Aerospace and avionics systems. 5. When was the first flex printed circuit made?From early applications during World War II to the present, growth and proliferation for flex circuits and flexible printed circuit boards continues exponentially. A flexible circuit in its purest form is a vast array of conductors bonded to a thin dielectric film. 6. What are the advantages and disadvantages of flexible circuit boards?The advantages of the flexible circuit board are mainly high assembly density, which can save the connection of redundant cables, in addition, it has good bendability, high flexibility, small size, simple structure, and convenient installation.Disadvantages of flexible circuit boards: 1. High initial cost 2. Difficult to change and repair 3. Size limited 4. Improper operation and easy damage, etc. 7. What do flexible circuit boards and rigid circuit boards mean?a. Flexible circuit boards are used more in digital products. The difference between it and the rigid circuit board is that the substrate of the circuit board is different. As the name implies, the board can be bent and softer.b. "Multilayer board" and "double-sided board" mainly refer to the number of sides of wiring on the circuit board. Above 2 layers are multi-layer boards.From the perspective of the process flow, the multilayer board needs to be processed by the inner layer map, and the outer layer can be processed after being pressed. The processing flow of the outer layer is basically the same as the processing flow of the double-sided board. 8. What is the temperature resistance of fpc flexible circuit boards?FPC flexible circuit board can withstand high temperature of 280 degrees, about 1 hour. However, the recommended temperature for normal use is not less than -20 and not higher than 80. 9. With flexible circuit boards, why pcb hard printed circuit boards are still not eliminated?For PCBs that need to use plug-in components, only rigid boards can be used, which is what you call rigid boards; for many PCBs with stress requirements, only rigid boards can be used. The cost of flexible boards is currently much higher than rigid boards, more than doubled. And the straight-through rate of rigid boards is higher than that of flexible boards 10.Classification of flexible circuit boards?According to the combination of base material and copper foil, flexible circuit boards can be divided into two types: flexible boards with glue and flexible boards without glue. Among them, the price of the glueless flexible board is much higher than that of the glued flexible board, but its flexibility, the bonding force of the copper foil and the substrate, and the flatness of the pad are also better than the glued flexible board. You May Also LikeSwitching Power Supply Tutorial: 4V~16VWhat is A MCU’s internal Structure: Single Chip Micro-ComputerPCB Wring Tutorial: A/D converterMonitoring Technology in Communication Power Supply: Application GuideDIY CommunityDIY Flxible Printed CircuitsMake Flexible Circuit Boards Using A 3D Printer
kynix On 2018-11-01
Join our mailing list!
Be the first to know about new products, special offers, and more.
Feature Posts
How Resistors Work: From Basic Principles to Advanced Applications2025-07-30
DC Switching Regulators: Principles, Selection, and Applications2025-05-30
FPGA vs CPLD: In-depth Analysis of Architecture, Performance and Application2025-05-07
MOSFET Technology: Essential Guide to Working Principles & Applications2025-05-04
SMD Resistor: Types, Applications, and Selection Guide2025-04-30