info@kynix.com
 00852-6915 1330


 0
0


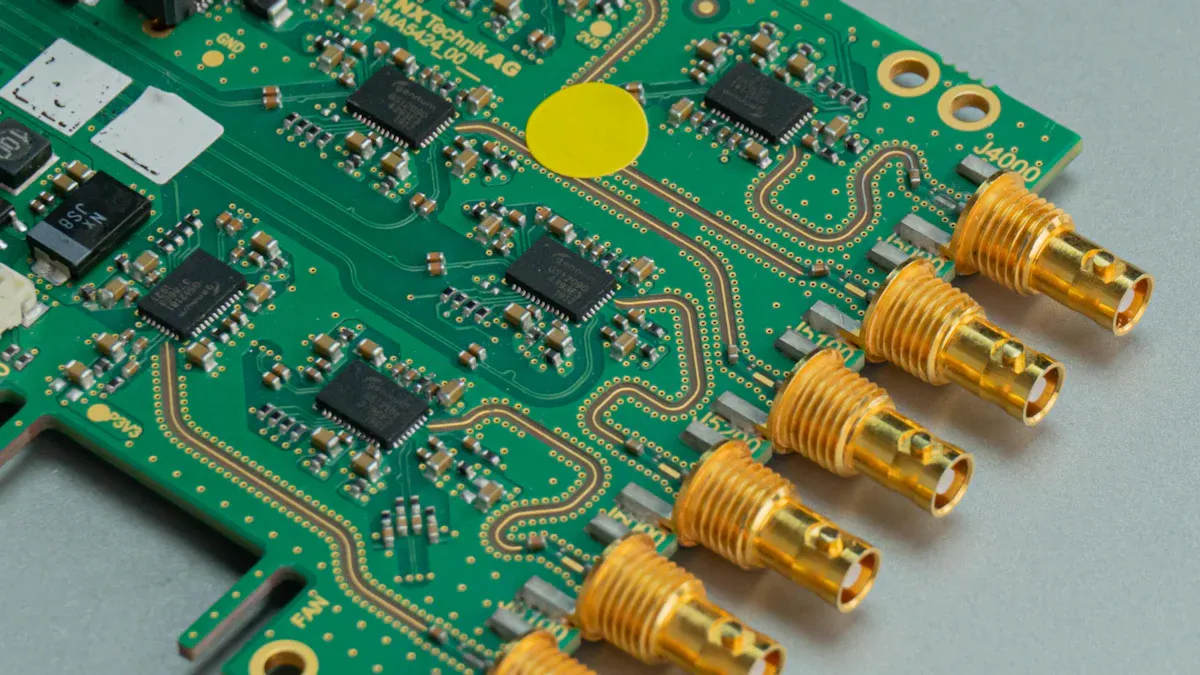



In global electronics manufacturing, multi-billion dollar supply chains rely on a fundamental operational guarantee: an integrated circuit (IC) or solid-state memory component designed by one semiconductor vendor must function reliably on another manufacturer's printed circuit board (PCB) without layout redesigns or firmware re-architecting. JEDEC standards provide the consensus-driven technical specifications that make this multi-vendor interoperability possible.JEDEC standards define the operational foundation of the modern semiconductor industry by establishing open, vendor-neutral specifications across electrical signaling, mechanical packaging, silicon stress qualification, factory-floor moisture management, and supply chain lifecycle governance. Governed by the JEDEC Solid State Technology Association, these standards allow hardware design engineers to guarantee physical and electrical tolerances across diverse operating conditions, while empowering procurement teams to enforce second-sourcing interchangeability, manage product obsolescence, and mitigate counterfeit risk.JEDEC Document Taxonomy and Technical Committee GovernanceJEDEC standards are developed through an open-consensus model spanning more than 50 specialized technical committees. Originally established in 1958 under the Electronic Industries Alliance (EIA) as the Joint Electron Device Engineering Council (JETEC), the organization transitioned into the independent JEDEC Solid State Technology Association in 1999. JEDEC operates on an open-access model, providing registered industry professionals with free access to its complete catalog of technical standards and publications.Navigating this extensive library requires an understanding of JEDEC document prefixes and the technical committees responsible for maintaining them.Standard Prefixes Decoded: Differentiating JESD, JEP, J-STD, and JS PublicationsJEDEC publications follow a strict document classification hierarchy based on regulatory weight and normative intent:JESD (JEDEC Standard): Normative, mandatory industry specifications. These documents define exact electrical architectures, test conditions, bus signaling parameters, and pass/fail thresholds. Compliance requires strict adherence to every mandatory provision (e.g., JESD79-5[2] for DDR5 SDRAM or JESD47[3] for IC qualification).JEP (JEDEC Publication): Informational publications, engineering guidelines, application notes, and recommended design practices. JEPs provide technical context, measurement recommendations, or mechanical package registration guidelines without imposing mandatory compliance criteria (e.g., JEP95[1] for package outlines or JEP30 for digital part models).J-STD (Joint Standard): Normative standards developed jointly between JEDEC and external standard bodies, most notably IPC (Association Connecting Electronics Industries). These primarily govern surface mount technology (SMT) assembly, soldering, and moisture handling (e.g., IPC/JEDEC J-STD-020[4]).JS (Joint Standard - ESD): Specialized electrostatic discharge (ESD) standards co-developed with the EOS/ESD Association, establishing unified device-level qualification thresholds (e.g., ANSI/ESDA/JEDEC JS-001).JEDEC Document Taxonomy and Publication HierarchyTechnical Committee Map: Navigating JC-11, JC-14, JC-42, JC-64, and JC-70Each JEDEC standard originates within a specialized technical committee composed of member company representatives, including semiconductor foundries, fabless designers, test equipment manufacturers, and tier-one OEMs:JC-11 (Mechanical Standardization): Responsible for physical package geometry, lead pitch, terminal configurations, ball grid array (BGA) ball diameter tolerances, and thermal pad dimensions published under JEP95[1].JC-14 (Quality and Reliability of Solid-State Products): Develops stress-test methodologies, failure mechanism models, accelerated life testing protocols (HTOL, HAST, Temperature Cycling), and master qualification frameworks like JESD47[3].JC-15 (Thermal Characterization): Defines standardized thermal resistance metrics (RθJC, RθJB, ΨJT) and transient thermal modeling parameters for packaged semiconductors.JC-42 & JC-45 (Solid State Memories and DRAM Modules): Governs volatile memory architectures, pinouts, timing parameters, command/address signaling, and Serial Presence Detect (SPD) tables for SDRAM (DDR4, DDR5) and modular form factors (UDIMM, SODIMM, RDIMM).JC-64 (Embedded Memory and Removable Flash Storage): Standardizes non-volatile mass storage interfaces, command sets, and physical layers, including Universal Flash Storage (UFS) and Embedded MultiMediaCard (eMMC).JC-70 (Wide Bandgap Power Semiconductors): Focuses on qualification guidelines, reliability testing, and datasheet parameter definitions for Gallium Nitride (GaN) and Silicon Carbide (SiC) power switching devices.Solid-State Memory and Storage Standards: Architecture, Timing, and ReliabilitySolid-state memory standards defined by JC-42 and JC-64 represent some of JEDEC's most widely implemented specifications. These standards define the physical layer interface, command protocols, power delivery, and signal integrity requirements necessary to ensure universal memory controller interoperability.DDR5 Architectural Innovations: On-DIMM PMIC, Dual Subchannels, and On-Die ECCThe DDR5 SDRAM standard, formalized under JESD79-5[2] (with current expansions under JESD79-5C), represents an architectural overhaul compared to legacy DDR4 memory:On-DIMM Power Management IC (PMIC): Under DDR4 specifications, voltage regulation resided on the host motherboard, distributing a 1.2 V rail across the memory traces. DDR5 relocates active voltage conversion directly to the memory module via an on-board PMIC. The PMIC receives an input supply (12 V on server RDIMMs, 5 V on client UDIMMs) and regulates a 1.1 V nominal VDD, VDDQ, and VPP locally. This significantly reduces host PCB routing complexity and suppresses voltage ripple under rapid transient load steps.Dual Independent 32-Bit Subchannels: DDR5 replaces the monolithic 64-bit wide data bus of DDR4 with two independent 32-bit wide subchannels per DIMM (expanded to 40 bits per subchannel in server RDIMMs to accommodate sideband ECC). Each subchannel utilizes its own independent 7-bit Command/Address (CA) bus. Combined with an expanded 16n prefetch architecture (up from 8n in DDR4), dual subchannels double the effective memory access efficiency and reduce command bus contention.Mandatory On-Die ECC (ODECC): As DRAM manufacturing nodes shrink below 14nm, raw bit-error rates (BER) within the silicon die rise due to cell leakage and cross-talk. JESD79-5C mandates On-Die ECC, executing real-time single-bit error detection and correction internally within the DRAM die before data leaves the I/O buffer.Security and Refresh Enhancements: DDR5 introduces Same-Bank Refresh (SBR), enabling the memory controller to refresh a single bank while continuing read/write operations across other banks within the same group. Furthermore, modern revisions integrate Per-Row Activation Counting (PRAC) architectures to counter Rowhammer-induced disturbance errors in high-density installations.High-Bandwidth and Embedded Standards: LPDDR5X, HBM3, and UFS 4.0Beyond standard computing DRAM, JEDEC maintains dedicated standards optimized for power-constrained and high-throughput environments:LPDDR5/LPDDR5X (JESD209-5C): Designed for mobile, automotive, and edge-AI compute engines. Operating at nominal supply voltages as low as 0.5 V (VDDQ) and 1.05 V (VDD1), LPDDR5X supports data rates up to 8.5+ Gbps per pin. It leverages a dynamic dual-clock architecture separating the continuous Command Clock (CK) from the high-speed Write Clock (WCK), which activates only during active data burst transfers to minimize dynamic switching losses.HBM3 (JESD238): Standardizes High Bandwidth Memory utilizing 2.5D and 3D Through-Silicon Via (TSV) stacking. HBM3 routes up to 16 independent pseudo-channels over a wide 1024-bit interposer interface, achieving memory bandwidths exceeding 819 GB/s per stack at nominal core voltages of 1.1 V.Universal Flash Storage (UFS 4.0 per JESD220): Specifies high-performance non-volatile flash storage for embedded architectures. UFS 4.0 utilizes the MIPI M-PHY v5.0 physical layer and the UniPro v2.0 transport protocol, achieving per-lane physical data rates up to 23.2 Gbps across a full-duplex differential serial link.Specification ParameterDDR4 SDRAM (JESD79-4)DDR5 SDRAM (JESD79-5C)LPDDR5X (JESD209-5C)HBM3 (JESD238)Primary StandardJESD79-4DJESD79-5CJESD209-5CJESD238Max Standard Data Rate3200 MT/sUp to 8800 MT/sUp to 8533 MT/sUp to 6.4+ Gbps/pinBus Architecture1x 64-bit wide2x 32-bit subchannels1x or 2x 16-bit channels1024-bit (16 pseudo-channels)Prefetch Scheme8n16n16n / 32n (Flexible)N/A (Wide I/O Array)Core Operating Voltage (VDD)1.20 V1.10 V (Managed by PMIC)1.05 V / 0.90 V1.10 VI/O Interface Voltage (VDDQ)1.20 V1.10 V0.50 V0.40 VInternal Silicon ReliabilityOptional Sideband ParityMandatory On-Die ECCLink/On-Die ECCOn-Die Parity/RedundancyPrimary DomainDesktop, Server, IndustrialServer, Workstation, PCMobile, Edge-AI, AutoHPC, AI Accelerators, GPUJEDEC Baseline Profiles vs. Overclocking Profiles: The Reliability Trade-OffA common source of confusion in hardware component selection is the distinction between standardized JEDEC memory baselines and consumer overclocking profiles, such as Intel Extreme Memory Profile (XMP) or AMD Extended Profiles for Overclocking (EXPO).DRAM Speeds & The Role JEDEC PlaysJEDEC memory profiles are deliberately conservative and market-agnostic. The operating timing parameters, voltage rails, and signal integrity guardbands defined under JESD79-5[2] are engineered to guarantee uninterrupted, 15- to 20-year lifecycles across harsh operating environments—ranging from factory automation equipment operating above 40 °C ambient to mission-critical medical diagnostics and telecommunications backplanes.To provide standardized flexibility across different silicon quality grades, JEDEC DDR5 specifications introduce tiered timing bins, commonly designated as Mode A, Mode B, and Mode C within standard frequency grades (e.g., DDR5-4800A vs. DDR5-4800B). These modes allow manufacturers to provide differentiated sub-timings while remaining strictly compliant with universal JEDEC signaling and voltage envelopes.Semiconductor Shmoo Plot: Voltage vs Frequency MarginsDuring semiconductor characterization, engineers validate silicon margins using Shmoo Plots—two-dimensional matrices that map functional pass states against operating voltage and frequency. In automated test equipment (ATE) environments, silicon is subjected to elevated temperatures inside thermal chambers to simulate years of aging.Under accelerated aging, the boundary separating stable cells from failure cells degrades toward the nominal envelope. JEDEC profiles enforce guardbands that keep the operational envelope safely within the passing zone throughout the component's rated lifespan.Conversely, consumer XMP and EXPO profiles bypass standard JEDEC voltages (often raising VDD from 1.1 V to 1.35 V–1.45 V) and tighten primary latency parameters to maximize memory bandwidth. While this can yield performance gains of up to 50% in consumer desktop systems, it narrows the operating margin, accelerates electromigration, and introduces the risk of silent single-bit memory errors in continuous enterprise and industrial workloads.Silicon and Package Qualification: Stress Testing and Environmental StandardsBefore an integrated circuit enters mass production, semiconductor suppliers must qualify its design and packaging against standard environmental stress profiles. JESD47[3] (Stress-Test-Driven Qualification of Integrated Circuits) serves as the master qualification matrix for commercial and industrial semiconductors.The JESD47 Qualification Framework: Core Principles and Sample SizingJESD47[3] defines the minimum set of stress tests required to demonstrate that a specific failure mechanism (such as dielectric breakdown, hot carrier injection, electromigration, package delamination, or bond-wire fatigue) will not cause premature field failures during the product's operating lifetime.Qualification requires testing components selected from multiple non-consecutive wafer fabrication lots and packaging assembly runs to account for process variation.Accelerated Environmental Test Methods: HTOL, Temperature Cycling, and HASTThe core reliability tests defined under JESD47[3] reference specialized methodologies from the JESD22 standard series:High Temperature Operating Life (HTOL - JESD22-A108): Designed to accelerate thermally driven failure mechanisms within the active silicon circuitry. Components are operated under continuous electrical bias at an elevated junction temperature (typically Tj=125 ∘C or 150 ∘C) for a duration of 1,000 hours. Lifespan acceleration is modeled using the Arrhenius equation: AF=exp[EakB(1Tuse−1Tstress)] (Where Ea represents the failure mechanism activation energy in eV, kB is Boltzmann's constant, and T is absolute temperature in Kelvin).Preconditioning (SMT Simulation - JESD22-A113): Crucially, before subjecting surface-mount devices to package-level mechanical stresses, components must undergo JESD22-A113 preconditioning. This process simulates board-level SMT assembly: parts are moisture-soaked according to their rated Moisture Sensitivity Level (MSL) and passed three times through a simulated lead-free reflow profile reaching a peak temperature of 260 ∘C per IPC/JEDEC J-STD-020[4].Temperature Cycling (TC - JESD22-A104): Evaluates package integrity against thermo-mechanical fatigue caused by mismatched Coefficients of Thermal Expansion (CTE) between the silicon die, mold compound, substrate, and copper leadframe. Parts are subjected to rapid cyclic transitions (typically −40 ∘C to +125 ∘C or +150 ∘C) for 500 to 1,000 cycles.Highly Accelerated Stress Test (HAST - JESD22-A110 / uHAST - JESD22-A118): Evaluates component resistance to moisture penetration and internal metallization corrosion. Biased HAST subjects parts to 130 ∘C and 85% Relative Humidity (RH) under an overpressure of 33.3 psia for 96 to 264 hours. Unbiased HAST (uHAST) performs the identical environmental soak without electrical bias to isolate galvanic corrosion from mechanical delamination.Electrostatic Discharge (ESD) Thresholds: JS-001 and JS-002 ComplianceSilicon qualification requires verification against standard electrostatic discharge damage models:Human Body Model (HBM - ANSI/ESDA/JEDEC JS-001): Simulates discharge from a charged human fingertip contacting an IC pin (100 pF capacitor discharging through a 1.5 kΩ resistor). Standard commercial baseline target: ≥2000 V (Class 2).Charged Device Model (CDM - ANSI/ESDA/JEDEC JS-002): Simulates modern automated manufacturing environments where an isolated IC becomes statically charged during SMT transport and rapidly discharges upon contacting a metallic ground surface. Standard commercial baseline target: ≥500 V (Class C2a).SMT Assembly and Moisture Management: IPC/JEDEC J-STD-020 and J-STD-033Non-hermetic plastic-encapsulated surface-mount devices absorb ambient moisture through permeable epoxy molding compounds. When these moisture-saturated components are exposed to elevated temperatures during SMT reflow soldering, rapid vapor expansion can induce catastrophic packaging failures.Physics of the SMT Package Popcorning MechanismThe Physics of Popcorning: Moisture Vaporization During ReflowDuring modern lead-free reflow processes, PCB assemblies reach peak temperatures between 245 ∘C and 260 ∘C specified in IPC/JEDEC J-STD-020[4]. If absorbed moisture resides within the mold compound interfaces, the internal vapor pressure can exceed 4 MPa (40 atmospheres).This explosive phase transformation generates severe internal shear stresses, leading to popcorning—the catastrophic delamination of the mold compound from the silicon die or leadframe, internal bond-wire tearing, and external cracking of the plastic package. In many cases, popcorning defects remain latent, escaping automated optical inspection (AOI) and causing intermittent failures in the field.Moisture Sensitivity Levels: Floor Life ClassificationsJoint standard IPC/JEDEC J-STD-020[4] establishes six primary Moisture Sensitivity Levels (MSL) that define the allowable factory-floor exposure time ("floor life") of an unpacked component prior to reflow soldering:MSL RatingFloor Life (Open-Air Exposure Limit)Standard Ambient Storage LimitsStandard Soak Test ConditionMSL 1Unlimited≤30 ∘C/85% RH168 hours @ 85 ∘C/85% RHMSL 21 Year≤30 ∘C/60% RH168 hours @ 85 ∘C/60% RHMSL 2a4 Weeks≤30 ∘C/60% RH696 hours @ 30 ∘C/60% RHMSL 3168 Hours (7 Days)≤30 ∘C/60% RH192 hours @ 30 ∘C/60% RHMSL 472 Hours (3 Days)≤30 ∘C/60% RH96 hours @ 30 ∘C/60% RHMSL 548 Hours (2 Days)≤30 ∘C/60% RH72 hours @ 30 ∘C/60% RHMSL 5a24 Hours (1 Day)≤30 ∘C/60% RH48 hours @ 30 ∘C/60% RHMSL 6Mandatory Bake Before Use≤30 ∘C/60% RHTime on Label (TOL) reflow windowDry-Packing, Storage, and Baking Protocols per IPC/JEDEC J-STD-033Handling, packing, and bake-out procedures for moisture-sensitive devices are governed by IPC/JEDEC J-STD-033[5].Components rated MSL 2a through MSL 5a are shipped in hermetically sealed Moisture Barrier Bags (MBB) containing specialized silica/clay desiccant pouches and a Humidity Indicator Card (HIC). If the HIC indicates an internal relative humidity exceeding $10\%$ upon opening (or if the active floor-life clock expires before SMT assembly), components must undergo controlled baking to desorb moisture without oxidizing terminal leads:High-Temperature Baking (125 ∘C): Requires transferring components into high-temperature metal matrix trays. Bake durations range from 8 to 48 hours depending on package thickness and MSL rating.Low-Temperature Baking (40 ∘C to 90 ∘C): Used when baking components directly inside non-bakeable plastic carrier tape or low-temperature shipping reels, requiring longer bake durations (typically 3 to 64 days at ≤5% RH).Mechanical Standardization and Digital Twin Formats: JEP95 and JEP30Component standardization requires that mechanical footprints, terminal alignments, and ECAD symbols remain interchangeable across competing silicon fabricators.JEP95 Package Outlines: Standardizing MO, TO, and DO Mechanical EnvelopesJEDEC Publication 95 (JEP95[1]) acts as the global registry for semiconductor package geometry. Maintained by committee JC-11, JEP95 defines standardized mechanical envelopes using strict category prefixes:MO-xxx (Microelectronic Outlines): Multi-terminal integrated circuit packages, including Small Outline Packages (SOP), Quad Flat Packages (QFP), Quad Flat No-Lead (QFN), and Ball Grid Arrays (BGA). For instance, standard DDR5 UDIMM modules adhere to strictly defined JEP95 board outline templates.TO-xxx (Transistor Outlines): Discrete power and small-signal transistor packages, including through-hole TO-220 and TO-247 packages, as well as surface-mount D2PAK and DPAK configurations.DO-xxx (Diode Outlines): Discrete two-terminal diode envelopes, such as DO-214 (SMA/SMB/SMC) and standard axial packages.Eliminating SMT Assembly Defects: Tolerancing, Coplanarity, and Second-SourcingWhen hardware design teams establish a Bill of Materials (BOM), sourcing identical components from secondary vendors requires precise package footprint compatibility. JEP95 eliminates assembly discrepancies by standardizing:Lead Coplanarity: Setting maximum allowable vertical deviation limits (typically ≤0.08 mm to 0.10 mm) across all terminal leads to prevent open-circuit solder joints.BGA Ball Pitch and Diameter: Establishing standard grid spacings (0.80 mm, 0.50 mm, 0.40 mm) and true-positional tolerance spheres to eliminate bridging shorts during reflow.Thermal Pad (Exposed Pad) Dimensions: Harmonizing ground slug geometry beneath power and RF packages (such as QFNs) to guarantee consistent thermal dissipation without causing component tilt.Modernizing ECAD Data Exchange: JEP30 Digital Twin and Chiplet IntegrationAs electronic systems increase in complexity, mechanical drawings and static PDF datasheets introduce manual data-entry errors into EDA and ECAD library creation. JEDEC developed JEP30 (PartModel XML Guidelines) to establish a standardized, vendor-neutral digital thread for electronic component properties.JEP30 structures electrical pinouts, thermal models (RθJC), mechanical package envelopes, and solder reflow constraints into machine-readable XML schemas. Furthermore, JEP30 aligns with the Open Compute Project's (OCP) Chiplet Design Exchange (CDXML), allowing automated validation of multi-die 2.5D/3D advanced packages and chiplet assemblies across heterogeneous manufacturing lines.Procurement Governance: Change Notification, Obsolescence, and Anti-CounterfeitingSupply chain resilience depends heavily on standard procurement mechanisms that govern when and how semiconductor manufacturers can alter silicon designs, discontinue product lines, or distribute inventory.JESD46 Product Change Notifications: The 90-Day Engineering RuleUnder JESD46[6] (Customer Notification of Product/Process Changes by Semiconductor Suppliers), semiconductor vendors are contractually required to provide written Product Change Notifications (PCNs) for any major change that affects the form, fit, function, quality, or reliability of an IC.Advance Notice Window: Suppliers must deliver formal PCN documentation at least 90 days prior to the first shipment of modified silicon or packaging.Scope of Major Changes: Mandatory PCN triggers include changes to the wafer fabrication site, silicon lithography shrinks, die passivation chemistry, mold compound materials, leadframe plating finishes (e.g., transition to pure tin), or package outline changes.Customer Evaluation Data: The vendor must provide qualification test data (executed in accordance with JESD47[3]) and supply qualification samples upon request to allow OEM engineering teams to validate the change.JESD48 Product Discontinuance: Managing the 12-Month Sourcing LifecycleComponent obsolescence can disrupt long-lifecycle industrial, defense, and automotive hardware lines. Standard JESD48[7] (Product Discontinuance) regulates how manufacturers announce and phase out End-of-Life (EOL) components:Announcement to Last Time Buy (LTB): Suppliers must give a minimum of 6 months notice between the formal EOL announcement and the final Last Time Buy cutoff date.LTB to Final Shipment: Suppliers must provide an additional 6-month window after the LTB date to fulfill and deliver final scheduled production orders.Total Lifecycle Protection: JESD48 guarantees procurement teams a minimum 12-month operational bridge to execute lifetime buys, secure second sources, or execute PCB redesigns.JESD243 Anti-Counterfeit Standards: Preserving Authorized Chain of CustodyMitigating counterfeit integrated circuits requires strict inventory tracking throughout the distribution channel. Standard JESD243[8] (Counterfeit Electronic Parts: Non-Proliferation for Manufacturers) defines mandatory operational protocols for semiconductor fabricators and franchised distributors:Authorized Chain of Custody: Establishes traceable documentation linking each component back to the original wafer fabrication lot and packaging date code.Customer Return Controls: Mandates electrical, visual, and package verification before restyling or re-inventorying returned components to prevent gray-market silicon injection.Scrap Material Disposal: Dictates physical destruction procedures (such as leadframe shearing or mechanical crushing) for non-conforming or obsolete inventory to prevent scrap parts from being remarked and sold through unauthorized channels.Standards Comparison: JEDEC vs. AEC-Q100 vs. MIL-STD-883Selecting an appropriate component qualification level requires balancing operating environment severity against production cost. Standard commercial and industrial designs rely on JEDEC baselines, whereas automotive and defense systems mandate specialized upscreening.Commercial and Industrial Baseline: Scope and Boundaries of JESD47JEDEC JESD47[3] represents the universal commercial baseline. It tests sample lots to demonstrate a standard statistical confidence level for operating in benign to moderately controlled industrial environments (typically −40 ∘C to +85 ∘C or +105 ∘C). JESD47 permits application-specific stress derating and does not require zero-defect lot screening.Automotive Upscreening: AEC-Q100 Lot-Testing and Temperature GradesDeveloped by the Automotive Electronics Council (AEC), AEC-Q100 builds directly on JEDEC JESD22 environmental test methods, but imposes much stricter pass/fail criteria:Zero-Defect Requirement: Qualification mandates testing three non-consecutive wafer fabrication and assembly lots with zero allowable failures (c=0) across every stress mechanism.Strict Temperature Grading: Operating environments are grouped into discrete grades:Grade 0: −40 ∘C to +150 ∘C (Under-the-hood engine compartments).Grade 1: −40 ∘C to +125 ∘C (General automotive powertrain and chassis).Grade 2: −40 ∘C to +105 ∘C (Cabin interior electronics).Grade 3: −40 ∘C to +85 ∘C (Infotainment displays).Defense and Aerospace Requirements: MIL-STD-883 Hermeticity and ScreeningFor mission-critical defense, avionics, and space platforms, the Department of Defense standard MIL-STD-883 supersedes commercial plastic packaging:Hermetic Construction: Requires ceramic or metallic hermetically sealed packages to prevent moisture ingress.100% Screening Flows: Requires 100% electrical burn-in, acoustic micro-imaging, and radiographic (X-ray) inspection across every production unit rather than batch sample testing.Extreme Mechanical Profiles: Evaluates components against severe mechanical shock profiles (up to 30,000 g acceleration) and radiation hardness assurance (RHA) for total ionizing dose (TID) survival in orbital space environments.Feature / CriteriaCommercial / Industrial Baseline (JEDEC)Automotive Electronics (AEC)Defense & Aerospace (DoD)Primary StandardJESD47AEC-Q100 (Rev-J)MIL-STD-883Target SectorConsumer, Enterprise, IndustrialAutomotive, EV, Advanced RoboticsDefense, Space, High-Rel AvionicsLot Sample RequirementsStandard sample size qualification3 non-consecutive lots (c=0 defect)100% device screening flowsOperating Temp RangeTypically −40 ∘C to +85 ∘C/+105 ∘CGrade 0 (−40 ∘C to +150 ∘C) to Grade 3Class S/V (−55 ∘C to +125 ∘C+)Package EncapsulationPlastic encapsulated (Non-hermetic)Plastic encapsulated (Special mold)Hermetic ceramic or metallicEnvironmental Test BasisJEDEC JESD22 SeriesJEDEC JESD22 methods modifiedMethod 1000–5000 test seriesCommunity Insights and Engineering ConsensusDiscussions across engineering forums, hardware design groups, and quality control communities frequently surface practical edge-cases when implementing JEDEC standards on the factory floor:Second-Source Footprint Variations: Design engineers frequently note that while two ICs from competing vendors may both claim compliance with a specific JEP95 outline (such as QFN-32), internal die pad sizing and exposed thermal pad copper geometries can vary within standard tolerance bands. SMT engineers emphasize building PCB land patterns using the nominal maximum material condition (MMC) to prevent solder starvation or thermal pad floating during reflow.MSL Floor Life Expiration and Reset Misconceptions: Hardware quality teams point out that simply storing opened MSL 3 components in standard air-conditioned factory air will not pause the floor-life clock. Once the 168-hour window is breached, baking per IPC/JEDEC J-STD-033[5] is mandatory before SMT line loading. Many facilities maintain dedicated dry storage cabinets (≤5% RH) to safely pause the exposure clock without exposing sensitive components to repetitive thermal baking cycles.Workstation Stability vs. Consumer Speeds: In enterprise server and embedded industrial circles, the consensus is clear: while consumer hardware enthusiasts routinely enable XMP/EXPO profiles to maximize raw benchmark speeds, enterprise mission profiles require strict adherence to JEDEC DDR5 baseline timings (Mode A/B). This ensures full protection against multi-bit parity errors, voltage sag, and thermal-induced memory bit flips under continuous full-load compute cycles.Summary and Practical Implementation FrameworkJEDEC standards provide the unified technical rules connecting semiconductor physics, PCB assembly manufacturing, and supply chain management. By establishing clear physical and electrical baselines, they protect hardware designs from unexpected operational failures and supply chain disruptions.To integrate JEDEC standards into your engineering and procurement workflows:For Hardware Engineering Teams:Mandate that all vendor qualification reports explicitly detail pass/fail results against JESD47[3] test methods (HTOL per JESD22-A108, HAST per JESD22-A110, and TC per JESD22-A104).Verify package outlines against JEP95[1] mechanical registries to ensure true pin-to-pin second sourcing on your PCB land patterns.Enforce SMT moisture control protocols by documenting the IPC/JEDEC J-STD-020[4] MSL rating directly in your Bill of Materials (BOM) notes.For Procurement and Sourcing Teams:Incorporate JESD46[6] compliance clauses into supplier Master Service Agreements (MSAs), requiring 90 days written advance notice for process changes.Contractually enforce JESD48[7] timelines, securing a mandatory 6-month Last Time Buy (LTB) and 6-month final delivery window upon any product discontinuance notice.Mandate JESD243[8] authorized chain-of-custody tracking across all franchised and independent distribution partners to prevent counterfeit silicon injection.For Standards Tracking:Register for free access at JEDEC.org to download active specification updates and track emerging standards across memory architectures, chiplet frameworks (JEP30), and wide bandgap power electronics (JC-70).Frequently Asked QuestionsAre all JEDEC standards freely accessible?Yes. JEDEC operates on an open-access model. Any engineering or procurement professional can register for a free account at jedec.org to download standards, publications, and packaging outlines at no cost.What is the difference between On-Die ECC (ODECC) in DDR5 and traditional Sideband ECC?On-Die ECC operates internally within the DRAM silicon die to detect and correct single-bit errors caused by high-density cell leakage, preventing bad bits from reaching the output pins. It does not protect data in transit across the memory bus. Traditional sideband/module-level ECC (used in server RDIMMs) transmits extra parity bits over an expanded 40-bit subchannel, allowing the host memory controller to correct data transmission errors across the entire motherboard bus.Can a semiconductor component be both JEDEC compliant and AEC-Q100 qualified?Yes. AEC-Q100 uses JEDEC environmental stress methodologies (such as the JESD22 test series) as its baseline, but adds automotive-specific requirements: testing three non-consecutive wafer lots with zero allowed failures (c=0) across broader operating temperature ranges (Grade 0 to Grade 3).What contractual protections does JESD46 provide for procurement teams?JESD46 establishes the industry baseline requiring semiconductor manufacturers to provide written Product Change Notifications (PCNs) at least 90 days before shipping components with major alterations to form, fit, function, or reliability. While JEDEC is a standards body and does not directly enforce commercial contracts, citing JESD46 in procurement agreements creates a legally binding timeline for change notifications and sample qualification.What should an engineering team do if a component exceeds its MSL floor life?Per IPC/JEDEC J-STD-033[5], a component that exceeds its allowable open-air floor life must not be subjected to reflow soldering. Doing so risks package popcorning and internal bond-wire failure. The components must undergo a controlled thermal bake (e.g., 125 ∘C in metal matrix trays for 8 to 48 hours, or low-temperature baking in tape/reel) to safely remove moisture before placement onto the SMT line.ReferencesJEDEC Publication 95: JEDEC Registered and Standard Outlines for Solid State and Related Products — JEDEC Solid State Technology AssociationJEDEC Standard JESD79-5B: DDR5 SDRAM Specification — JEDEC Solid State Technology AssociationJEDEC Standard JESD47: Stress-Test-Driven Qualification of Integrated Circuits — JEDEC Solid State Technology AssociationIPC/JEDEC J-STD-020: Moisture/Reflow Sensitivity Classification for Nonhermetic Surface Mount Devices — JEDEC Solid State Technology Association / IPCIPC/JEDEC J-STD-033: Handling, Packing, Shipping and Use of Moisture, Reflow, and Process Sensitive Devices — JEDEC Solid State Technology Association / IPCJEDEC Standard JESD46: Customer Notification of Product/Process Changes by Semiconductor Suppliers — JEDEC Solid State Technology AssociationJEDEC Standard JESD48: Product Discontinuance — JEDEC Solid State Technology AssociationJEDEC Standard JESD243: Counterfeit Electronic Parts: Non-Proliferation for Manufacturers — JEDEC Solid State Technology Association
On 2026-09-07